|
For the last half of 2020 my workroom has been buzzing with lots of activity since so many people have turned their focus to updating their homes this year. I'm very lucky to have so many new and repeat clients that want to work with me to transform their decorating visions into finished rooms. Here are some photos from a few of the projects that I have recently completed. While you’re looking at the photos if you see anything that strikes your fancy, and you want to start a new project of your own, give me a call. I would love to work with you too! (click on any photo to start the slideshow):  So where were we . . . . . . . . . prior to the mask making interruption. . . . . . . . . oh yes, “composing a gallery wall and installing it easily and perfectly by yourself”. Gallery walls are very popular these days, and for good reason. It’s fun and stylish to display your favorite art and photos rather than have them sadly tucked away awaiting “the plan” and “the time.” If you have children, you more than likely have an ever growing selection of artwork that would be delightful to display (….before your children leave for college). Additionally, with open concept house plans, we tend to have large expanses of uninterrupted walls that are virtually impossible to treat with just one or two pieces of artwork. So, let’s assume you have lots of artwork to hang, but you haven’t tackled that project yet for a variety of reasons. If you’re concerned that your current collection of art poses too much of a commitment (fearing that “once the gallery wall is up, it can never change”), you might want to check out a terrific hanging system called the Walker Display System: https://walkerdisplay.com/gallery/ I’ve posted about the Walker system before (“How to Display Your Children’s Artwork”) and especially like that it allows for the easy reconfiguration and the addition of new art. Galleries, libraries, and shops use the Walker Display System, or other similar systems, to showcase their ever-changing displays. As shown in the photo below, it imparts a bit of a modern vibe, so consider whether that will work with your décor. But once you have that top rail installed, everything is reconfigurable, so it’s a great option for most people.  If you want to go the old-fashioned route of hanging your artwork with hooks and nails (and no connecting rods), then you have a bit more of an opportunity for placement creativity. But the issues then become (1) how to arrange your artwork for an interesting effect and (2) how to actually hang the pictures without it taking forever. For advice on arranging your artwork, let me point you to the All Modern website which gives some terrific tips in their article titled “How to Create a Gallery Wall”. Here’s some of their advice on gathering the art for your gallery wall: “Grab pieces from around your home, ones hidden away in the attic, or art you've collected for this purpose. Take stock of what you have and consider these factors:
What I’ll help you with today is a fast (!) and super simple way for determining exactly where to put the nails and picture hooks in the wall to achieve the overall look that you desire. Miraculously, there’s very little measuring involved. The materials that you will need are:
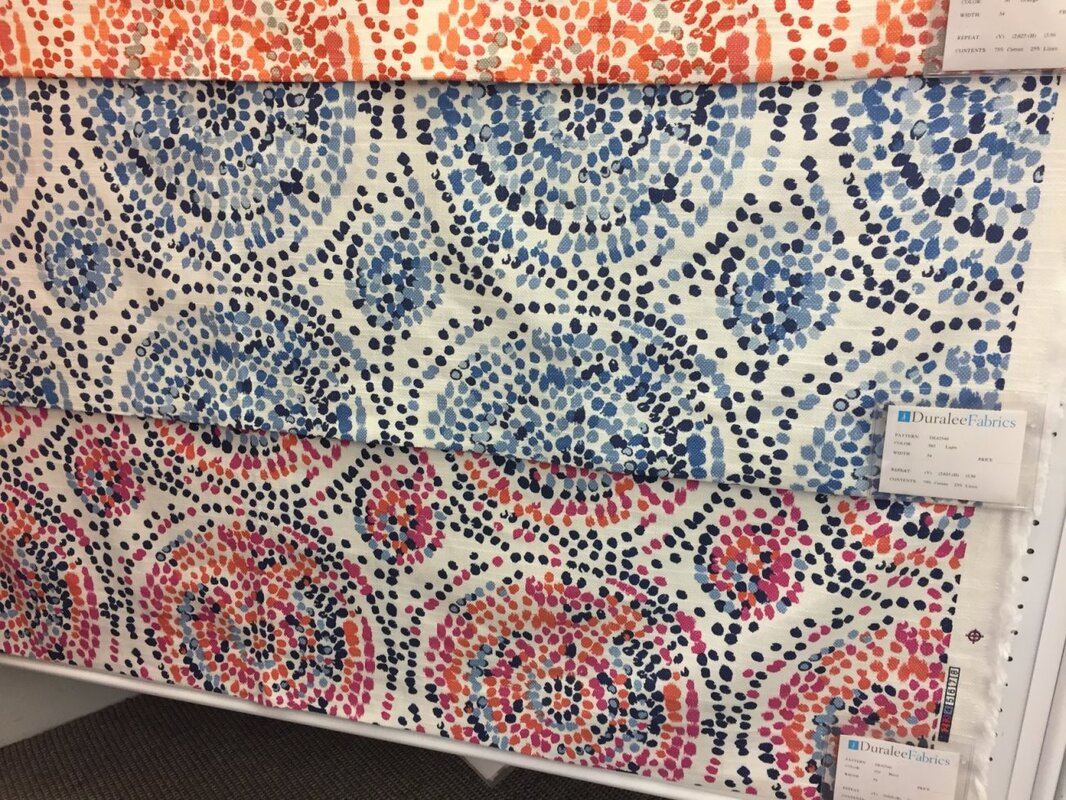
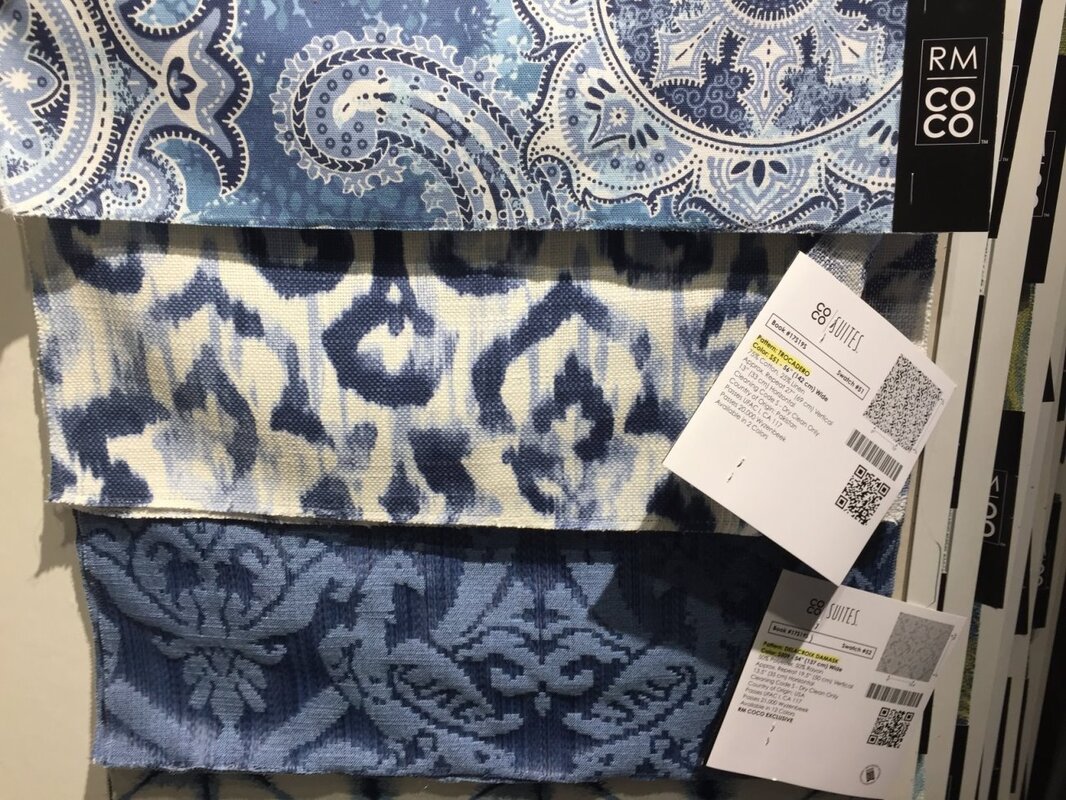
Step 1: Create paper templates of your artwork. Rollout the gridded wrapping paper and randomly lay out your artwork on the gridded side of the wrapping paper. Trace around the frame of each picture on the wrapping paper. To make rearranging the art easier I‘ve laid everything out on the carpet, which enables me to get a good view of all the artwork and the overall montage. Note: In this step-by-step process, I’m using some of my daughter’s artwork. She is prolific and it’s all beautiful. 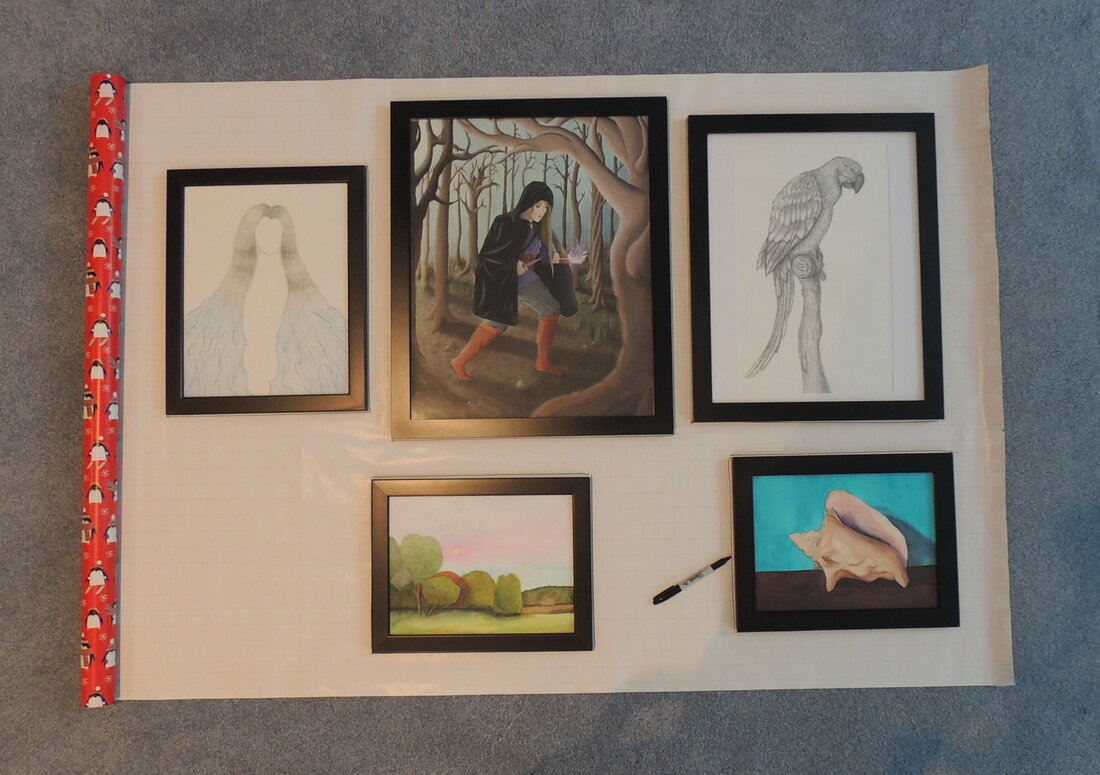 Step 2: Flip the artwork over and label both the artwork and templates. Labeling the pictures at this stage will help enormously. In addition, label both the front and back of the template with the number of the appropriate piece of art. I suggest you also label the number on both the front and back of the picture. Next, look at the hanging device (for example, a triangular hook, sawtooth hook, or wire that will need a few nails) for each picture. On each template, mark where the nail(s) should be placed. You will eventually transfer this point to the wall, so measure and transfer it accurately. 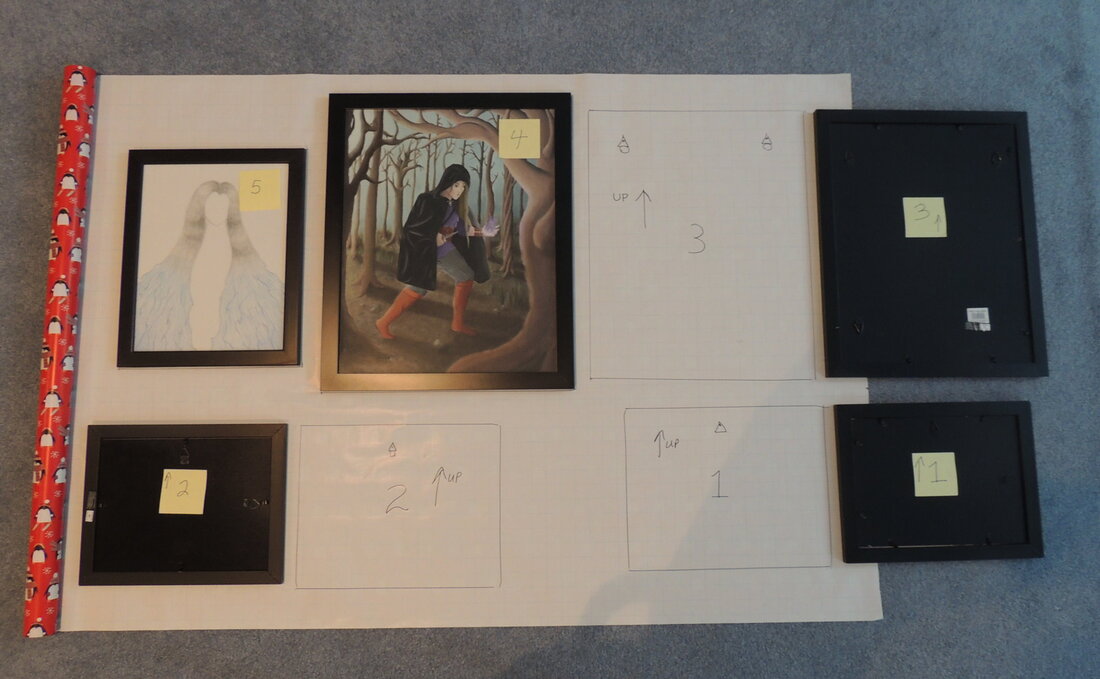 Step 3: Cut out all the templates that you’ve drawn. 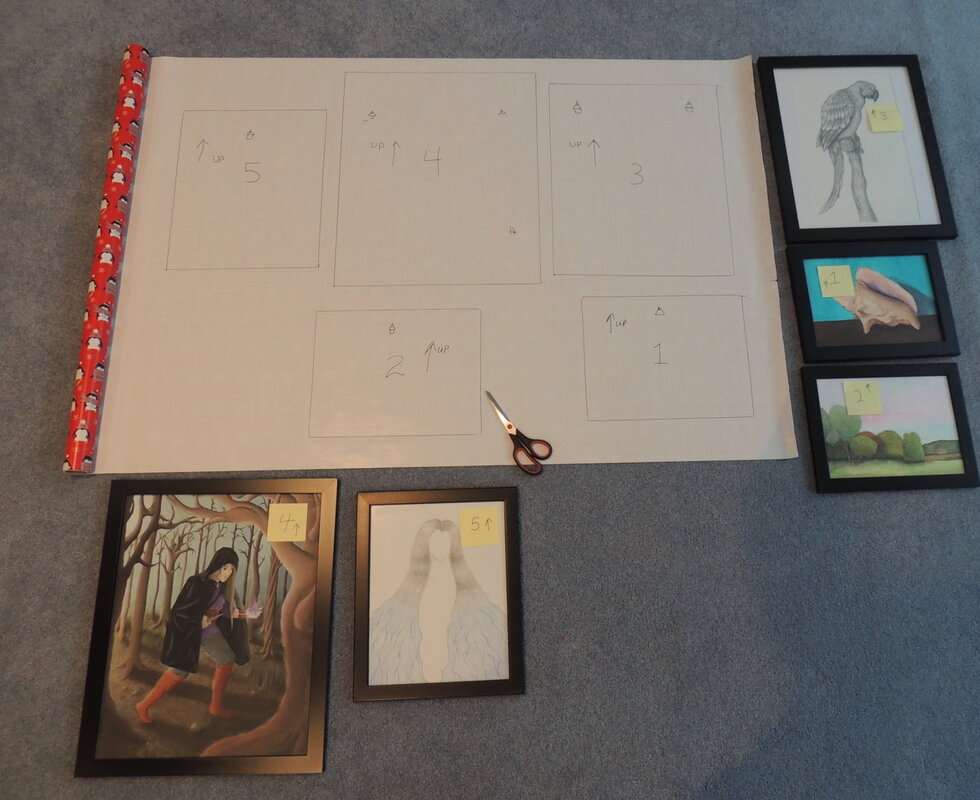 Step 4: We now have our templates. Don’t skip this template stage. It’s very important since the templates show the positions of the nails that will eventually go into the wall. Having these templates also allows you to easily try out alternate arrangements - either on the wrapping paper on the floor - or actually on the wall using blue painter’s tape to temporarily hang the templates. 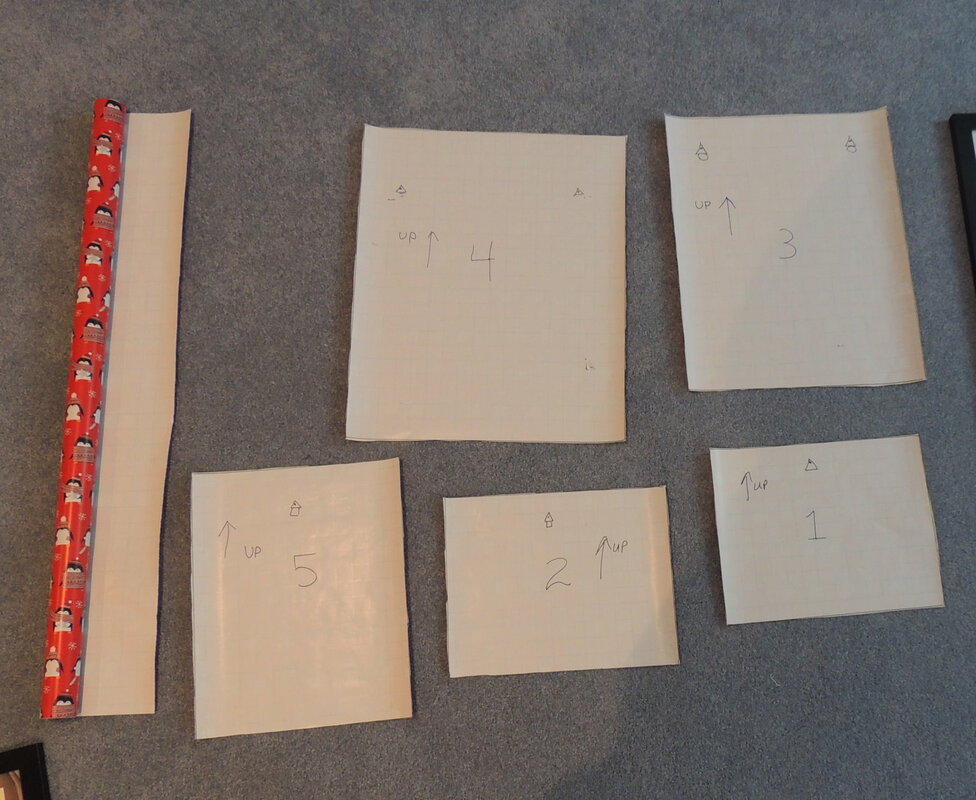 Step 5: Roll out more wrapping paper - wide enough for the gallery wall - and try out different arrangements with the artwork. Based on the test arrangements that you made using the templates on the wall, place your artwork on the rolled out paper as it pleases you. If you haven’t tried out different arrangements on the wall, then play with different arrangements on the rolled out paper using either the artwork or the templates. For this example I’ve shown a very symmetric arrangement, but asymmetric arrangements work very well and are probably preferred if you have a great deal of artwork, perhaps more than 6 pieces. Once you’ve decided on your final configuration, trace around the picture frames so that you’ve captured the final layout on the rolled out paper. If your gallery wall height (the vertical distance of the pictures) is large, you might need to connect two strips of paper together. If you are doing a configuration up the stairs, you will definitely need to connect papers together. If you would like to use computer technology to play with different layouts (instead of paper), you can take a photo of the arrangement and Photoshop or PowerPoint it onto a picture of your wall. I have rendering software that will easily do this. So, if you want some help send me a photo of your wall, the size (width) of the wall, and a photo of the wrapping paper with the pictures placed upon it. Give me the dimensions of the wrapping paper, and I will scale your photo montage accordingly and give you a rendering of your proposed configuration. 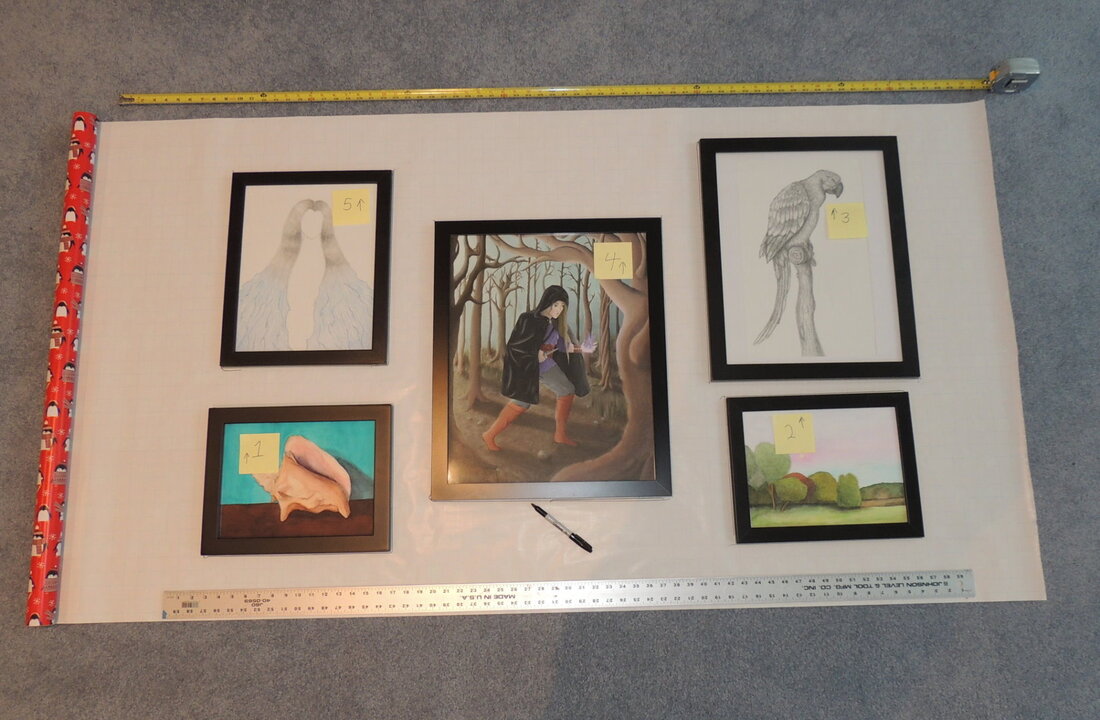 Step 6: Remove the pictures from the rolled out paper. Remove the artwork and place the appropriate template onto that picture’s space. In the example below, I place Template 2 on top of the final desired location for picture 2. Next, use an awl (or other pointy object) to push through both pieces of paper to mark where the nail should go. 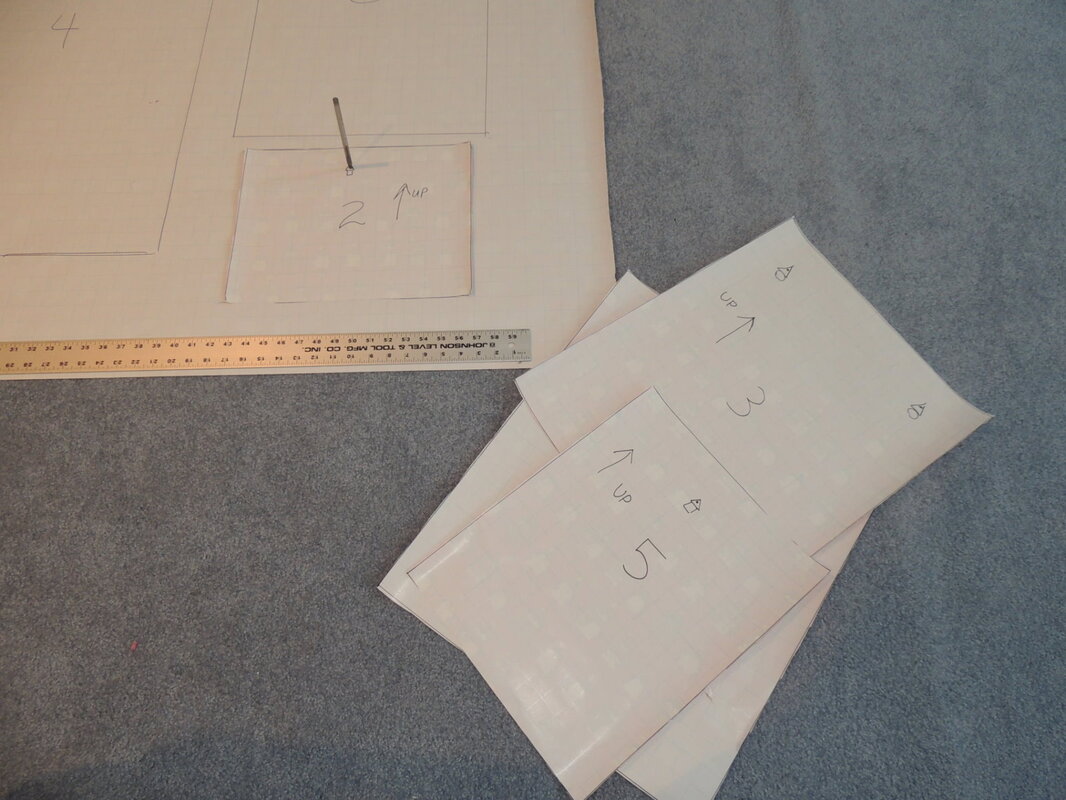 Step 7: Place all templates on the rolled out paper and mark all nail spots. Having the paper on carpet makes this an easy exercise. If you are working on a table, you can use carbon paper between the template and the rolled out paper to record the nail marks - but please, do it gently so that you don’t damage your table. 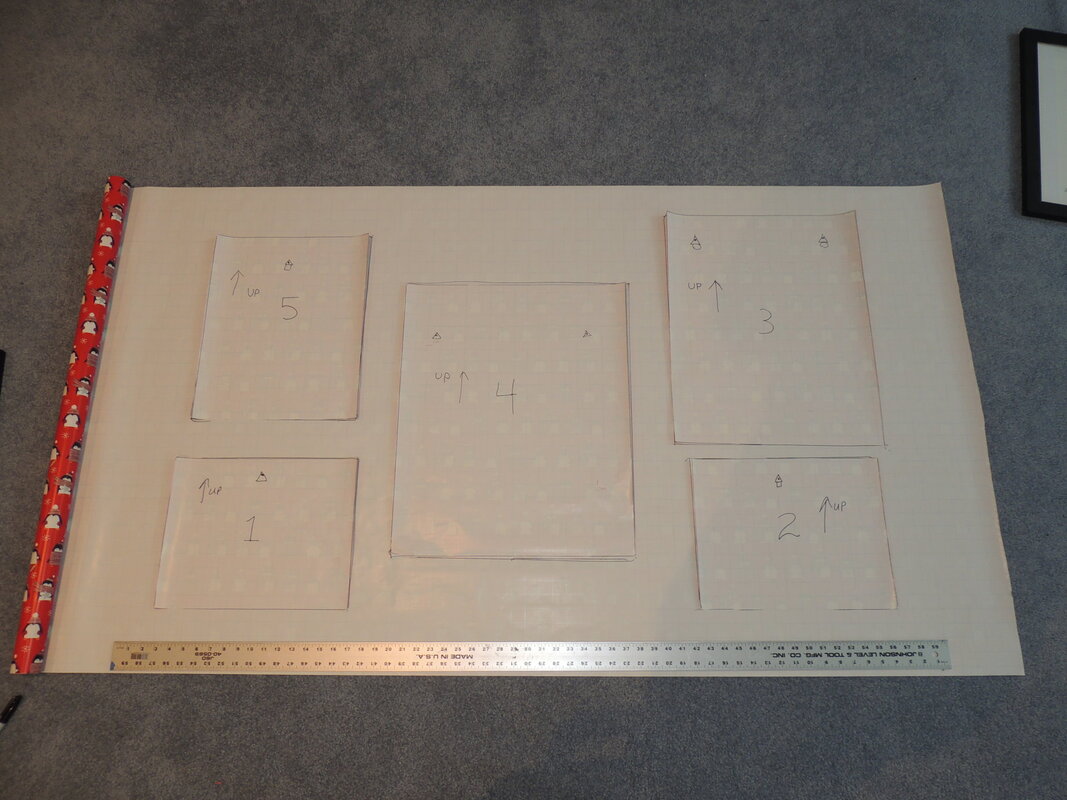 Step 8. Now you should have all of the outlines of the pictures drawn on the rolled out paper with all of the nail spots marked. 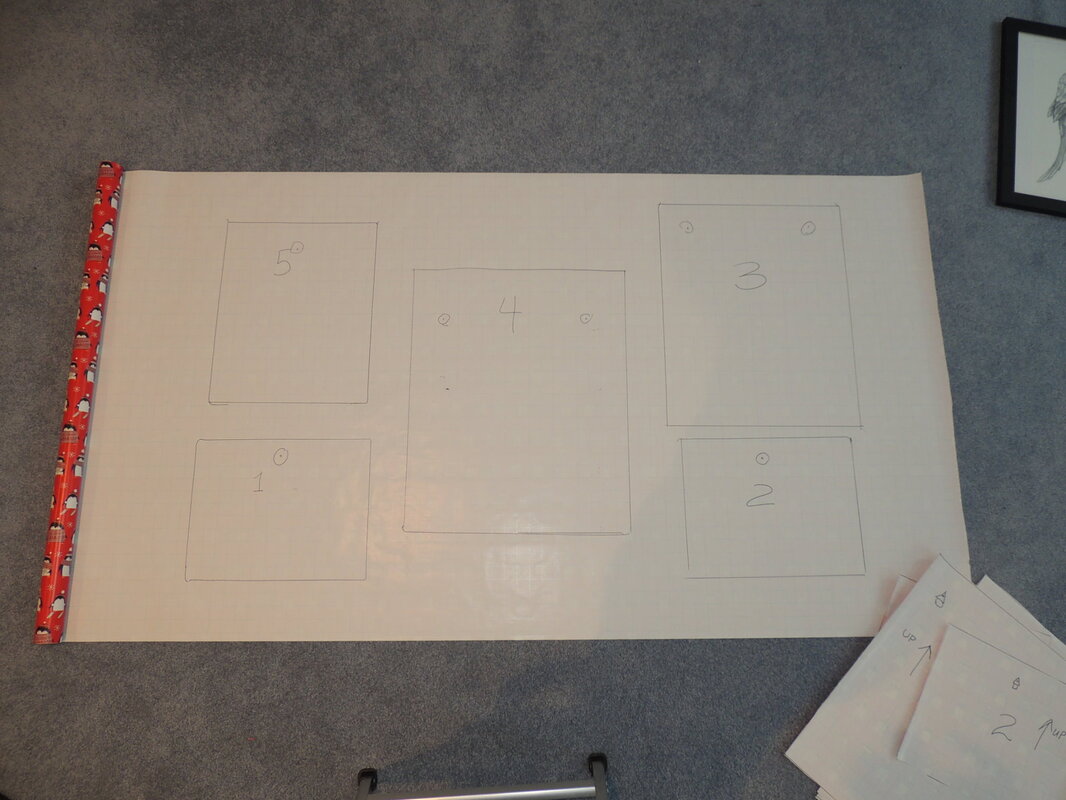 Step 9: Hang the roll of paper on the wall with blue painter’s tape, making sure the horizontal grid lines are perfectly level. 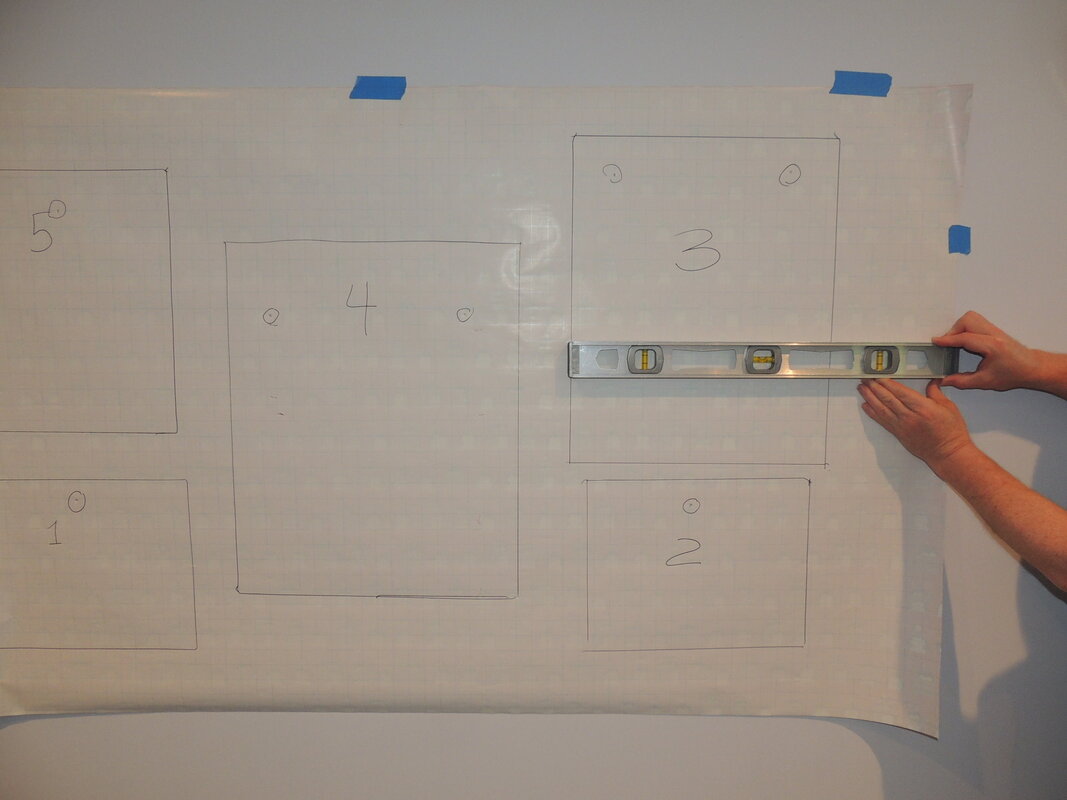 Step 10: Now you know where to hammer the nails. Make slight indentations with a nail, remove the paper, and finish the process. Hang the pictures and you’re done. Viola! Featured Artwork was made by My Daughter I hope you’ve enjoyed seeing a fraction of my daughter’s artwork that I used for demonstration purposes in the photos for this gallery wall tutorial. We have several gallery walls in our home with her beautiful artwork in oils, pencil, watercolor and acrylic mediums. If you’d like to see more of her art and photographs, you can see it online by going to her Redbubble shop - which I previously mentioned in my “Finding Inspiration in Your Travel Photos” blog post. On the Redbubble site you can purchase over 75+ different types of items with artwork from over 500,000 artists printed on them (e.g. mugs, stickers, phone cases, wall art prints, T-shirts, pillows, acrylic blocks, coasters, postcards, greeting cards, tote bags, drawstring bags, water bottles, shower curtains, spiral notebooks, etc.,). We’ve enjoyed seeing where my daughter’s customers are coming from around the globe. Amusingly, with COVID-19 currently raging, people have started buying one of her photos from the “Lord of the Rings” and “The Hobbit” movie set located in Hobbiton, New Zealand for facial masks. The photo’s of Bag End with the “No admittance except on party business” sign. Now that’s just perfect for a mask!  Who would have thought?? In any event, you might want to check out her Redbubble shop and browse around. You will of course recognize some of the originals that I used in this demonstration. Stay healthy and productive. Drop me a note, or give me a call, if you get stuck during your efforts to create a gallery wall. I’ll be happy to help you out with a rendering if you ask.  Bedding……..We all know a good night’s sleep is priceless…….and is a function of many variables like…the mattress, the warm body next to you…the sheets…the weight of the covers…and a million other things. To enhance your sleep, having linens that you just want to dive into, and blankets to snuggle under, makes for a refreshing “I can’t wait to go to bed” experience. I can remember back to when I was about 10, my wonderful mom bought me a pretty sunflower patterned sheet set (which was pretty radical for my practical mom), and I literally luxuriated under those sheets every night. It was the 70’s and you can imagine the loud pattern…funny the favorite things we remember. I’m often asked by my clients for recommendations for new bedding. This is an important question, because you will spend almost 1/3 of your day in a “relationship” with your bedding, and it should be a comfortable, restful and joyful experience. So please get bedding that makes you happy! When they talk to me my clients are generally looking for my input on a recommended pattern (yay or nay) on the bedspread or duvet cover, since it normally provides a good portion of the visual energy in the a bedroom’s décor. Here are some tips I shared with my clients. First, if my clients are starting with “no pattern” in the room yet, due to changing the bedding, and have only solid or textured fabrics on the headboard and/or chairs, ottoman and window treatments, then I generally recommend researching a ready-made patterned duvet or bedspread as a starting point. I know, I know, I’m all about custom. So how can I tell my clients to head straight to.…..Pottery Barn? But, really, it’s highly impractical for 95% of my clients to have me make them custom bedding when there are retailers with good products at reasonable process like:
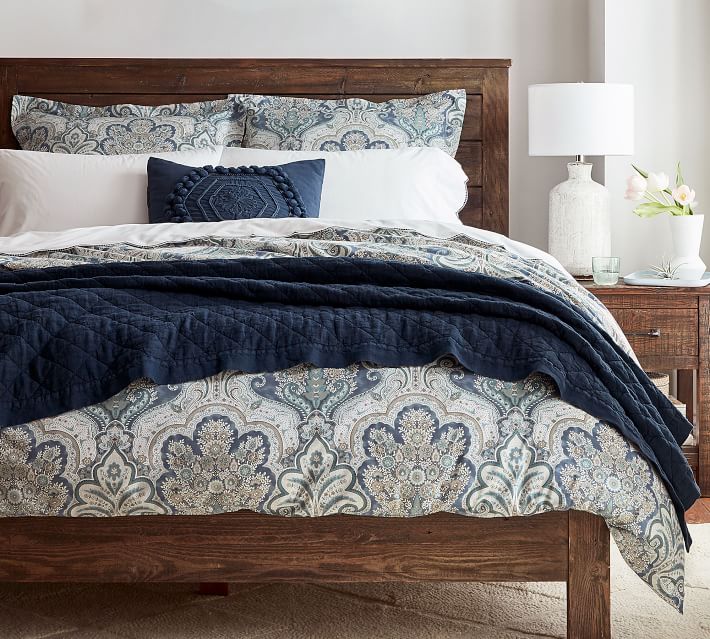
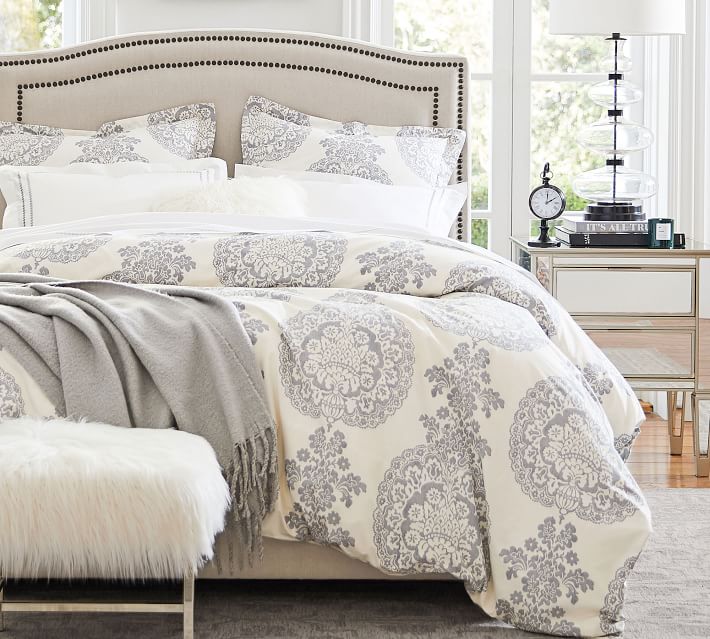
If you like bold medallion-type fabrics like Pottery Barn’s Zella duvet (pink and green, sort of Christmas-y, don’t you think?), then you will probably be intrigued by PB’s many options. No, I don’t get any advertising dollars to promote Pottery Barn, just goodwill from my happy clients when they find what they want. 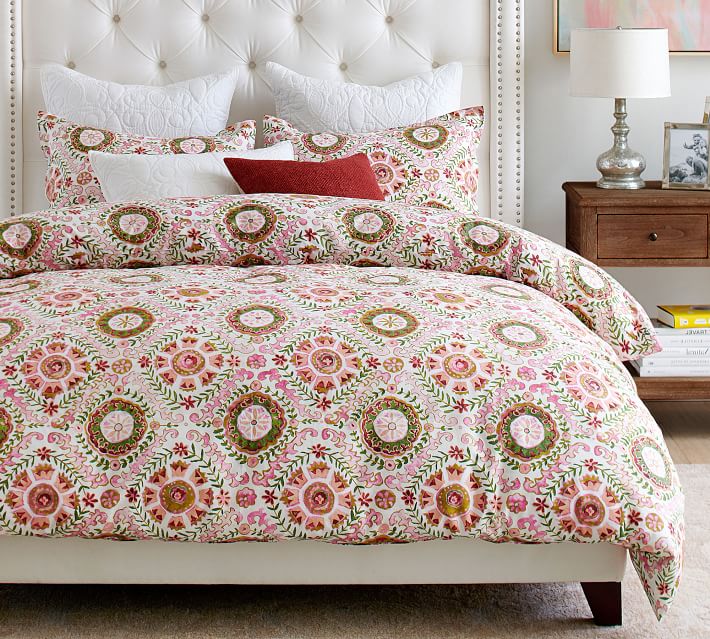 Here are two other Pottery Barn favorites of mine, the Jordana Paisley and the Lucianna Medallion duvet covers.
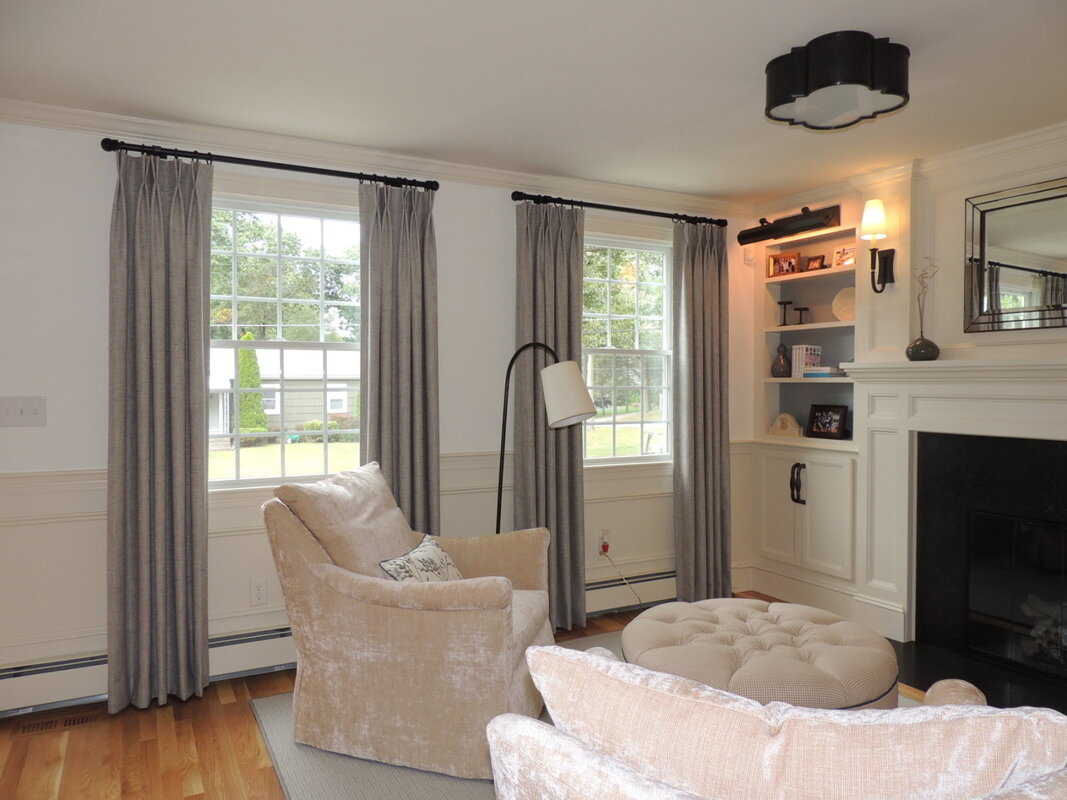
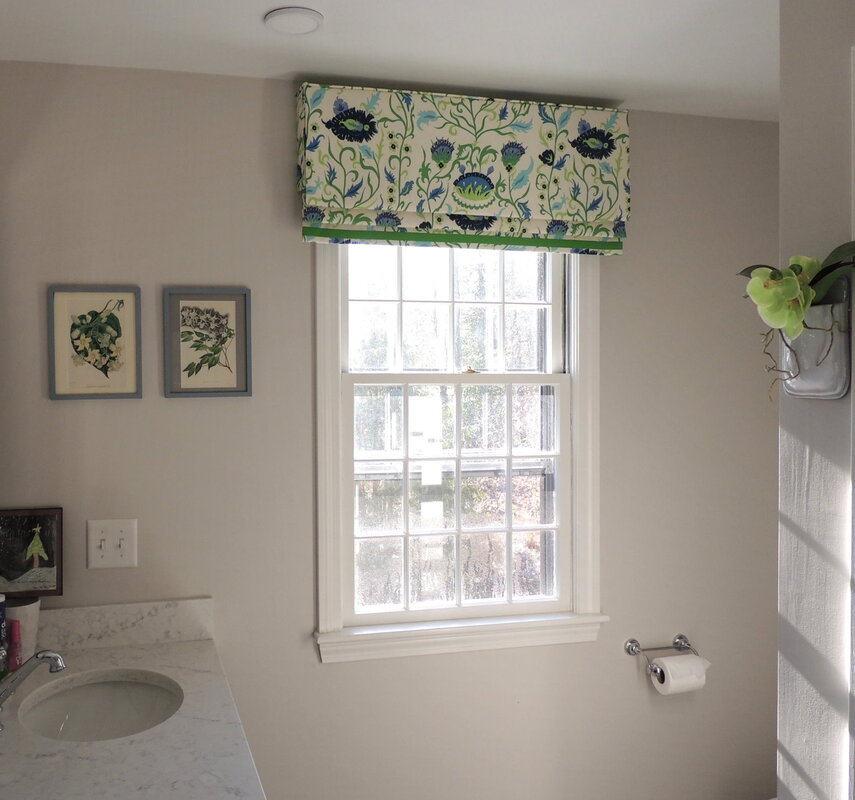
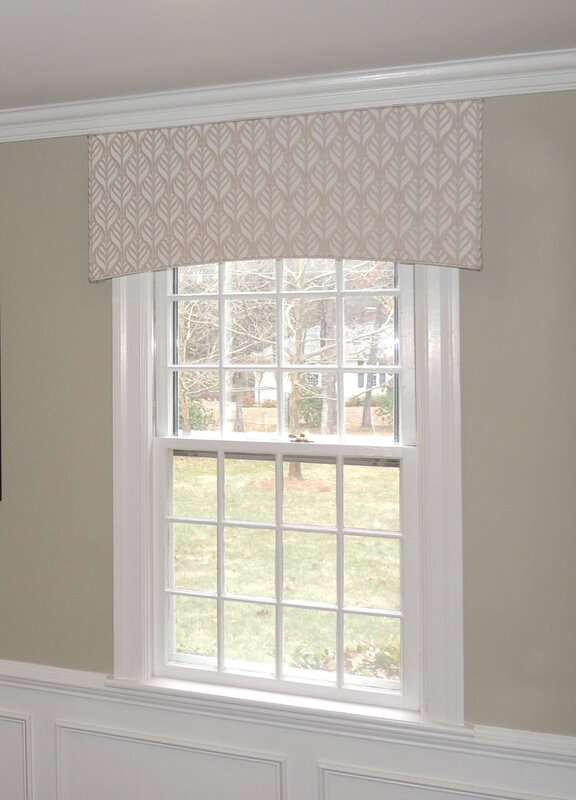
With the patterns shown above, you can choose many complementary patterns for the other soft furnishings (e.g. fabric items) in your bedroom: textures, stripes, small diamond designs, velvets, plaids. Solid Bedspread or Duvet? If you already have patterns in your room, and want to make the bed more neutral, restful, and maybe not appear so large (really, a king bed in an apartment bedroom can almost overwhelm the space visually if the pattern is too bold), then look for either a solid color duvet or quilt. There are many options available out there. If you are exclusively shopping on-line, I recommend ordering just a pillow sham first to see how you like the colors, pattern, and the feel of the cloth. Whatever you choose, just remember two things: 1) the bedspread will probably dominate the room’s visual esthetic, but 2) you can easily change it in the future if you find another bedspread that matches the room and pleases you more. So take a look – and call me if you need any help deciding! Built-in bookcases are a custom touch in any family room, library, or living room, giving the room architecture, storage, and well…a place to put all our, ahem, “collectibles.” Stuff, as my teenage daughter would say. Usually lots of stuff. Based on my experience I’d like you to consider one idea before you load up your brand-new built-ins right after the contractor has departed. Consider putting a textured wallpaper or an actual paint color at the back of the cabinets or bookshelves! It will make a world of difference, and you’ll be happy with the results, I promise. Seldom does the semi-gloss white trim paint that adorns a whole built-in cabinet look crisp and stunning when it’s glaring across the back of the entire bookshelf. Pictured below are some examples of my clients’ built-ins where we put wallpaper or fabric as the interesting, but understated “backdrop” for the collectibles they chose to display. My favorite backdrop is grasscloth wallcovering. The blue Phillip Jeffries grasscloth Soho Hemp, 5508, Color Broadway Blues (https://www.phillipjeffries.com/shop/CARD-NAT-SOHOHE/5508/) shown in the photo is a perfect fit for behind the display shelves of this transitional living room. If you use this technique make sure you pay particular attention to the width of the paper in your selections since you don’t want to have any seams from the wallpaper. The Color Broadway Blues grasscloth was perfect since it came in rolls that were 36” wide, which was wide enough for a seamless application. 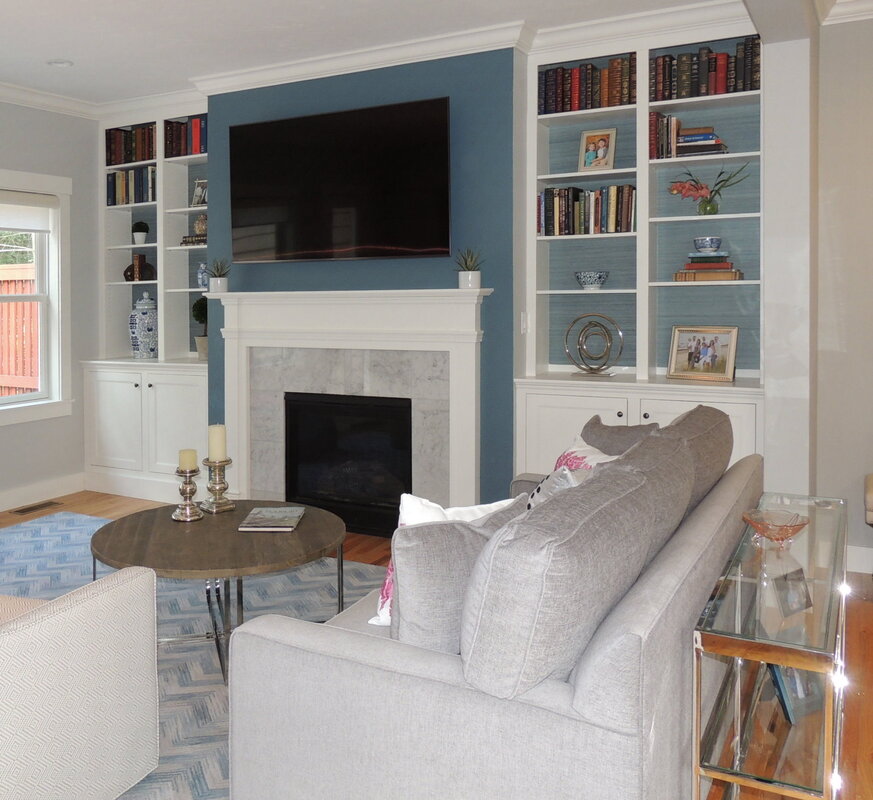 The next photos are of family room from my client and their beautiful slate gray built-in cabinetry. We put another Phillip Jeffries paper at the back, one that has a metallic/texture combination that is small scale (Metallic Paper Weave 3531 Chromium, https://www.phillipjeffries.com/shop/CARD-4-METWEAVE/3531/). The wonderful thing about this product is that it is an “engineered” grasscloth, so even if there are seams they don’t show very much, or at all. 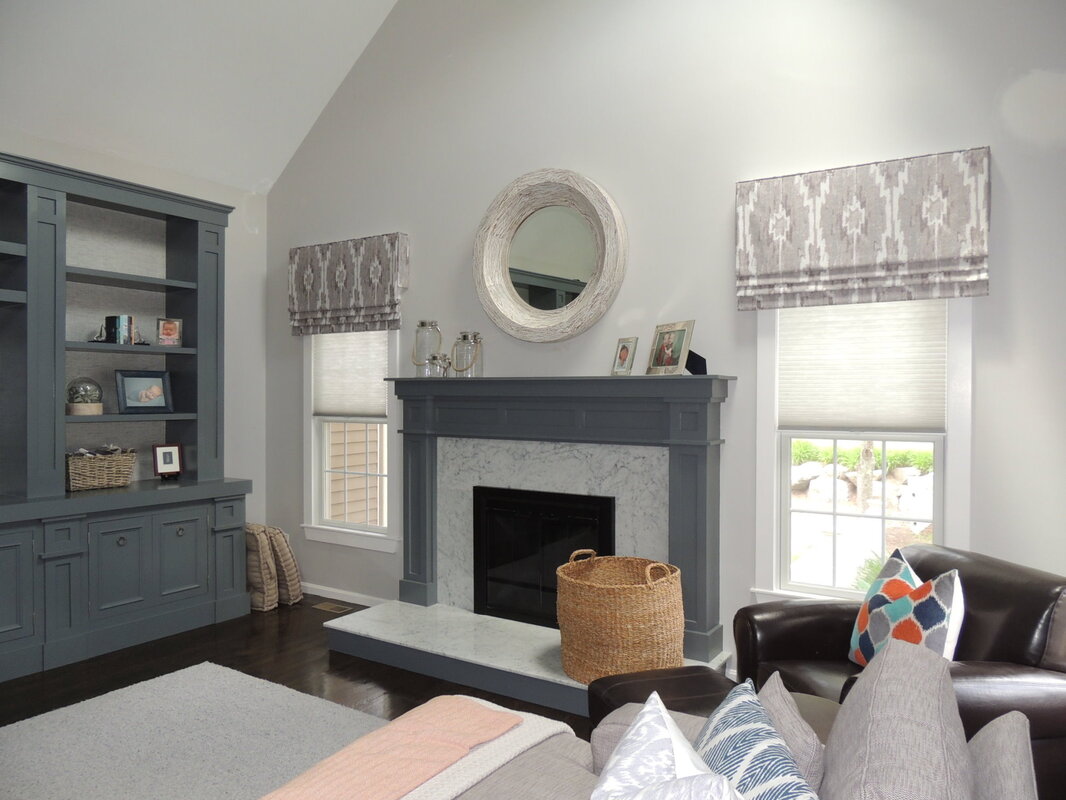 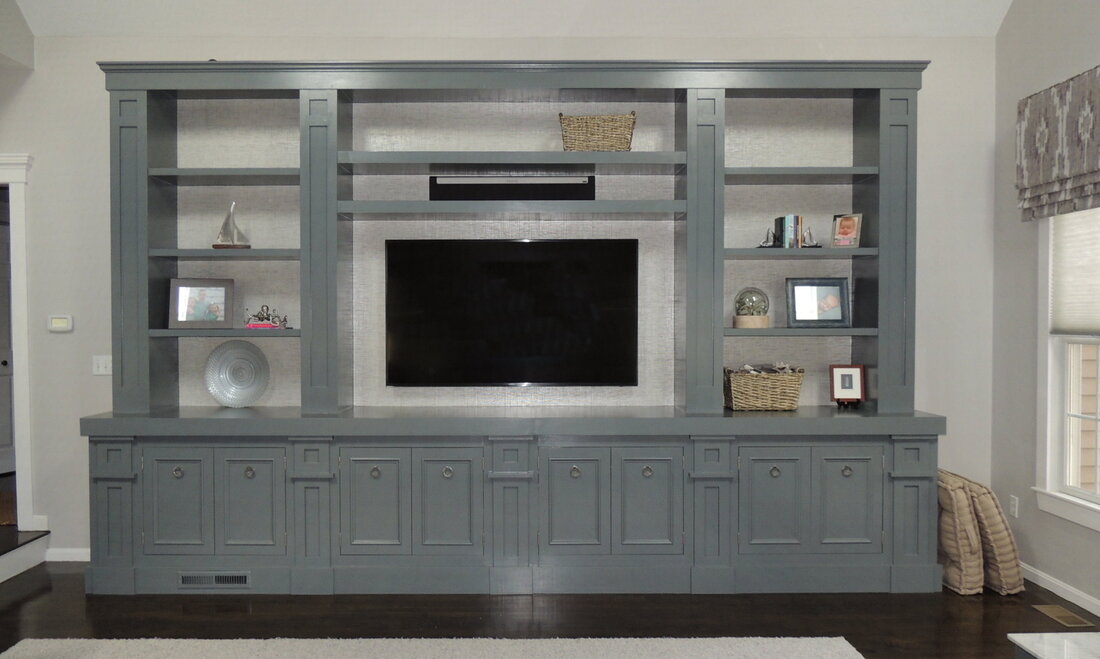 My client was planning to do more styling on her bookshelves after I took these photos (during the same trip that I installed the faux roman valances I had fabricated), so I am sure the bookshelves are a lot more dressed now. Just gorgeous custom cabinetry, I know she was pleased. When deciding on a suitable paper or color for the back of shelves, remember that the backdrop should not detract from the “main event.” Sort of like when you take close-up photographs; the background should be fuzzy and the object in front should be the crisp focal point. Your objects should pop like that. A busy wallpaper, especially a larger geometric, will fight your collectibles. The next photo shows a current project of mine where we are currently selecting the wallcovering for the backs of the bookshelves. When you compare how the white of the shelves in this photo compares with the blue in the first photo you can see what a difference a colored background can make. I’ll update you with an “after” photo when we’re done! 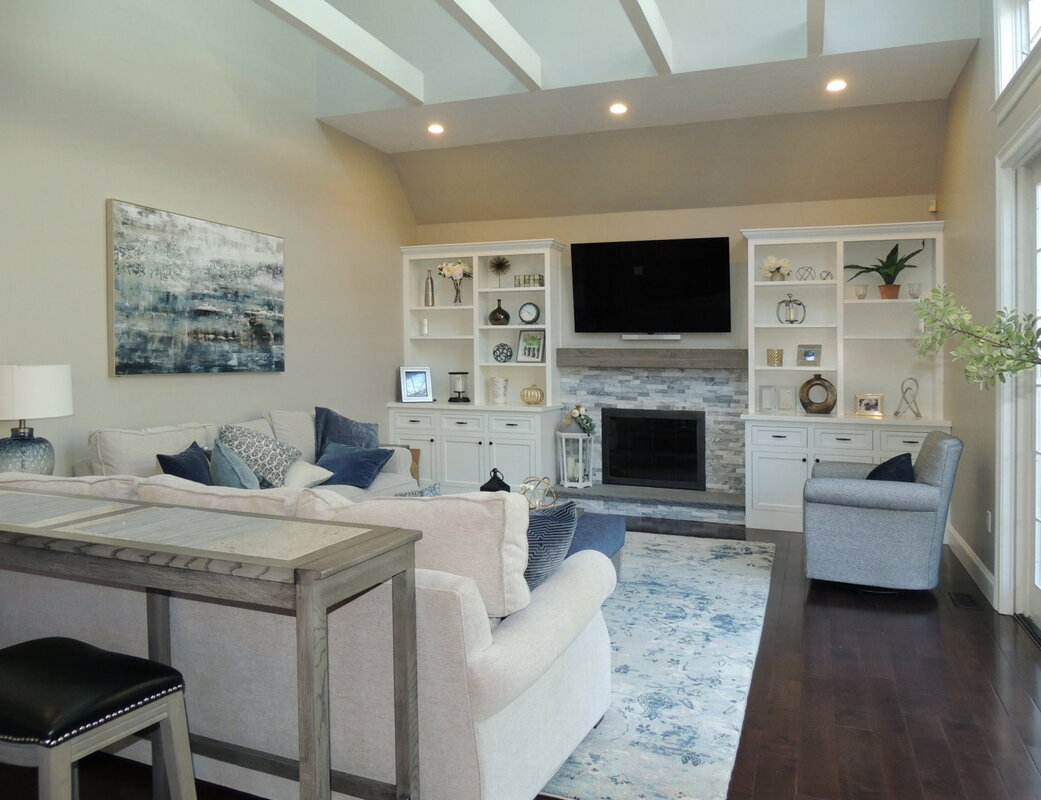 Finally, here’s a photo of a project of mine where the client wanted to accent the gray scheme in red, but in an updated way. We chose to use red very prominently in the area rug (not shown), fabric on the backs of the built-ins, and the same fabric as edging on the cornices. A bold accent color can go a long way. When selecting where you will put the accent color, a bookshelf gives you the opportunity to feature that color in a ceramic or art piece, which will delight the eye as it searches around the room for the accent. As a general design rule you should always strive to use an accent color in at least 3 places in a room; preferably at different heights. 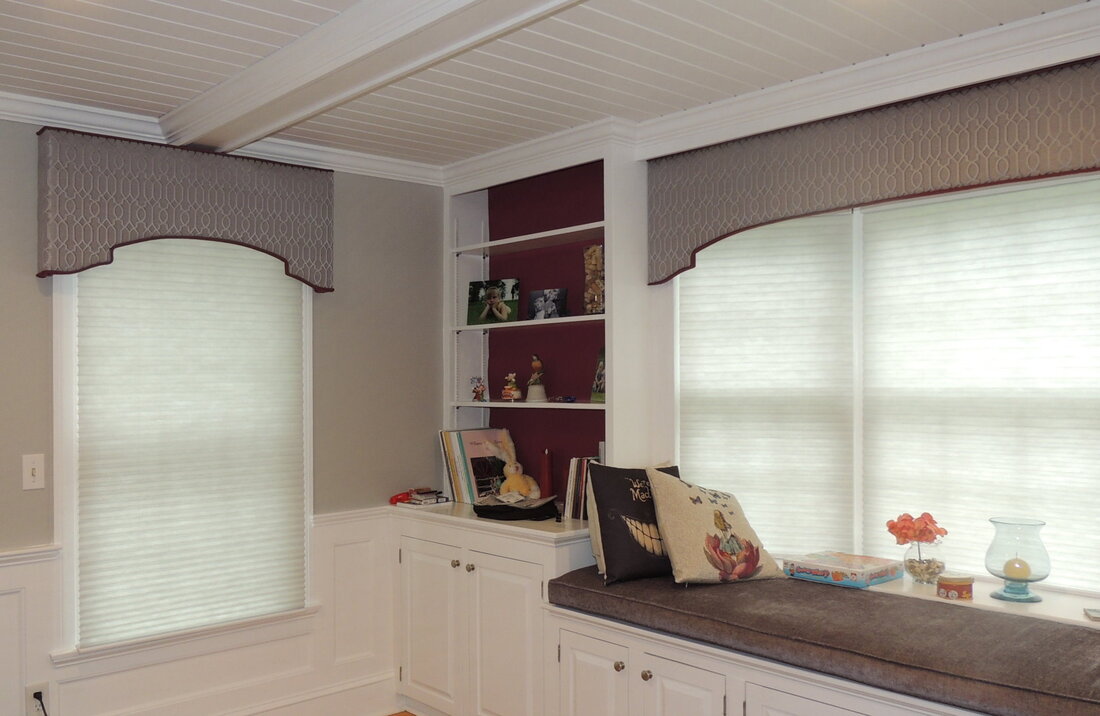 As for styling those new bookshelves with object and books, it looks easy. But it’s not. It takes time and lots of good “raw ingredients” are needed to make your built-in shelves look effortless, stylish and perfect. Unless you’re hiring your designer to style your bookcases, I would recommend you take a first pass yourself, and then invite over trusted friend to make a second pass. There are lots of websites available that can give you good rules and tips for actually styling a bookcase or bookshelf, so I won’t go into details on that here. Just remember a few key tips as you gather your items to create your masterpiece:
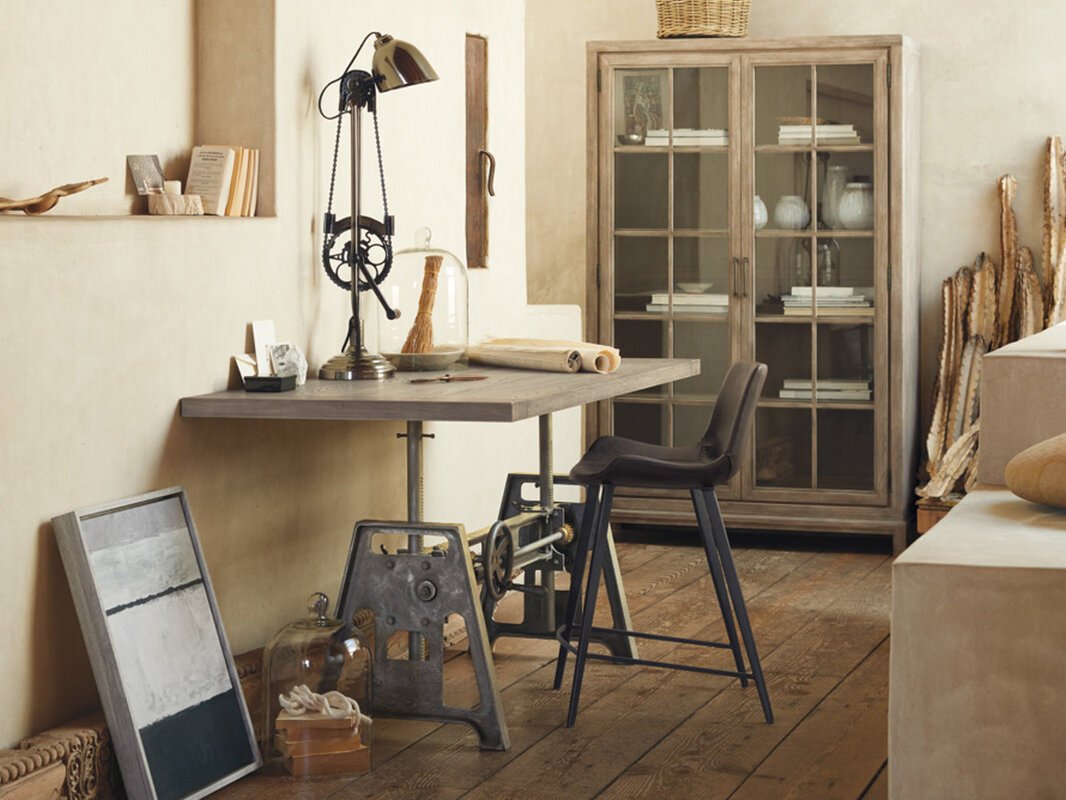
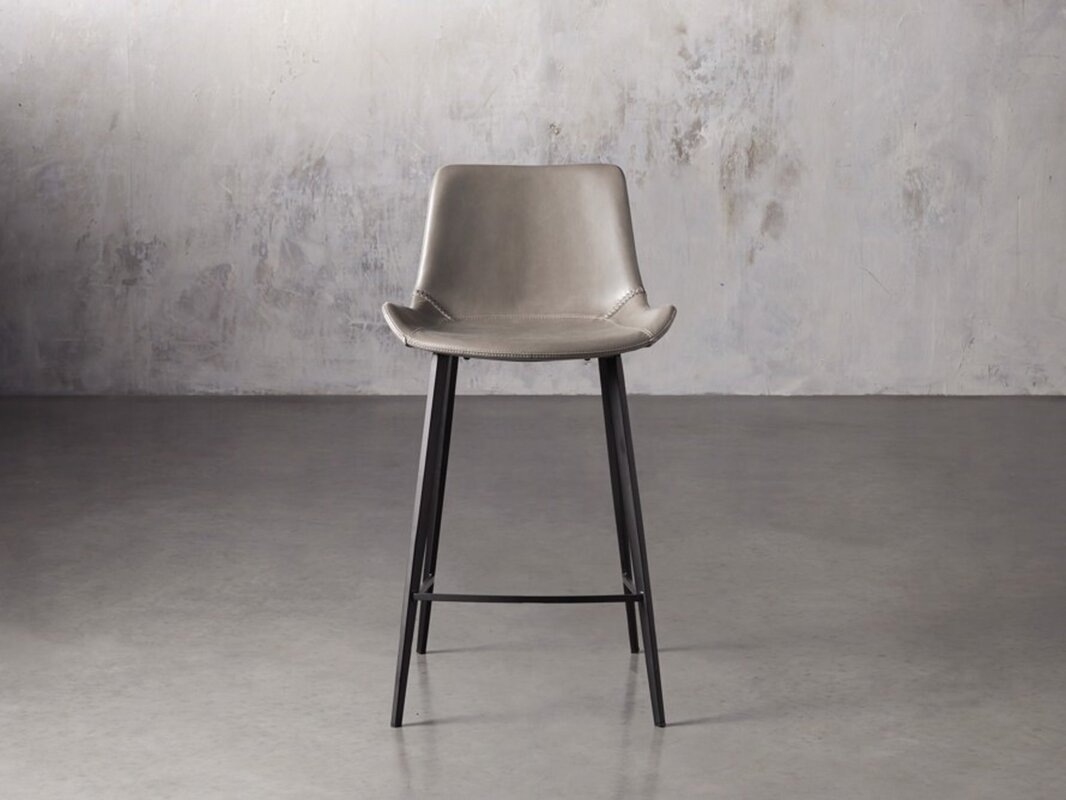
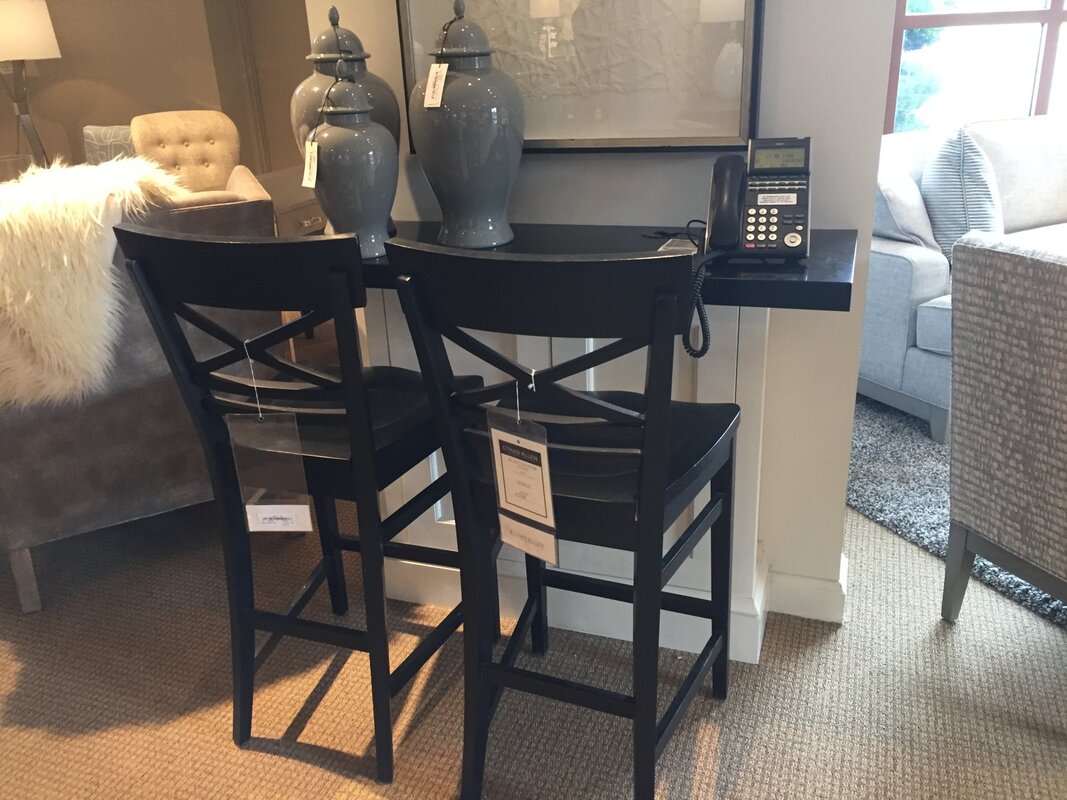
I invite you to browse through my wallpaper vendors to see if you might want me to order some swatches to consider for the back of your bookshelves. Here’s a previous blog on wallpaper to get you started: https://www.centerstageinteriordesigns.com/blog/use-wallpaper-to-transform-your-home-in-201 You might also want to check out my blog for a super cool idea of how to turn a stack of books into art. This is genius! https://www.centerstageinteriordesigns.com/blog/hospitality-industry-rocks-design Whatever you do I hope that you have a good experience with your new bookcases. They really do pack a huge decorative punch in a room, and should be thoughtfully and deliberately planned. Here’s wishing all of you a wonderful Thanksgiving holiday weekend! Needless to say, I’m thankful for each and every moment, opportunity, and the wonderful people I meet in my both my professional interior decorating and personal life. Last winter I featured some beautiful counter stools sold through Darby Road Home in Waltham, MA (See my blog from 30 November 2018 – “Darby Road Home Delights with Counter Stools and Holiday Cheer”) and remarked that it is hard to find just the right counter stool at just the right height. Well, that challenge still continues; despite a growing number of on-line retailers who offer stools. The purpose of today’s post is to highlight to my wonderful readers that you can’t rely on the name “counter stool” to magically fit your new kitchen island, because there is great variability in the height of stools - much more so than with chairs, in my opinion. So, you must pay attention while shopping! Especially when using catalogs or shopping on-line. Before you start looking for stools the #1 thing you need to do is to first figure out the optimal seat height that fits for you and your family. The graphic below (from Williams Sonoma) illustrates this point since it shows the variability they have for seat heights where a counter stool seat could be between 23” and 28” tall. 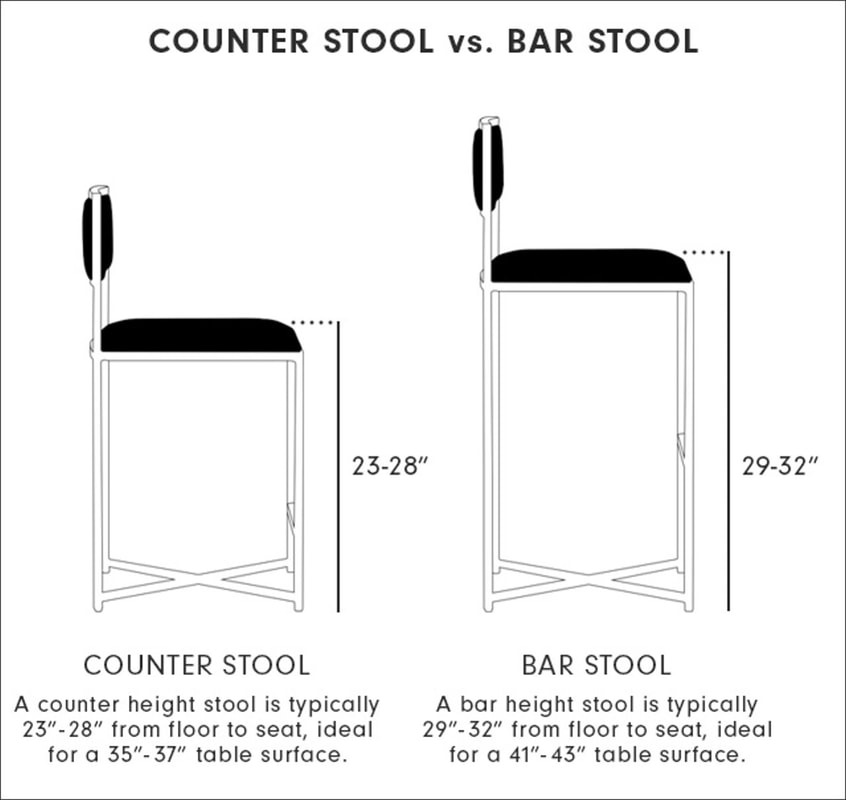 So where have I been shopping for stools for clients recently to solve their design problems? Well, everywhere – and with good success. Here’s the Gage counter stool from Arhaus, a stylish and practical stool that is incredibly comfortable. I love that Arhaus tells you the dimensions (including seat height and overall height); Gage Counter Stool - Dimensions: 19.5" W X 19.5" D X 36.5" H (SEAT 25" H). Here's the link to the Arhaus website's page about the Gage stool: https://www.arhaus.com/furniture/dining-room-furniture/bar-and-counter-stools/gage-counter-stool/
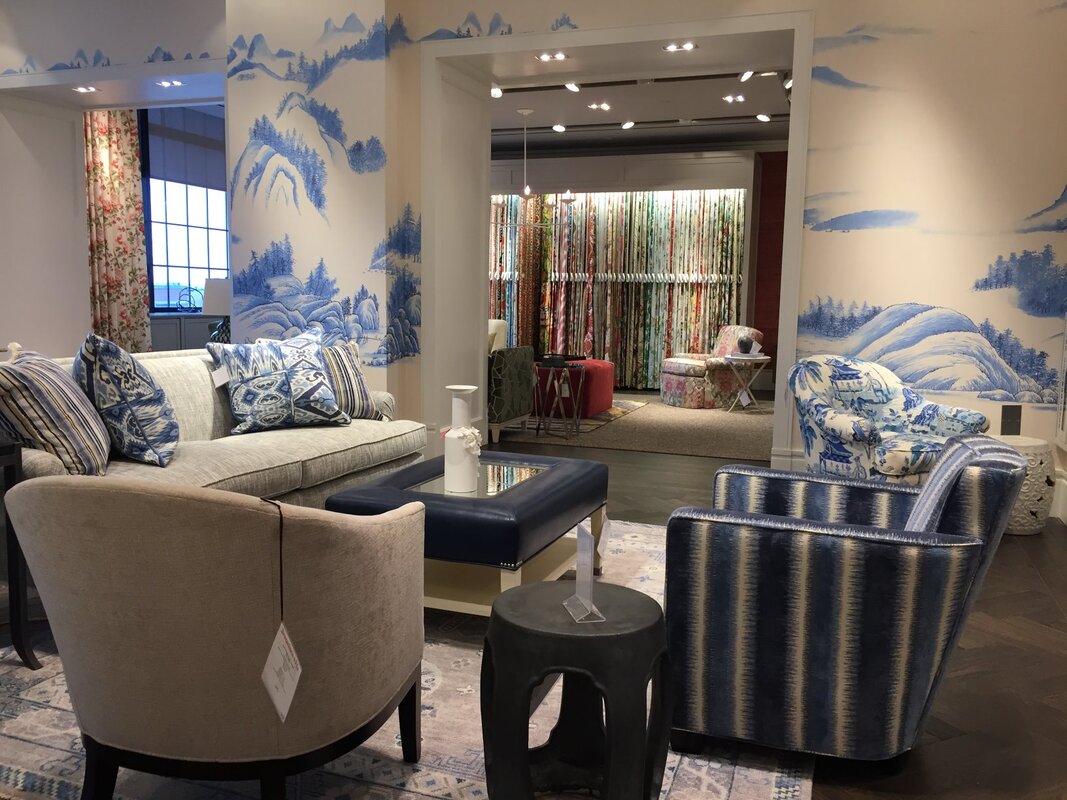
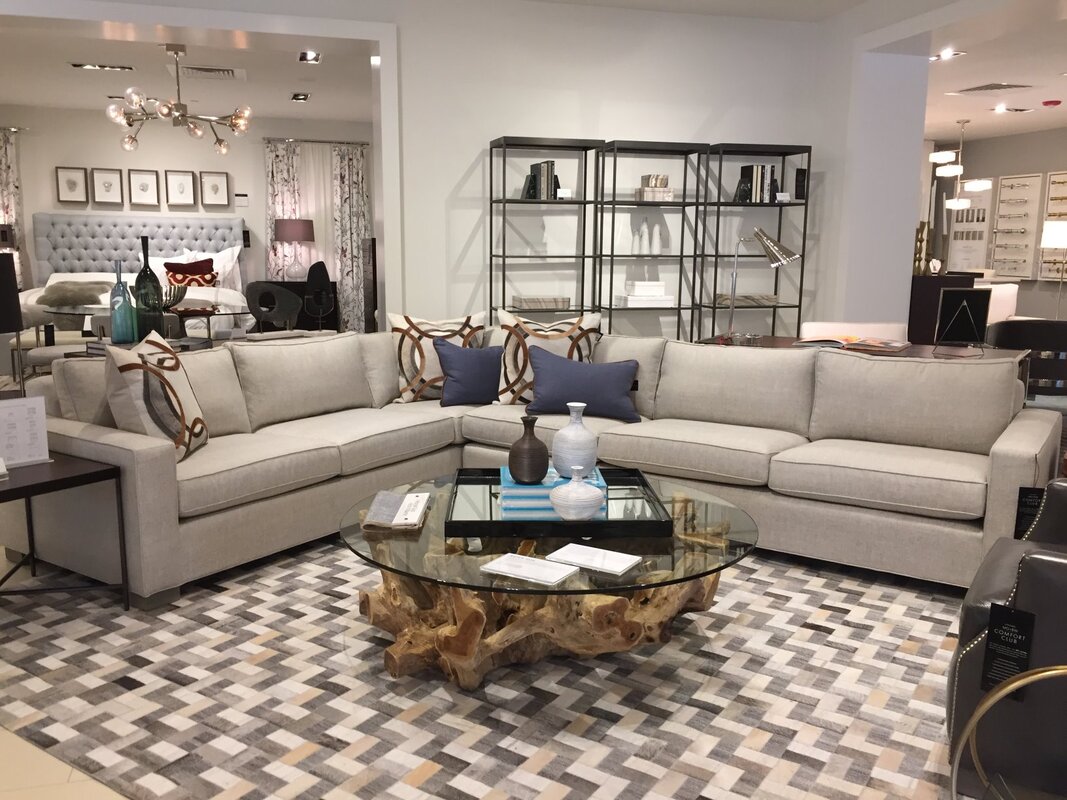
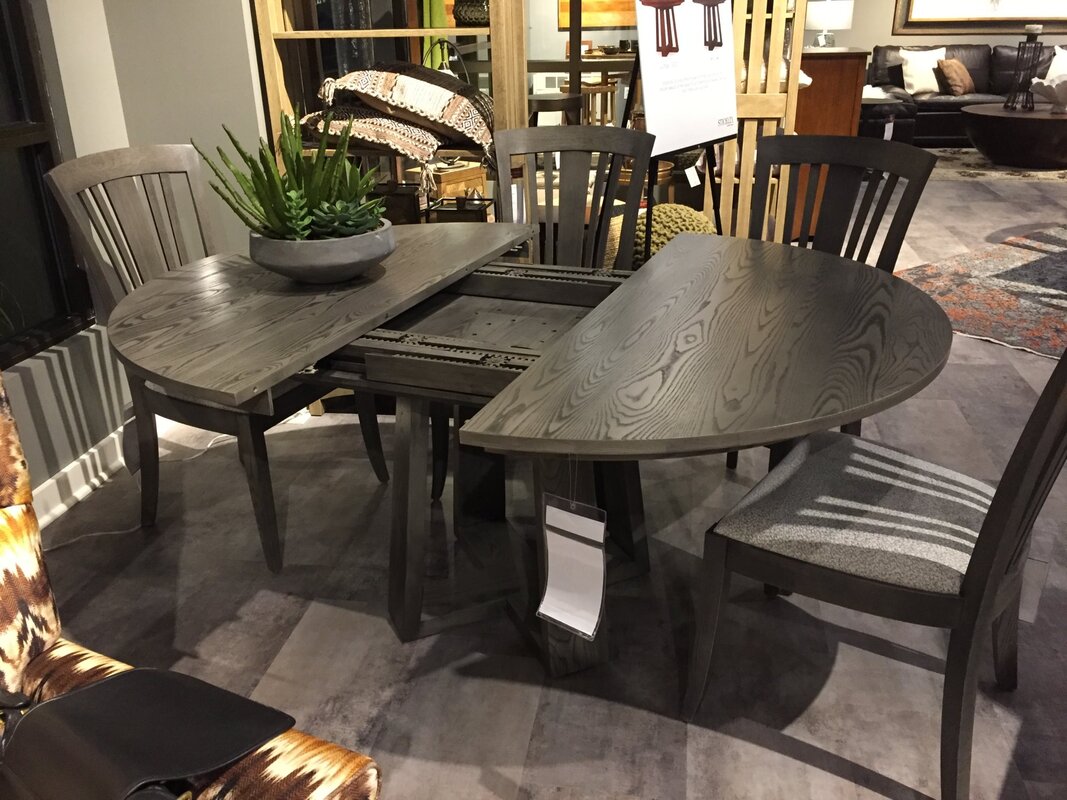
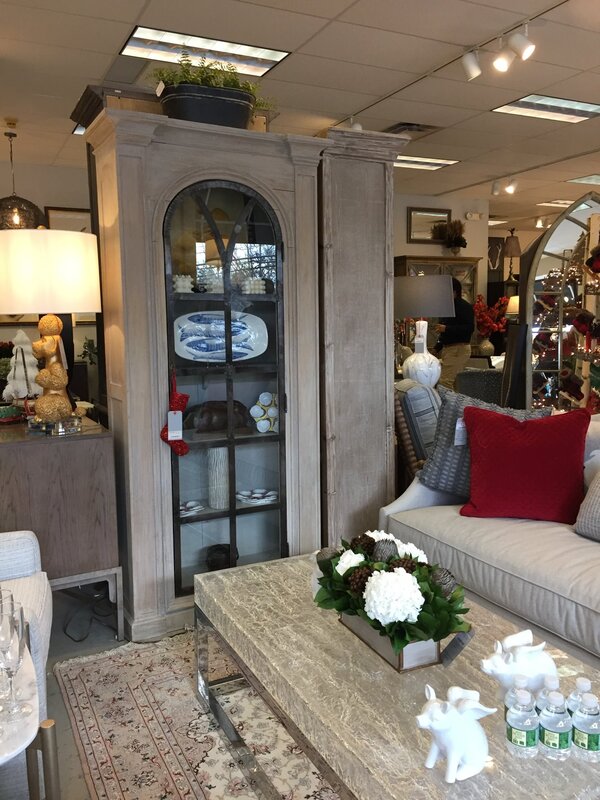
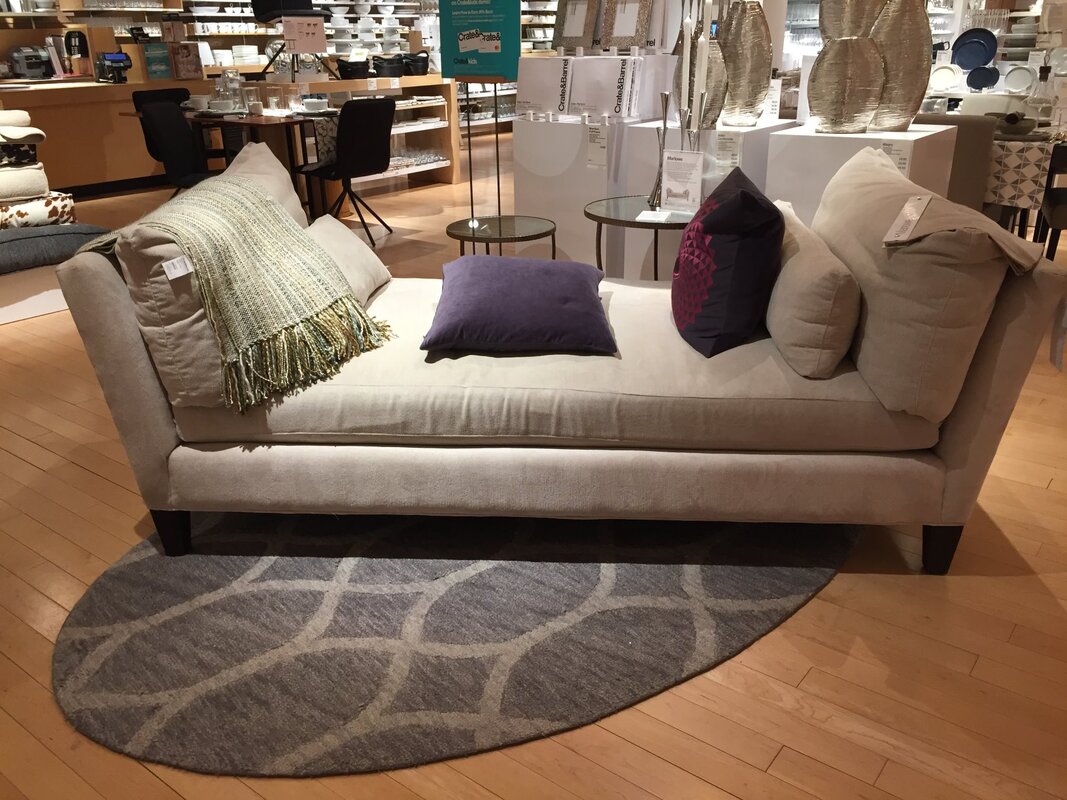
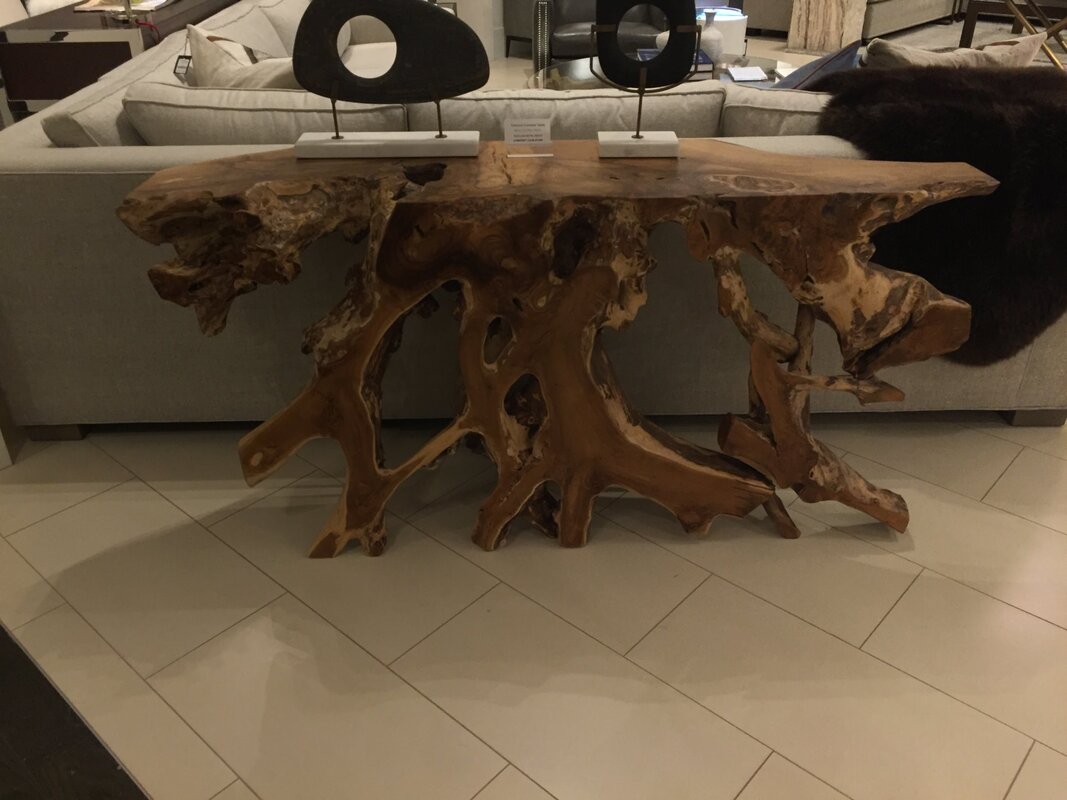
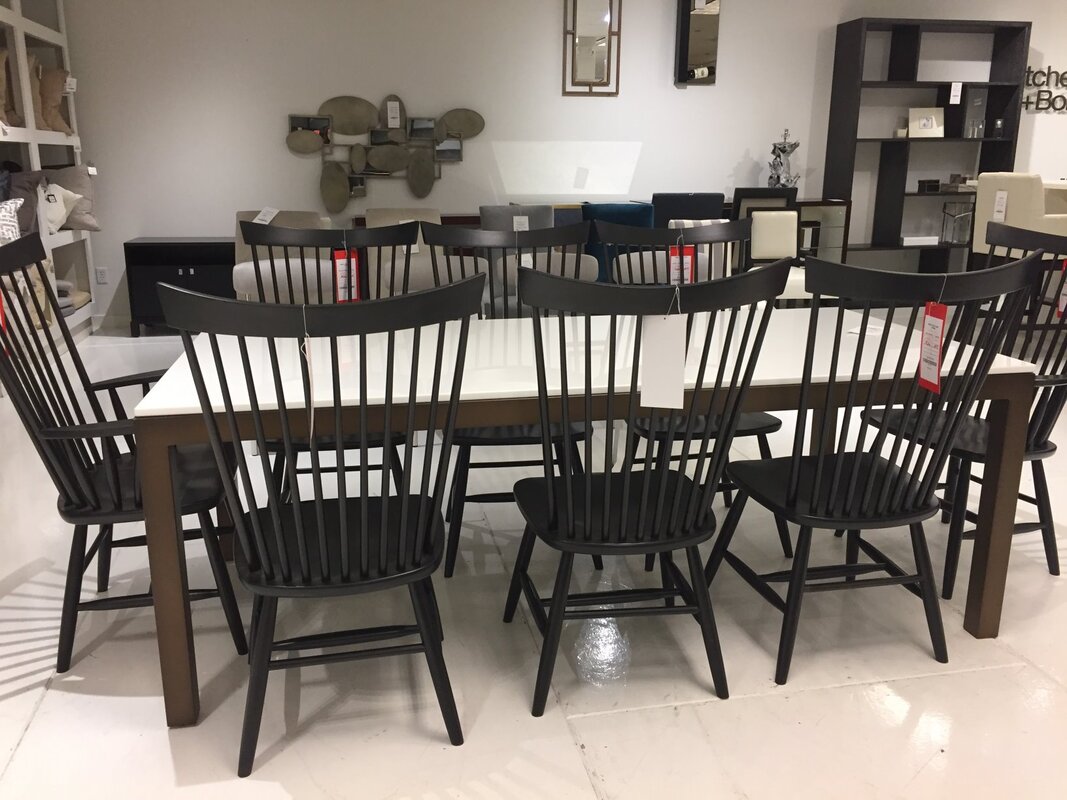
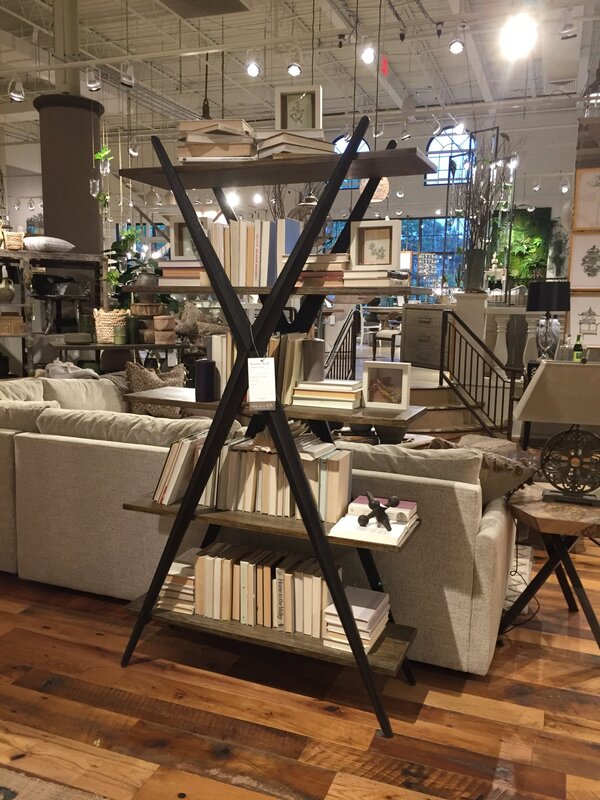
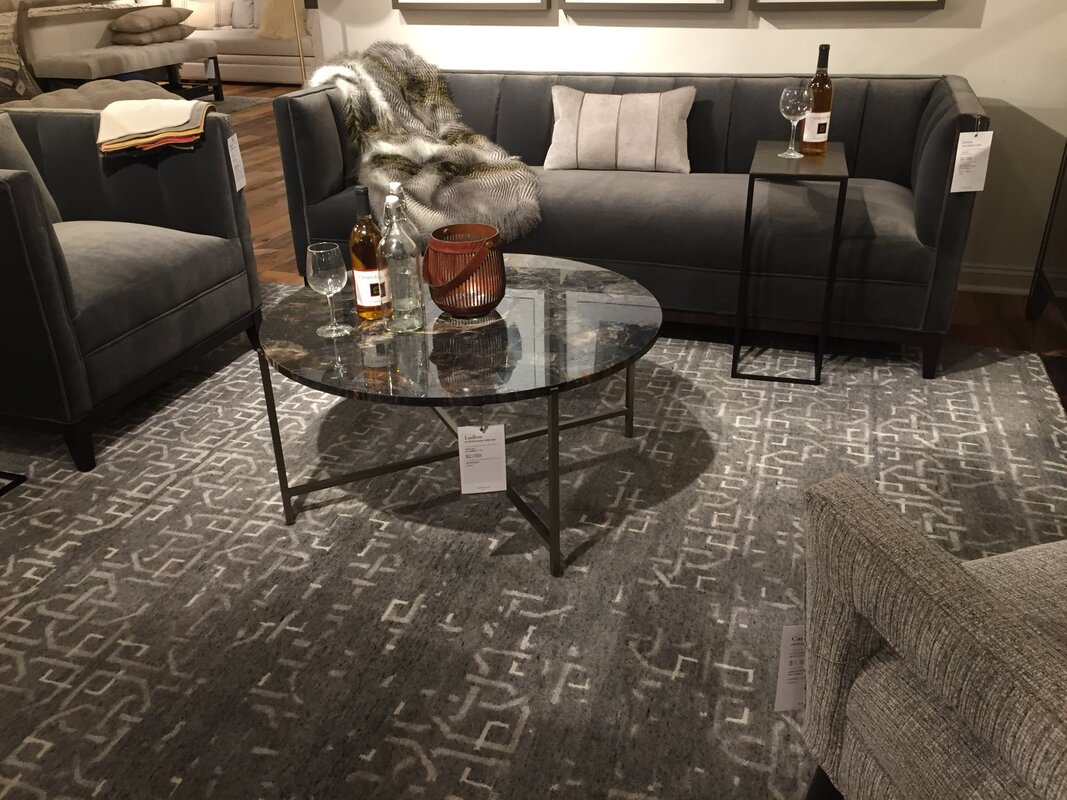
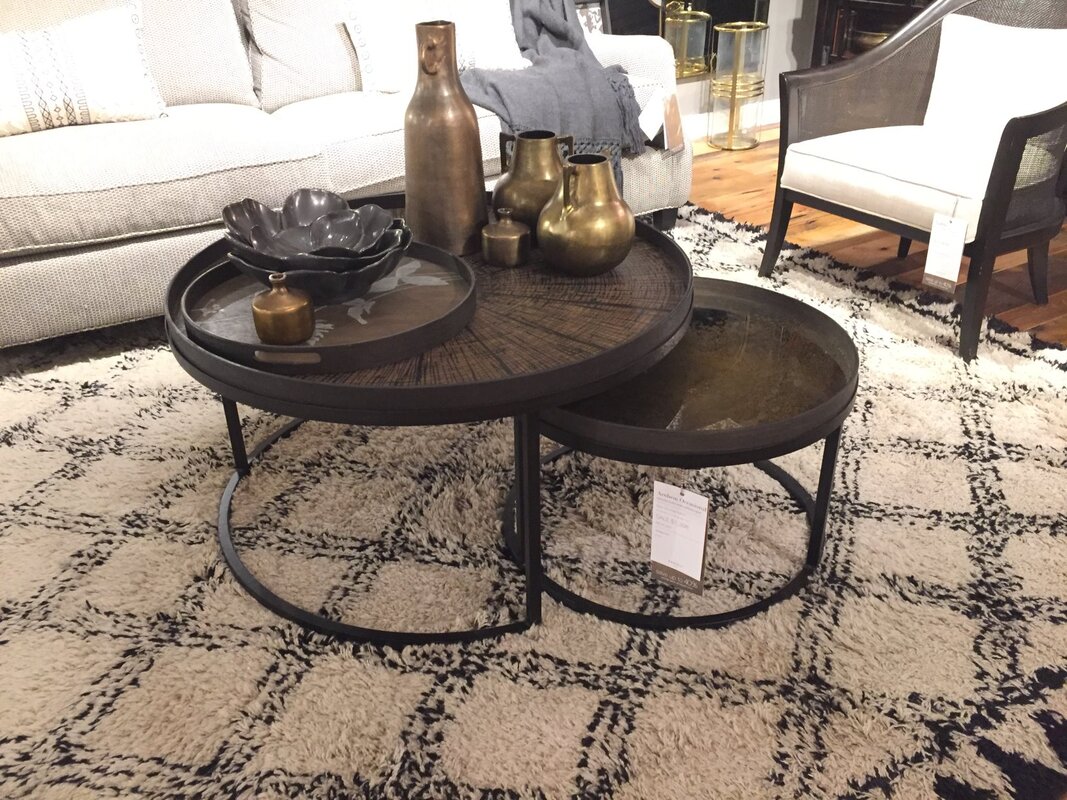
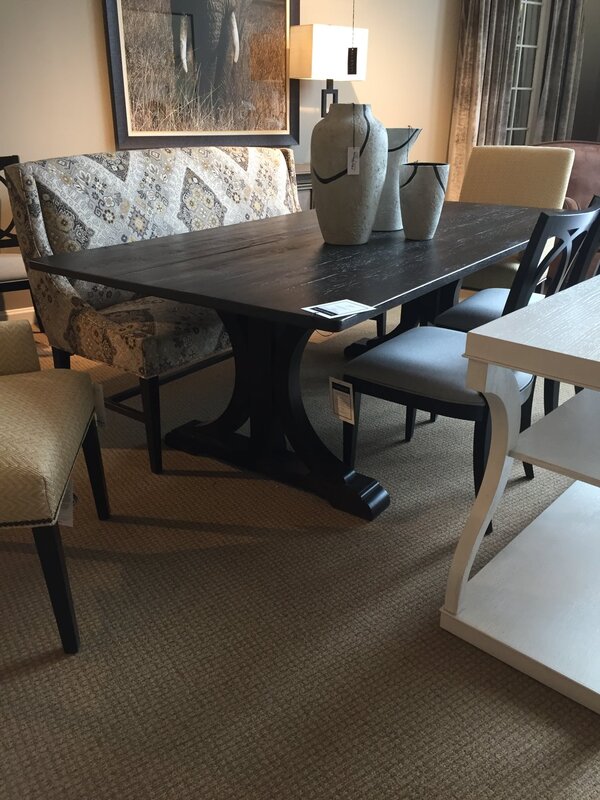
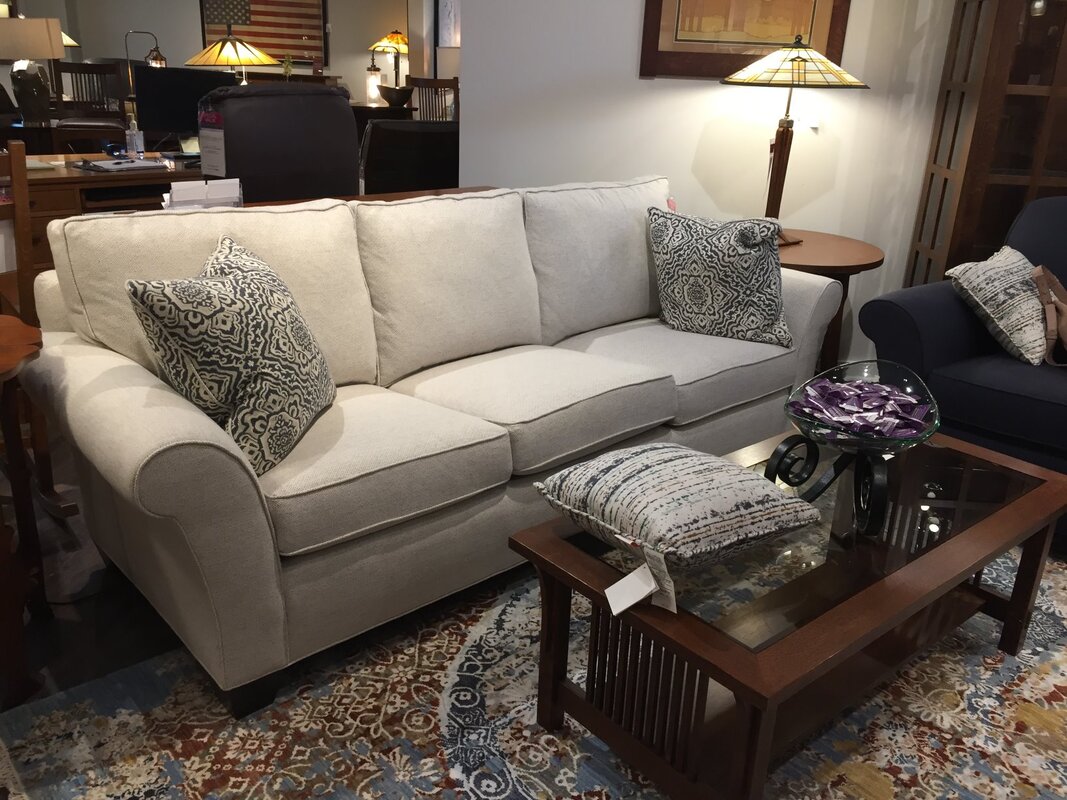
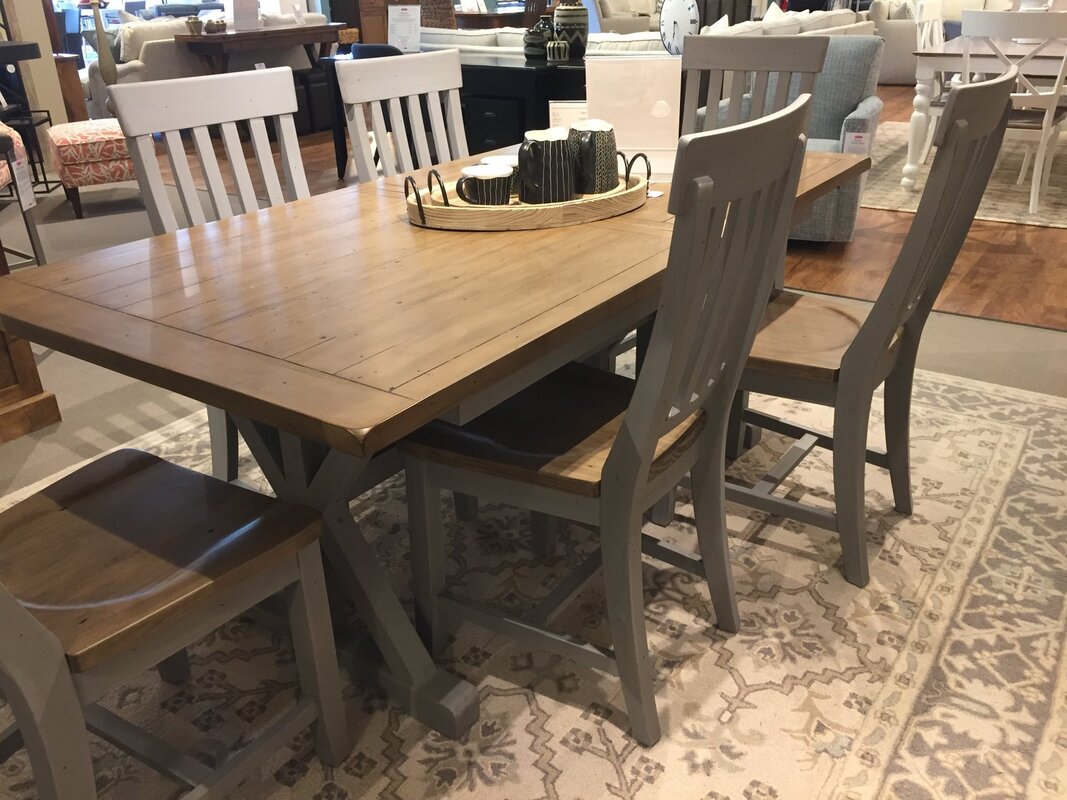
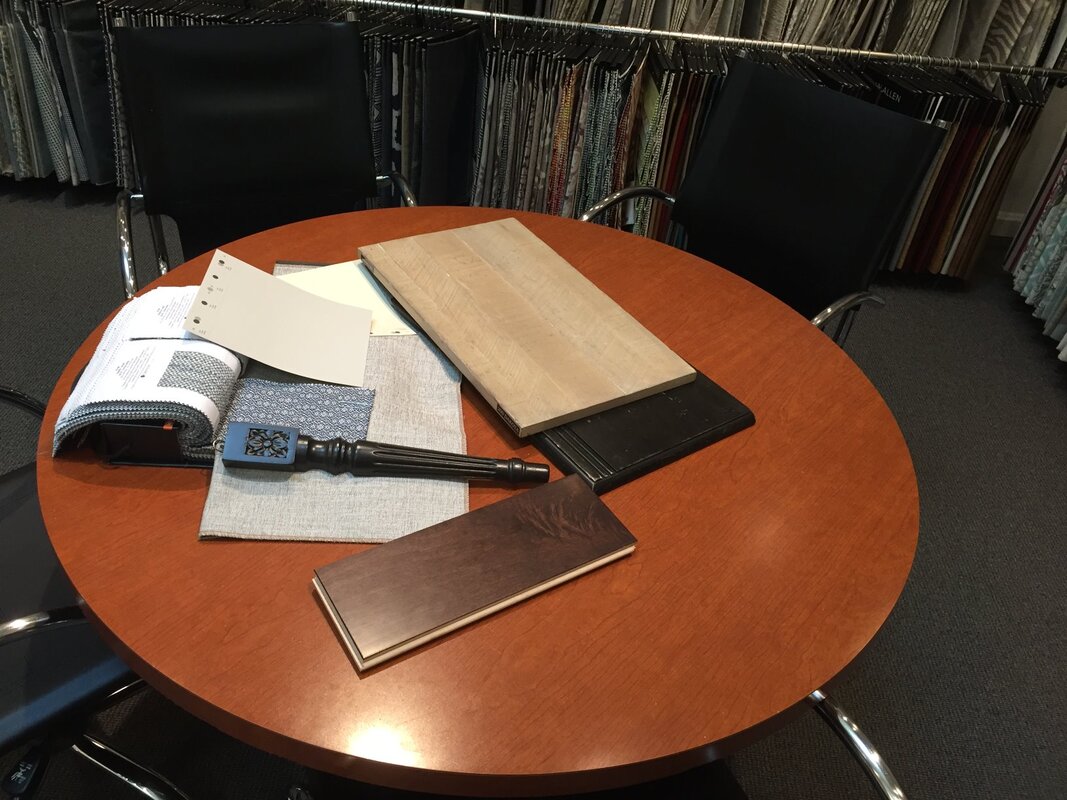
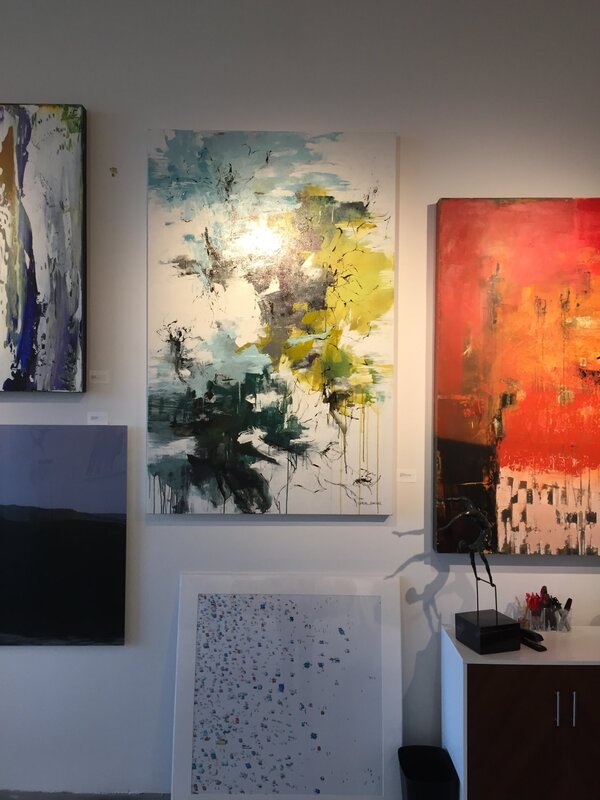
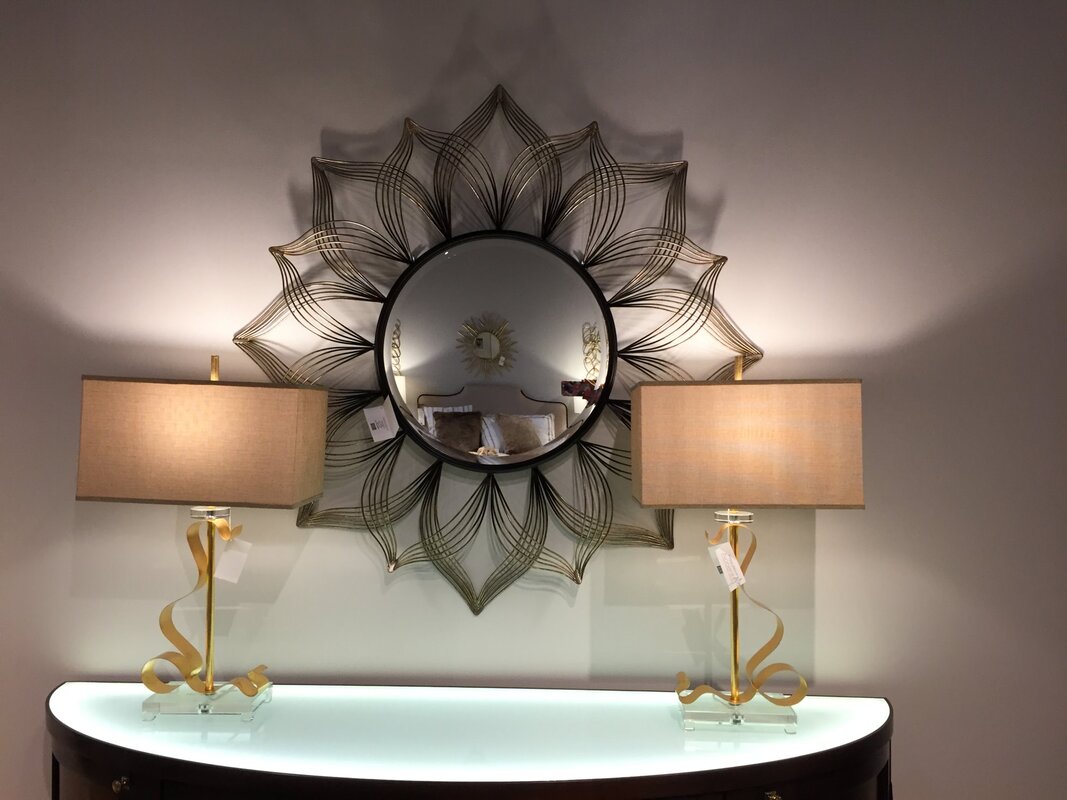
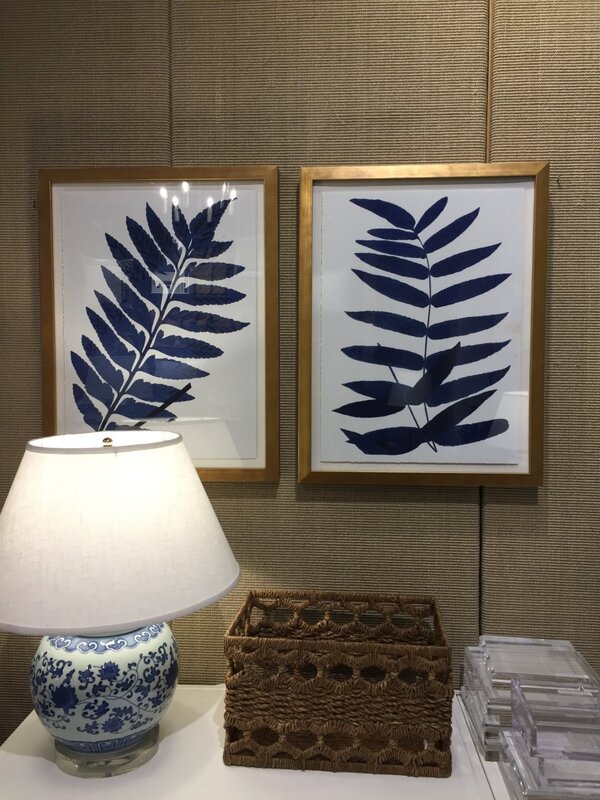
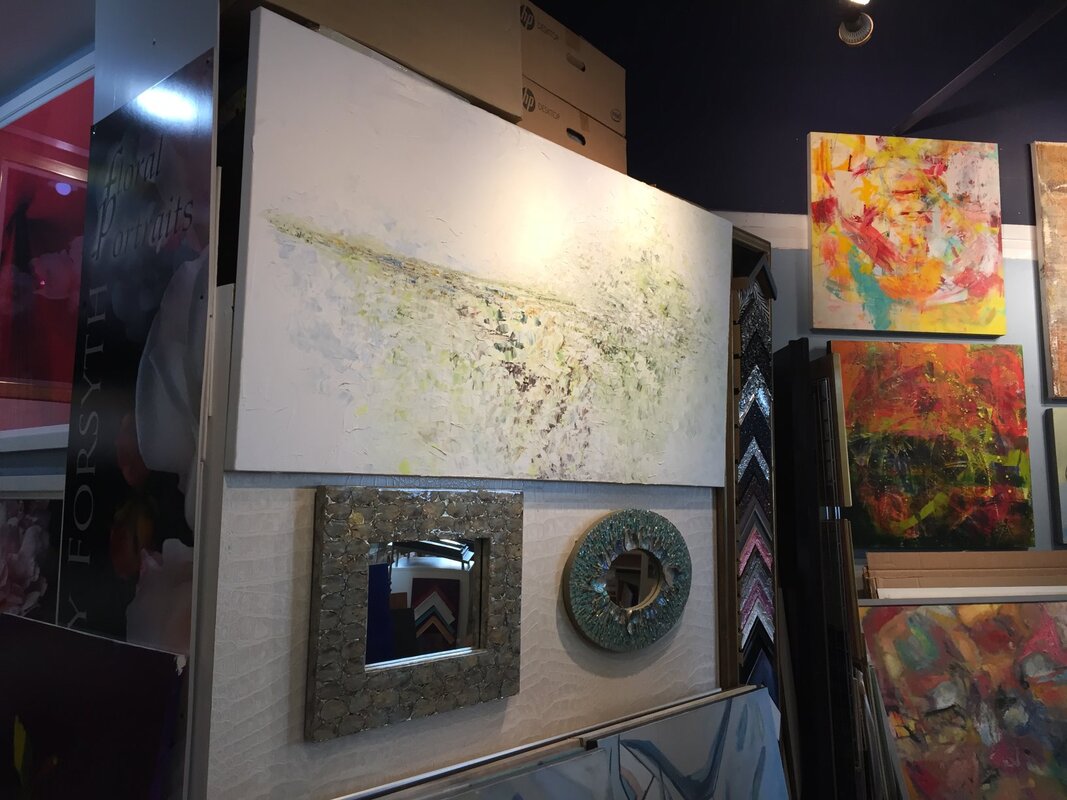
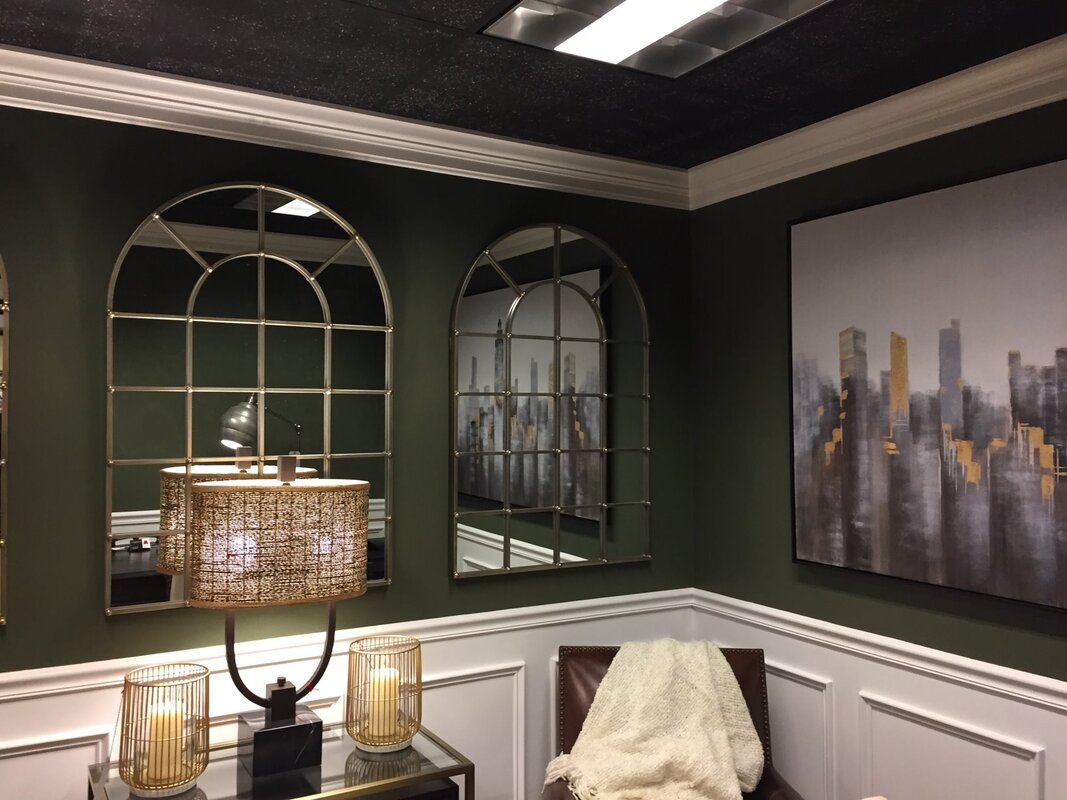
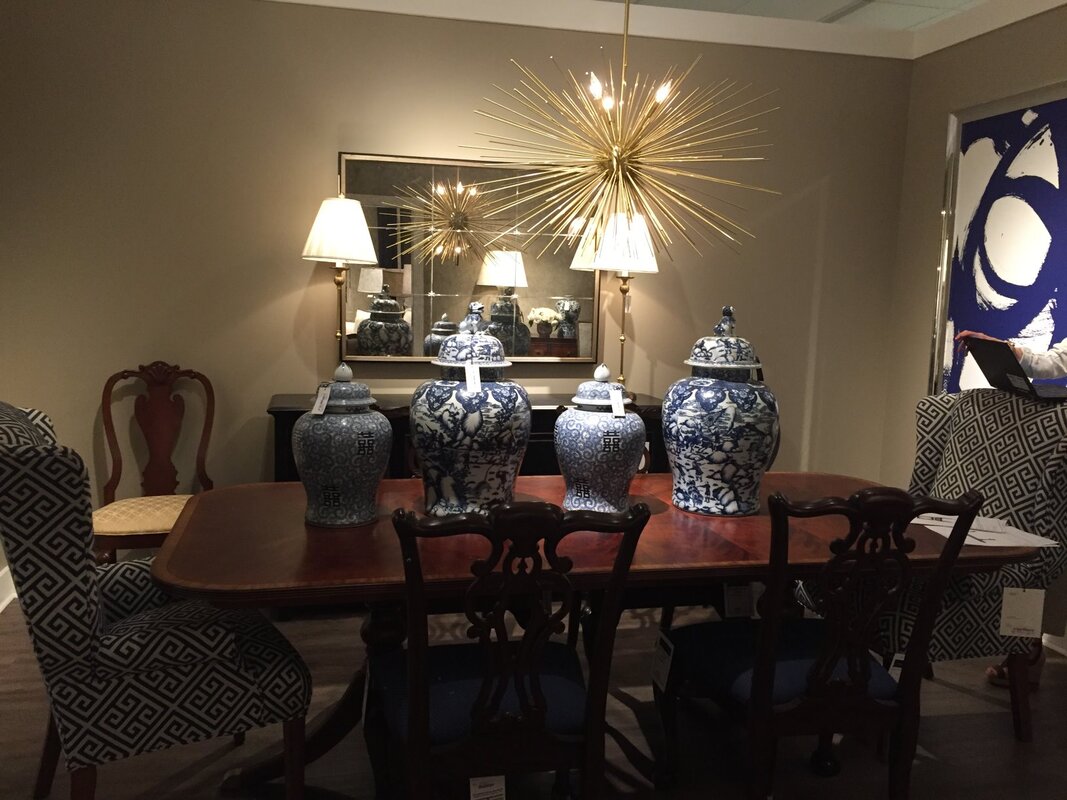
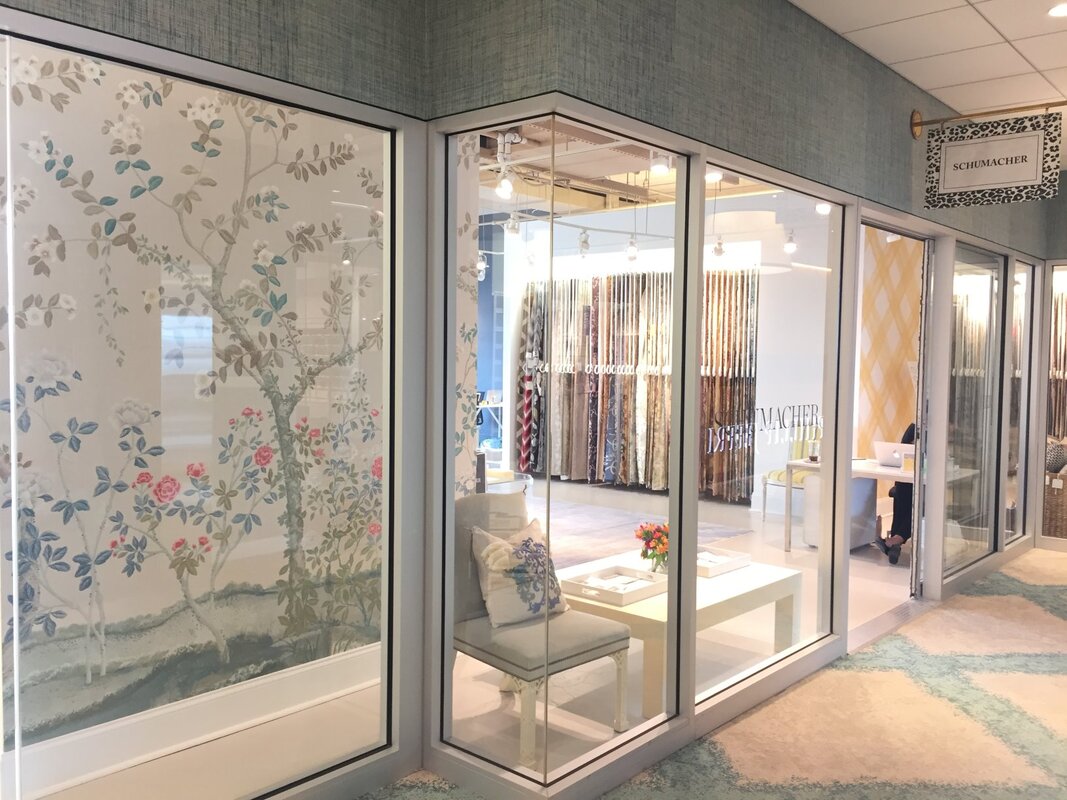
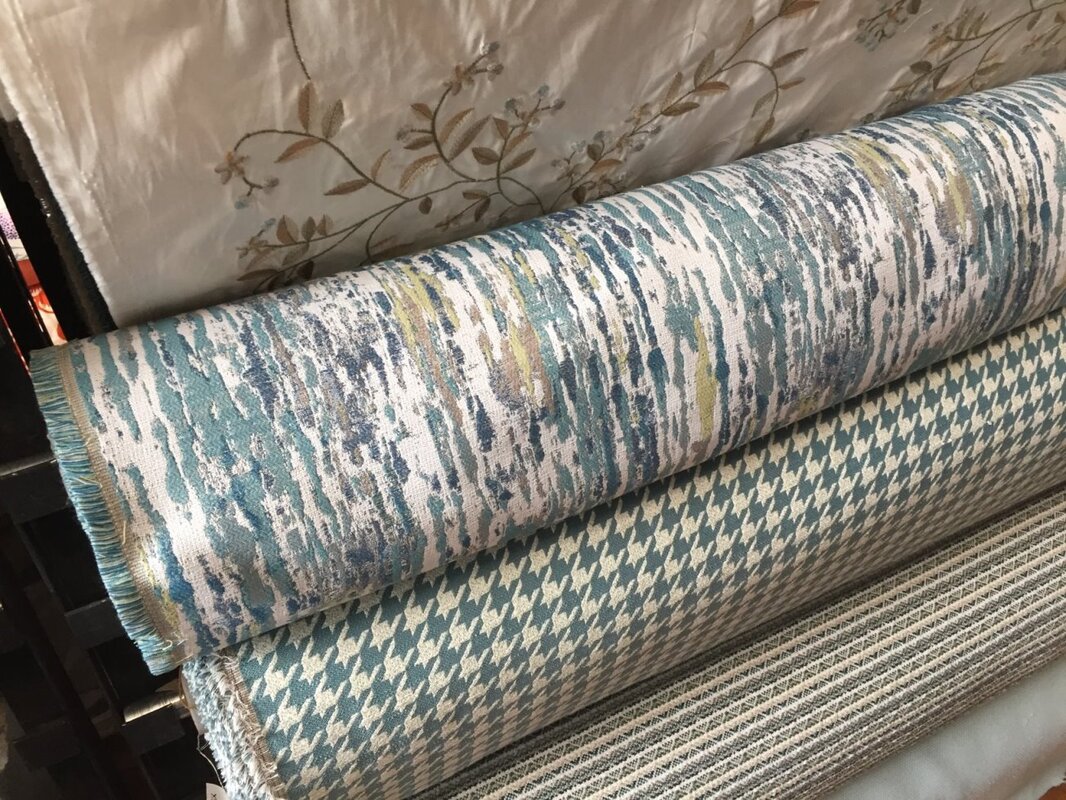
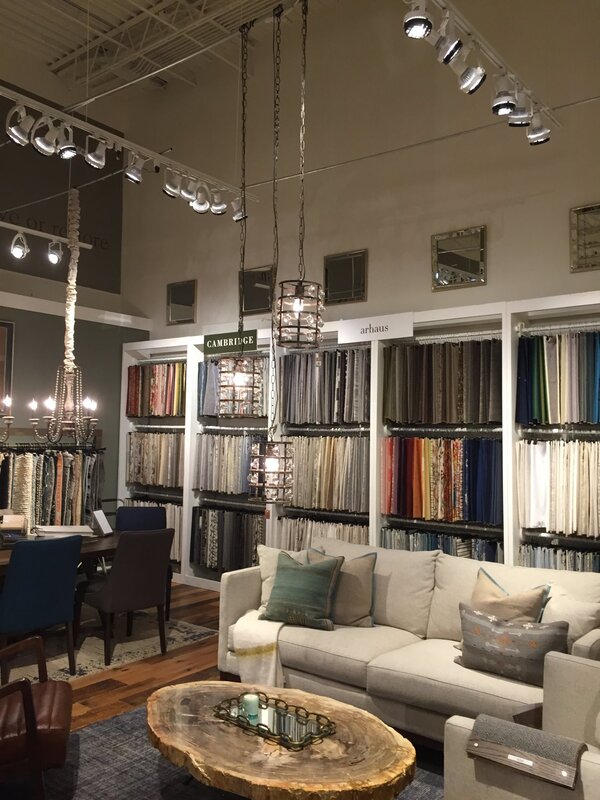
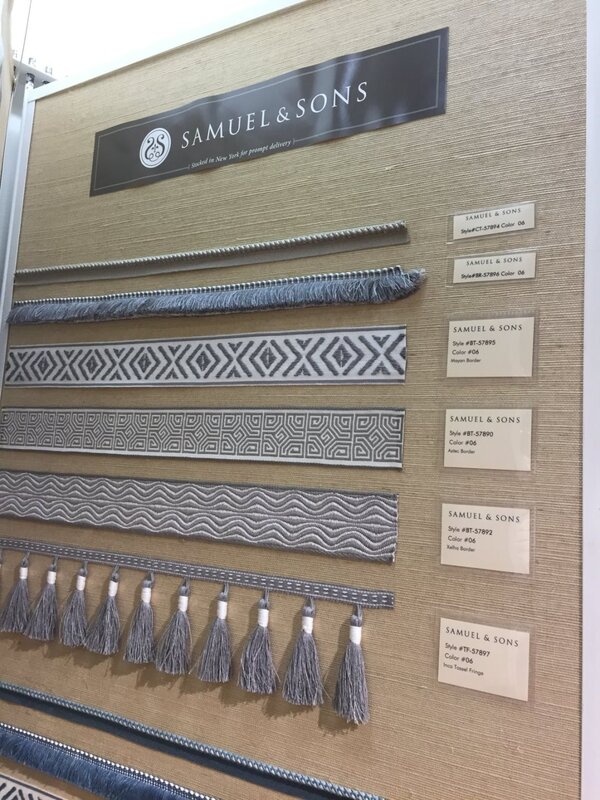
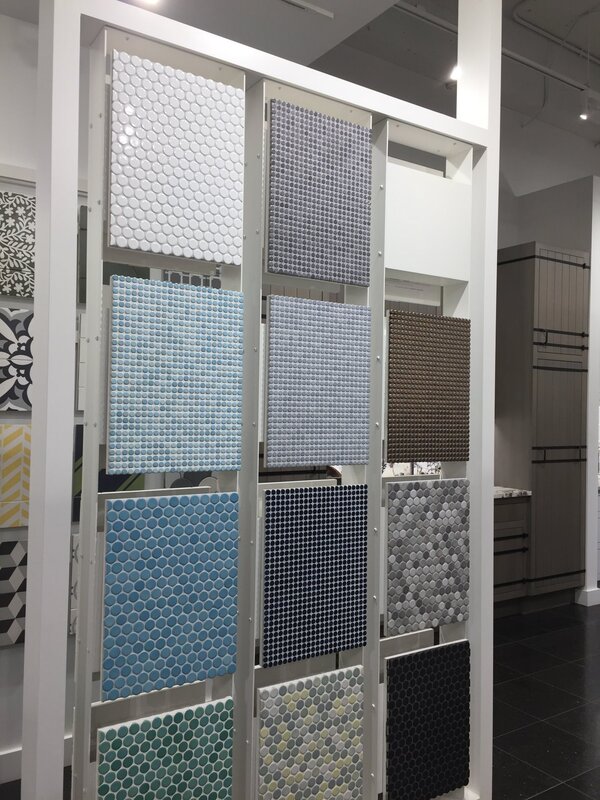
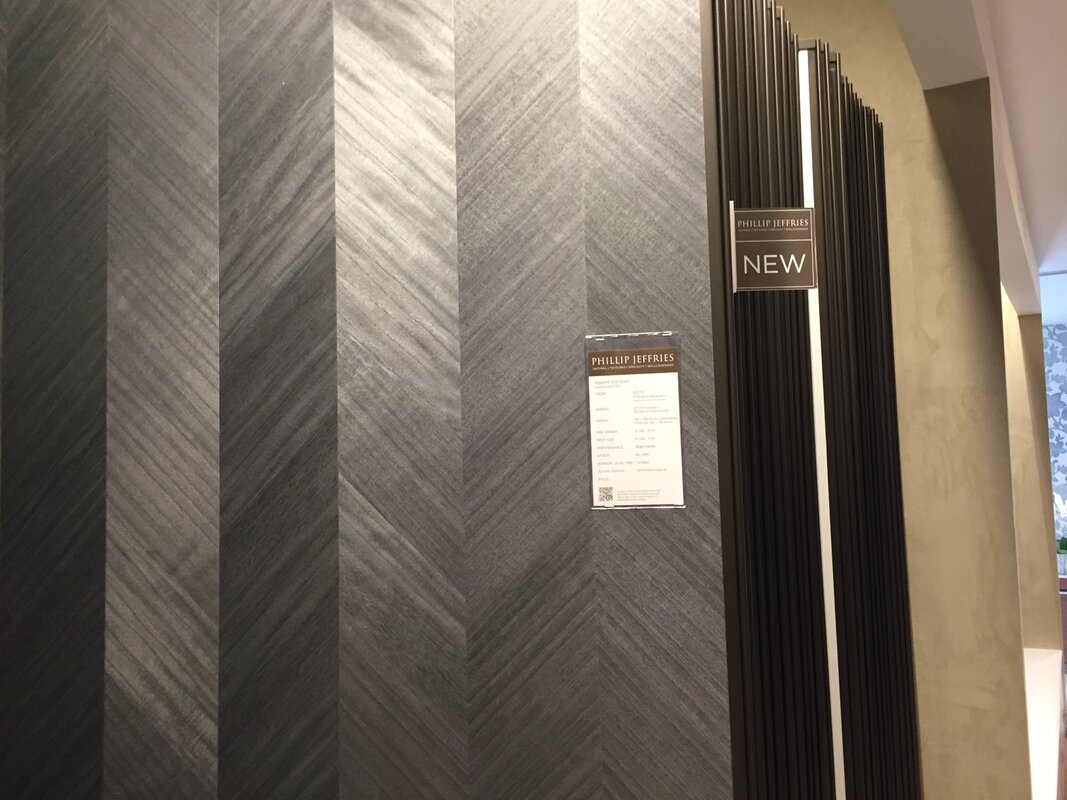
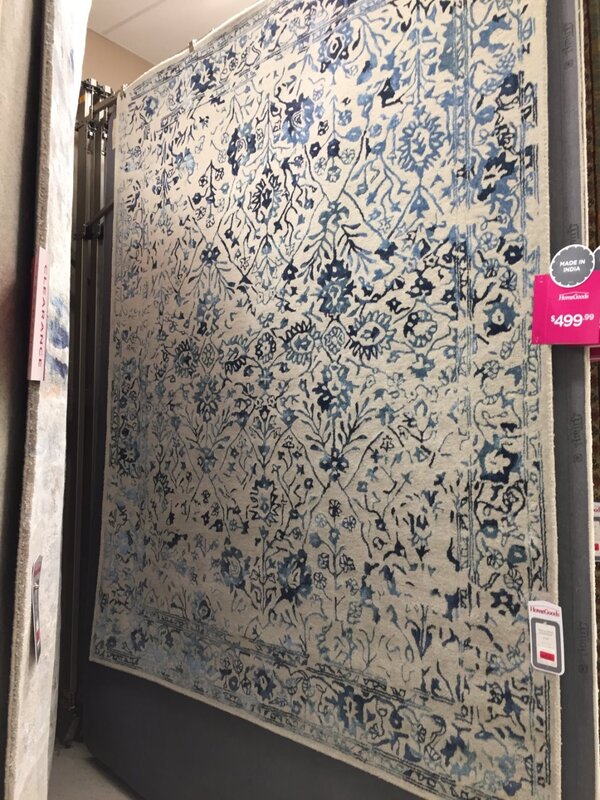
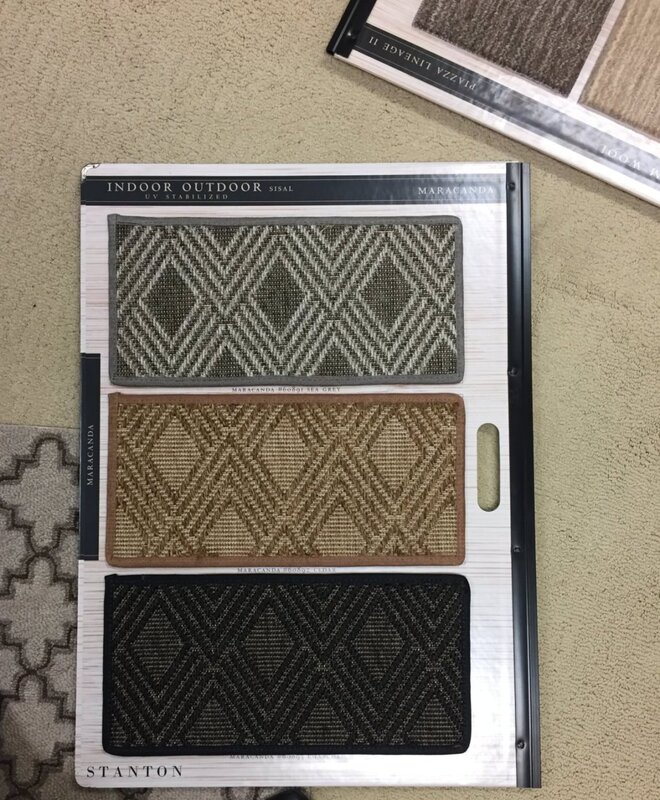
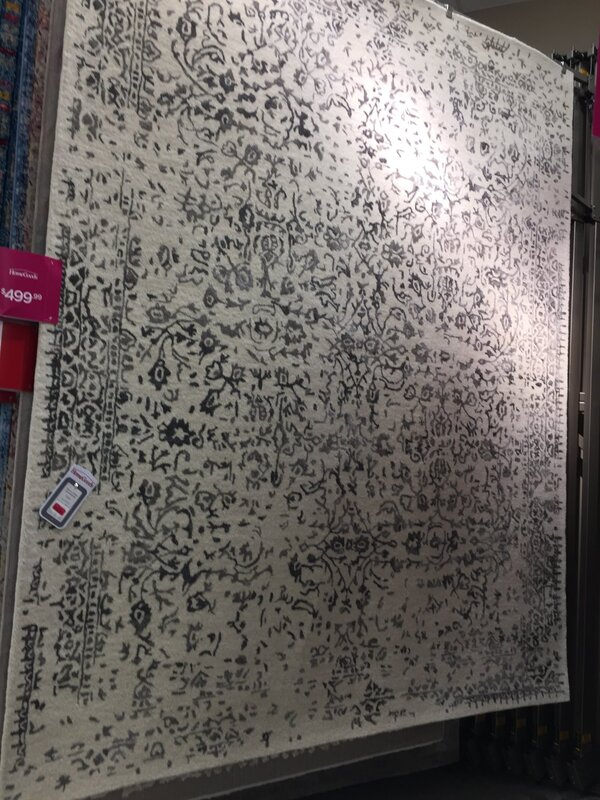
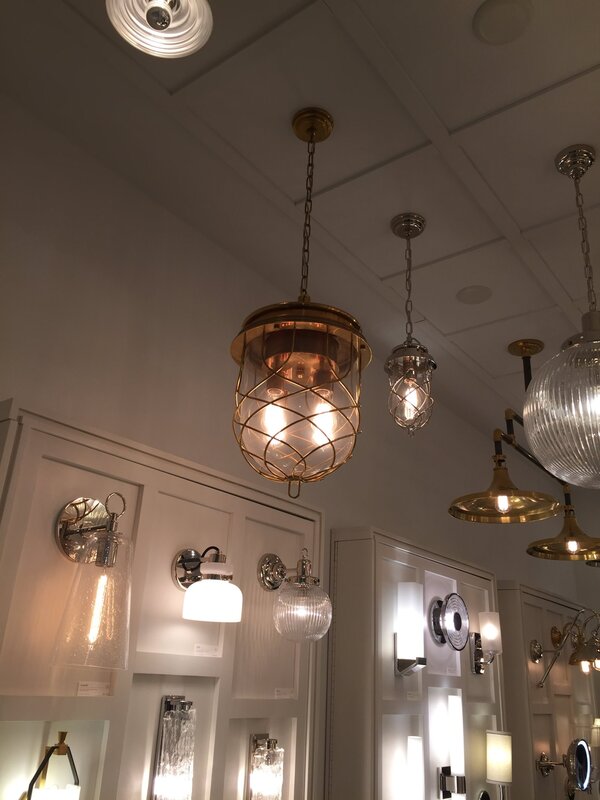
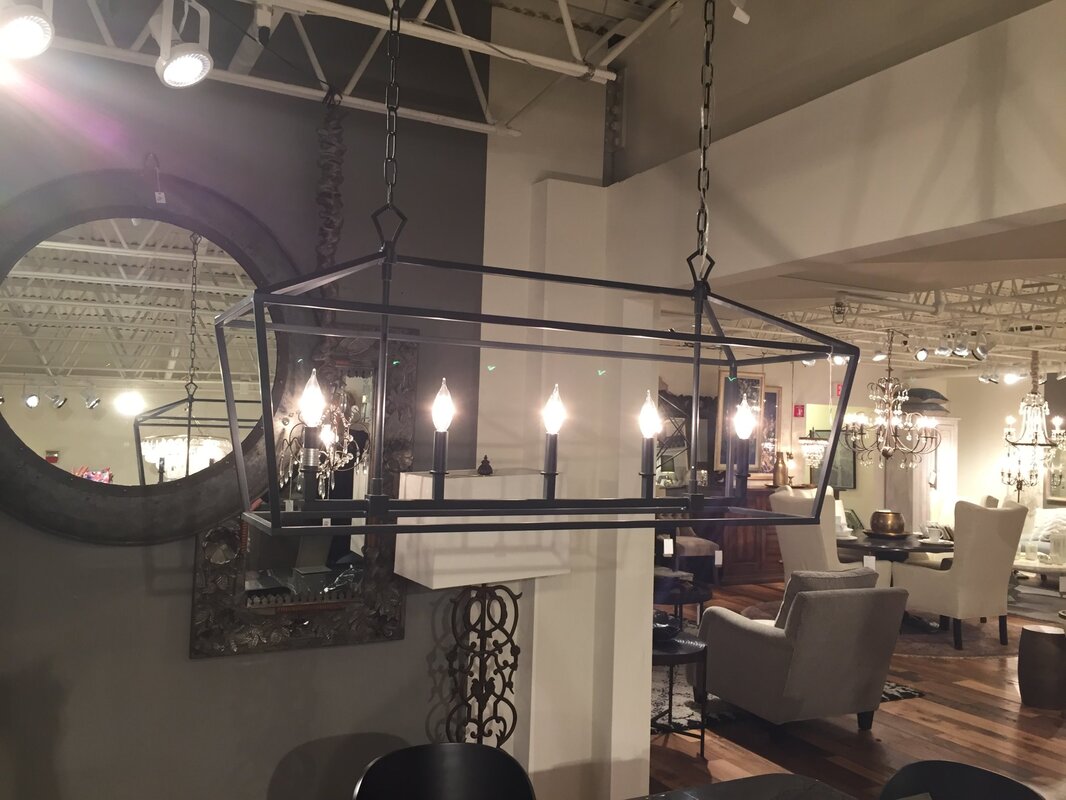
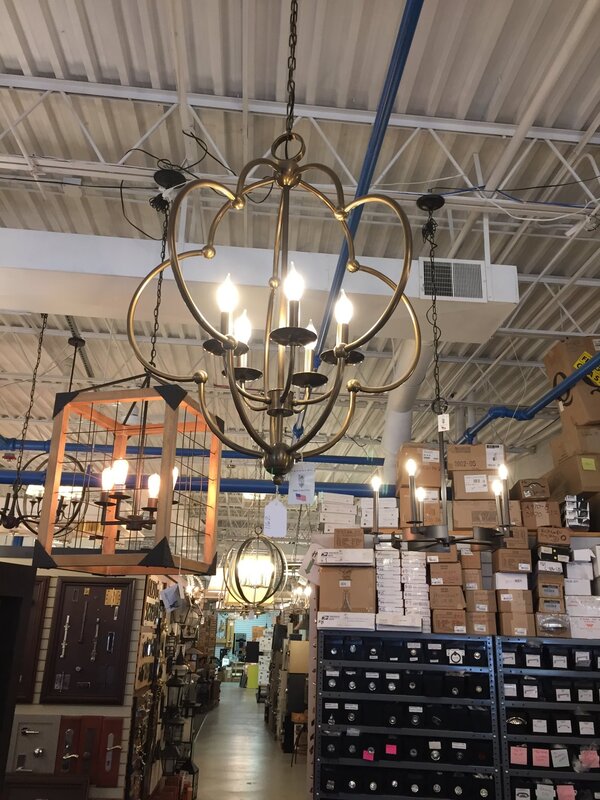
Arhaus also has an adjustable stool, the Kensington, which is a good solution if you have children who will grow (well, that’s a given, right?) and family members of different heights. But these adjustable stools are somewhat casual and industrial in nature, and won’t fit every situation. Of course, adjustable has its perks. Here's the link to that page: https://www.arhaus.com/furniture/dining-room-furniture/bar-and-counter-stools/kensington-adjustable-barstool/ 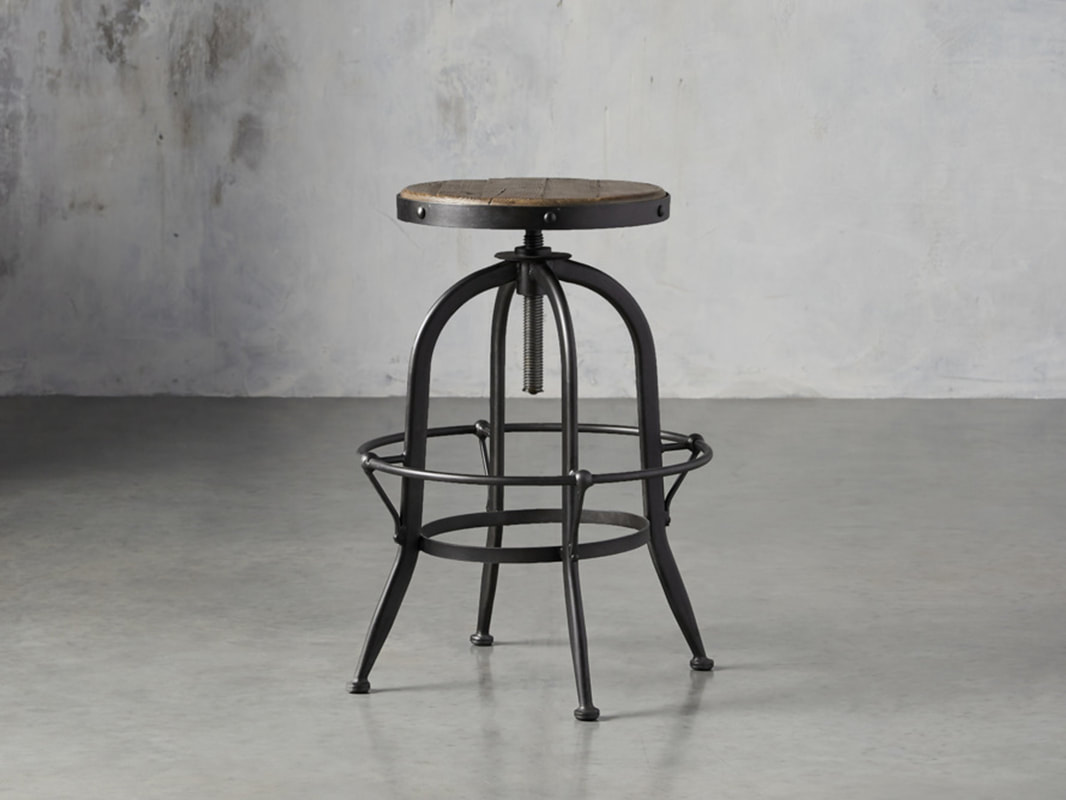 Frontgate is my #1 catalog/on-line source for stools, and I just saw that they have a new guide related to the subject of choosing just the right stool; their “Bar Stool Guide”: https://www.frontgate.com/whats-new/guides/bar-stool 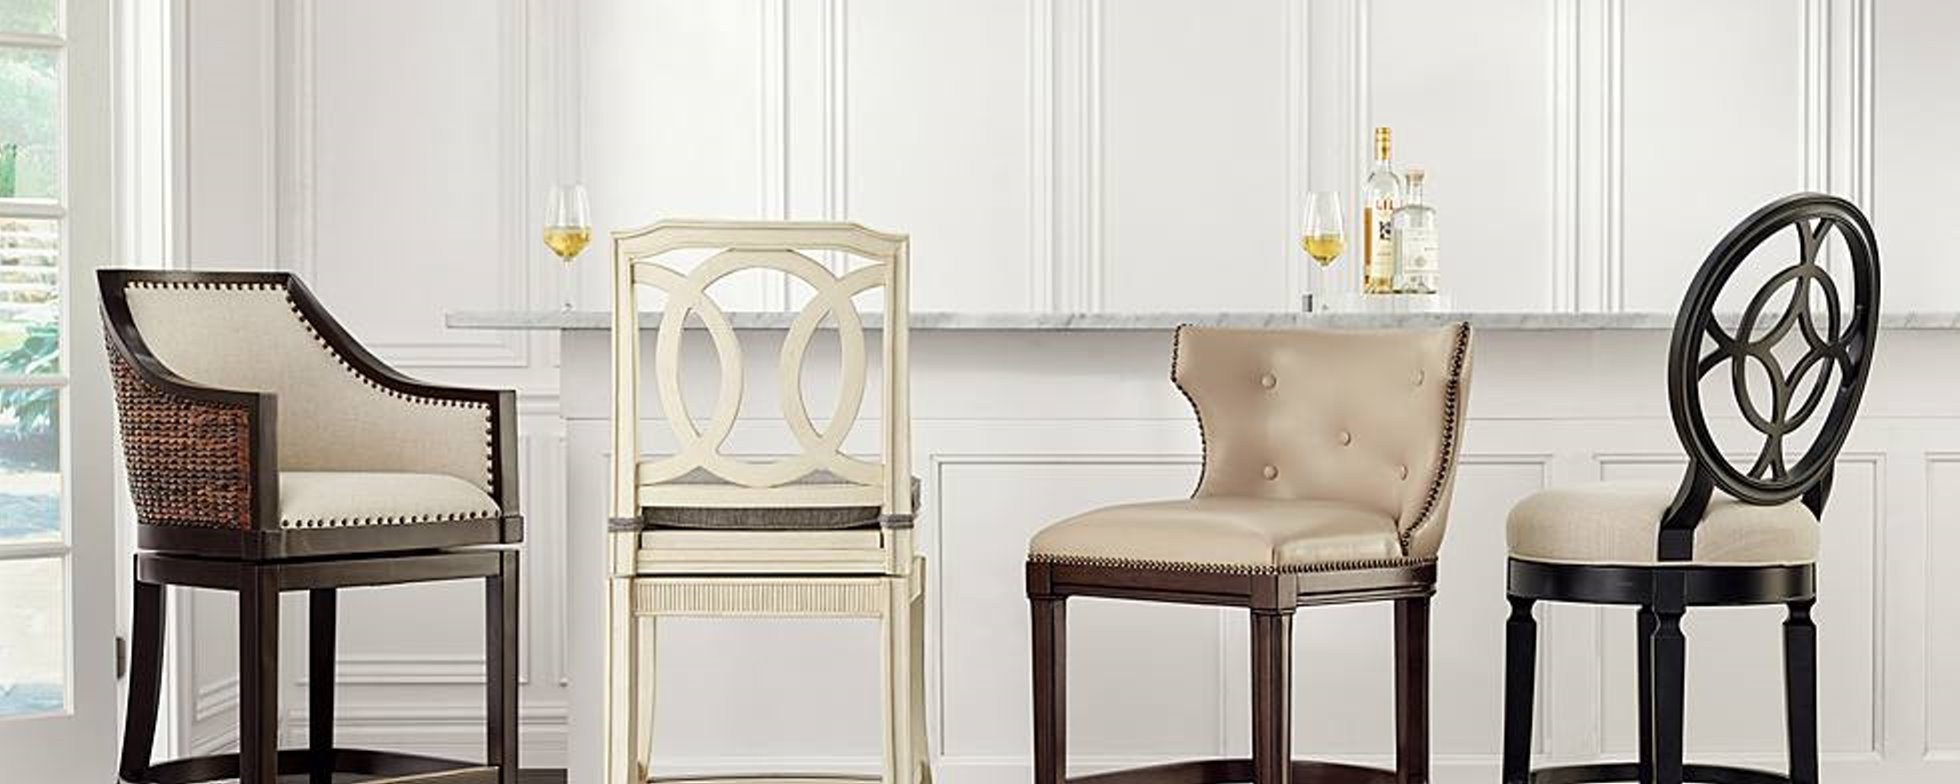 In addition, here’s another great resource from Frontgate to help you find the perfect stool for your situation and style; “Seat Yourself: Which Types of Bar Stools Work Where”. https://www.frontgate.com/homeplusstyle/entertaining/seat-types-bar-stools-work/ 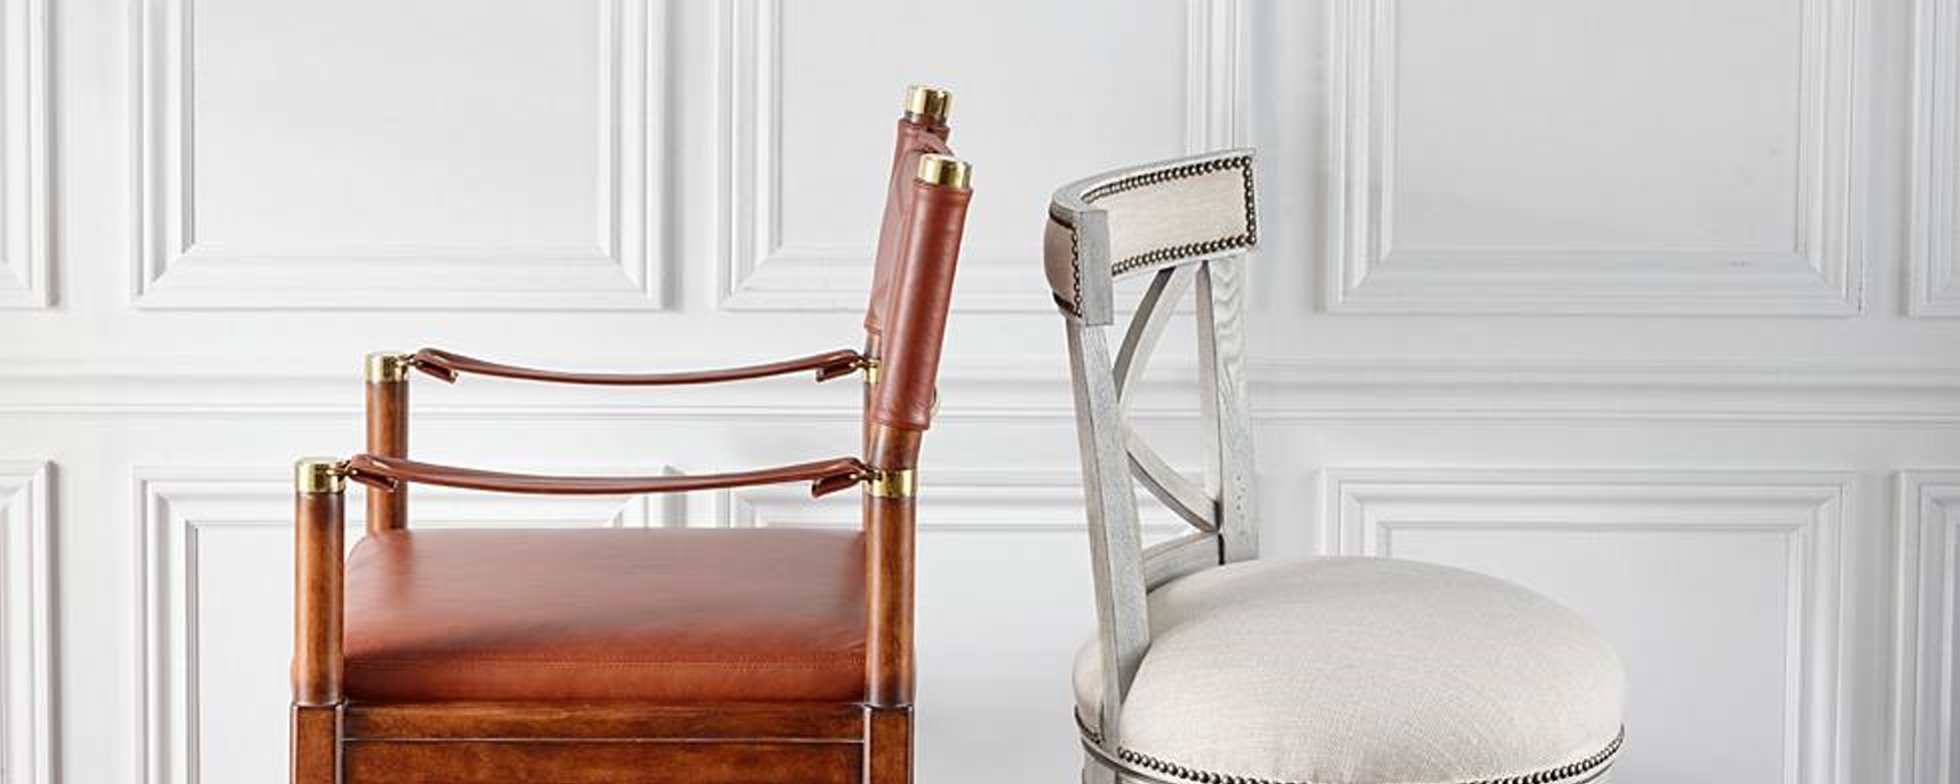 You might not think that getting the counter stools “just right” is that hard, or that important. But Fall is just around the corner, kids are going back to school, and I would venture to say that there are many students out there who do their homework at the kitchen island or peninsula. So perhaps you should think about purchasing new counter stools or barstools for your hard-working kitchen as another “back to school” shopping expedition.  We’ve all been there. We have ideas for a great new decorating scheme for a room in our house – but don’t have the time to look for all the pieces of the puzzle; paint colors, fabrics, rugs, chairs, tables, light fixtures, art, wallpaper, accessories and all of the other odds and ends. Well I can help. Since many of my clients are too busy to spend the time required to track everything down, or don’t have the trade resources to locate the furniture that they need to transform their decorating visions into finished rooms, one of the services that I often provide is shopping for them to find what they are looking for, or to narrow down the options, then shopping with them to make the final selections. Here’s how it works. I meet with my client and review what their decorating issues and style are. We then decide on the priority of the items needed and the budget targets. With that information I start looking at my preferred vendor stores and websites for the desired items. When I’ve found some interesting pieces, and narrowed the choices down to a manageable number, I either send my client photos and the details about the item (or a link to the website if it’s online) or we go shopping together to evaluate what would best meet their vision. From a pricing point of view I can either work based on a commission tied to purchases, on an hourly fee basis, or a hybrid of the two. Where do we look? Well if it’s an item that my client physically wants to see we go to the stores that best fit their design vision in the Boston Metro area. Stores like: Mitchell Gold, Arhaus, Stickley Audi & Co, Darby Road Home, the Boston Design Center (BDC), Ballard Designs, Ethan Allen, Crate and Barrel, Needham Decorative Hardware, and Carpet Carousel. If it’s something that can be purchased online, we use the vendors that I’ve found over the years that have quality products and good delivery track records. Vendors like Uttermost for accessories, Surya for rugs and Philip Jeffries for Wallpaper. You can see a complete list of my preferred vendors on my website’s “Vendors & Resources” page. Here are some photos from my recent shopping expeditions: Furniture Shopping (click in any image to enlarge it or to start a slideshow): Accessories and Art Shopping (click in any image to enlarge it or to start a slideshow): Fabric and Wallcovering Shopping (click in any image to enlarge it or to start a slideshow): Carpet Shopping (click in any image to enlarge it or to start a slideshow): Light Shopping (click in any image to enlarge it or to start a slideshow): Over the years I’ve found that this holistic approach allows my clients to see the big picture and then choose specific items that fit into their desired design esthetic. It’s an approach that saves my clients both time and money since I know which stores/vendors have what they might be looking for and my trade accounts normally allow my clients to purchase what they find at a discount. So, if you want to redo a room, or start an entire new project, but don’t know where to begin, I can help! Call me and we’ll figure out what approach works best for you.  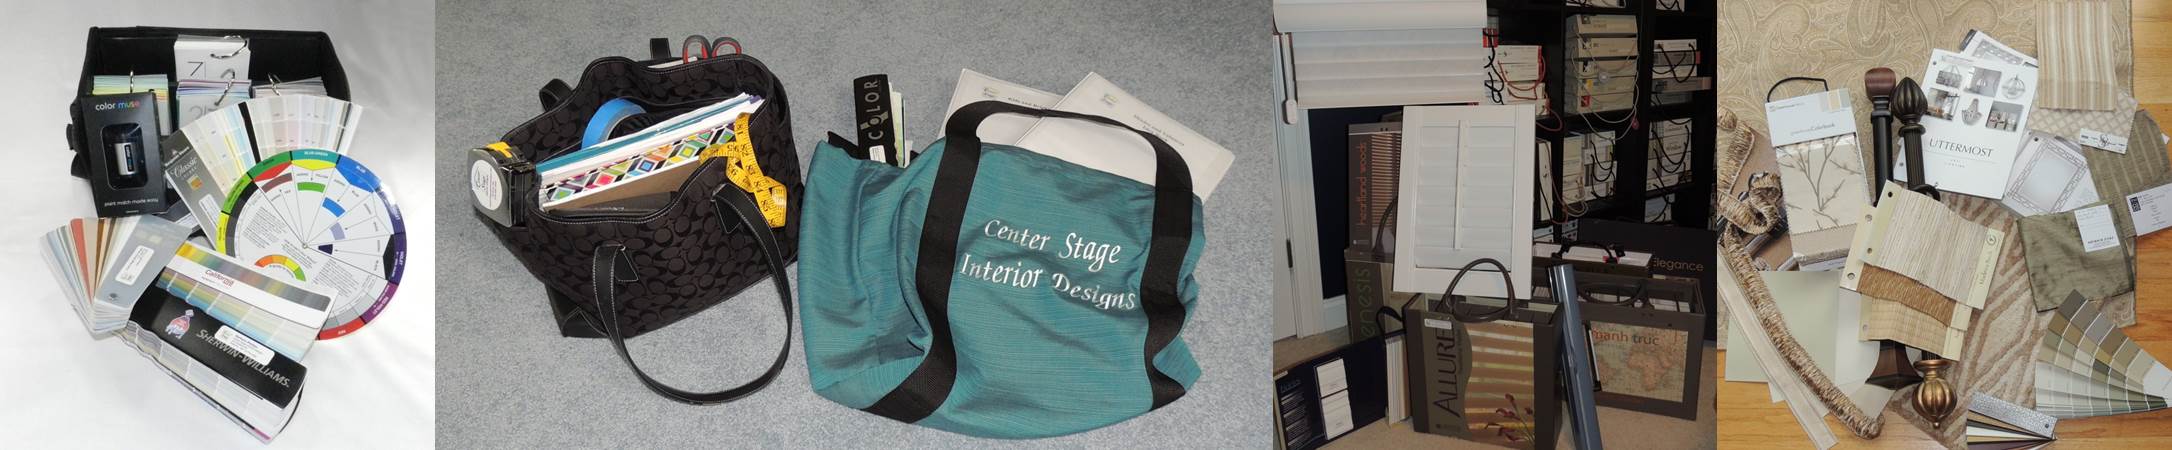 So, you've set up an appointment with an Interior Designer to get the ball rolling on your newest project, and now you’re starting to wonder what to do next. Rest assured that everyone has this question. Since I see things from the other side (e.g. the Designer’s side), here are some suggestions for you to effectively prepare for a discussion about your ideas and needs during your initial appointment.
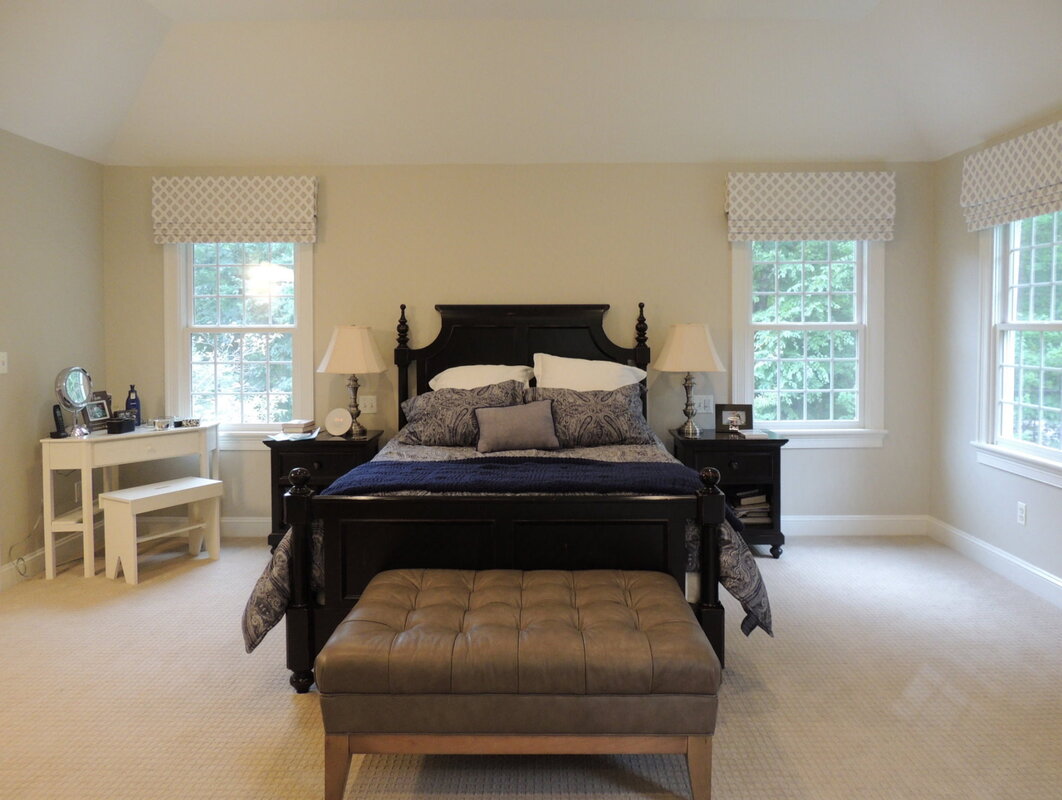
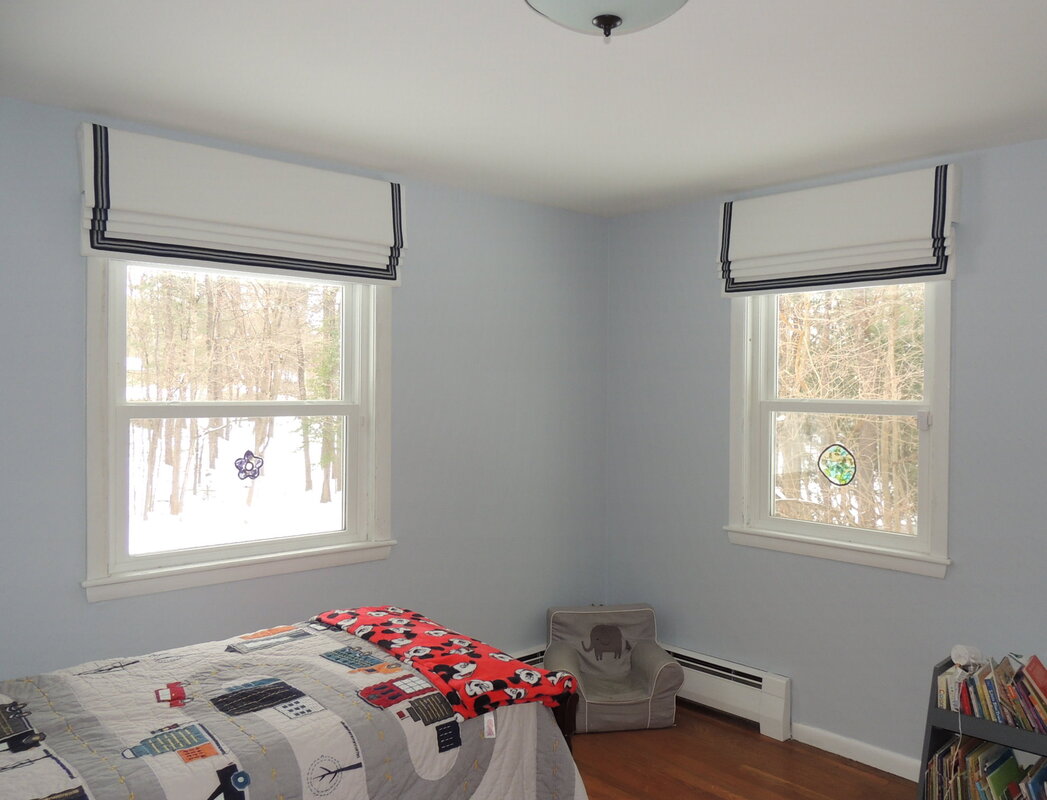
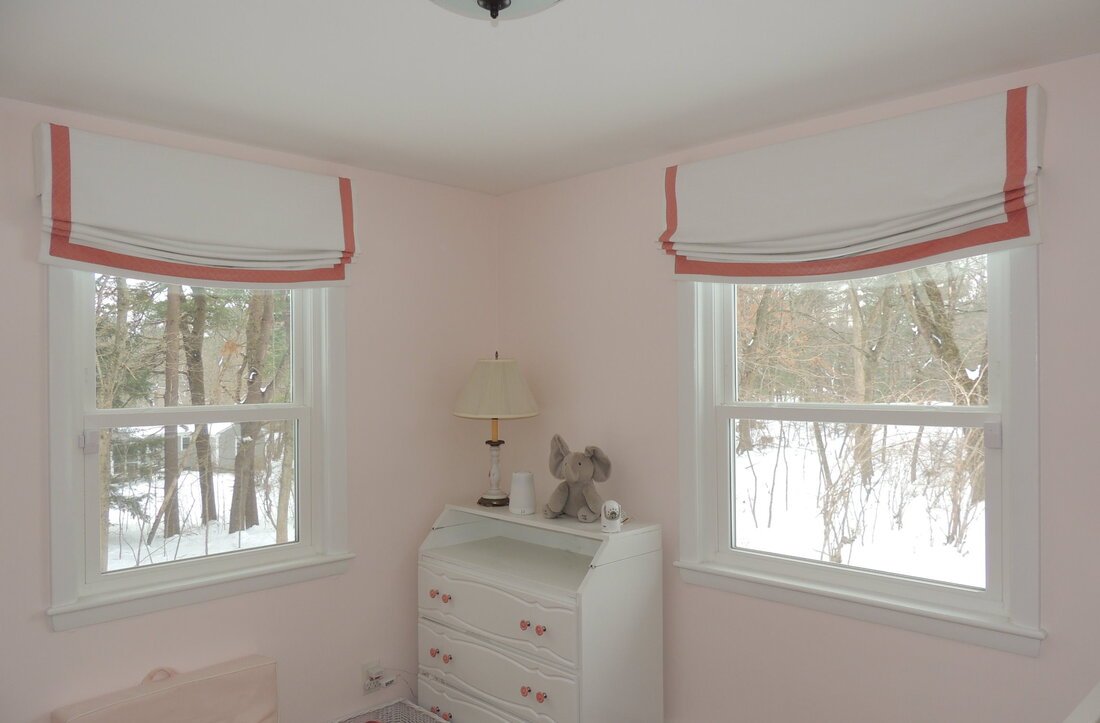
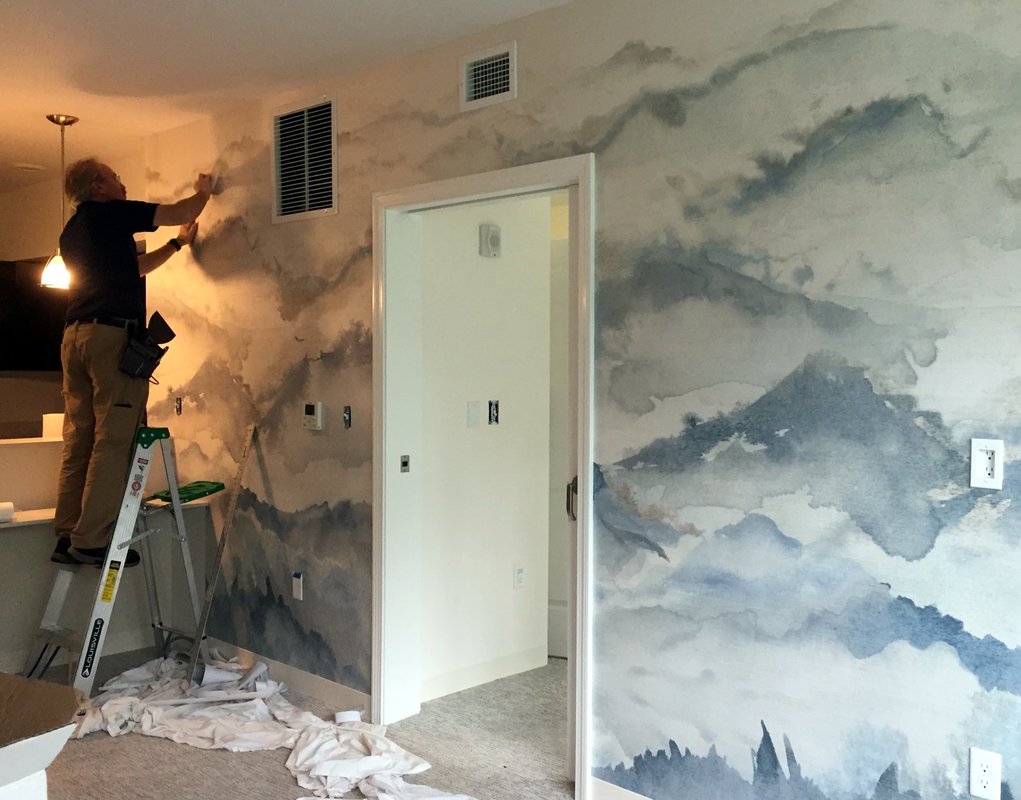
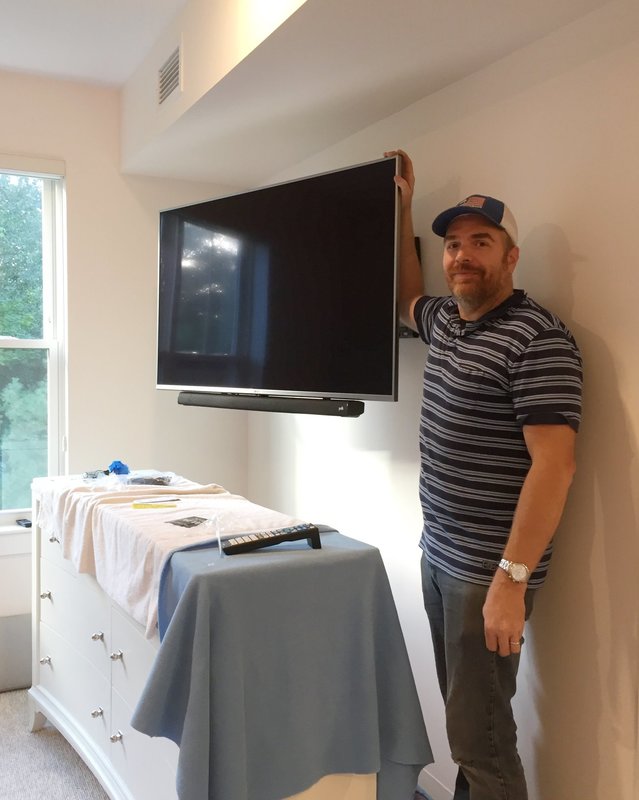
 If you follow these tips then you and your Designer will have a much more productive initial meeting – and that will allow you to get rolling on your project even faster. During your initial meeting your Designer will be happy to discuss all your preferences and needs, and your preparation ahead of time can make it a truly enjoyable and productive session!  Deadline Driven Design (DDD). Does that describe an interior home project you are deciding on right now? One where you have an important fixed deadline for a specific purpose - perhaps Christmas, your child’s wedding, Bar-Mitzvah, baby shower, or in-laws visiting for the first time in your new home. Anything where you have less than 2 months to make some significant décor changes and you just haven’t found a designer who can respond that quickly?  Well, I can respond and deliver on your fast-track project. I know because I’ve delivered big projects on tight deadlines over and over during my 18 year career as an interior designer. The reason that I can do this is simple - my company is not just me. It’s my team of trusted vendors and sales consultants I can go to in a pinch for furniture that’s stylish, comfortable, and available in 2-3 weeks instead of the regular custom timetable of 8-12 weeks. Quality furniture manufacturers like Mitchell Gold + Bob Williams, Arhaus, and Curated Kravet who have carved out a niche for fast track projects with designer wow-factor. Perhaps even more important, I have a team of quality professionals and trades that I can count on to execute the trickiest of projects and who also respond brilliantly to a deadline - painters, paperhangers, electricians, TV/audio, window treatments and shades (hey, that would be me), re-upholstery, carpentry, installers, carpet, movers, organizers, closet systems - well just about everything on your list. Here are a few of the folks on my team that completed a recent fast-track project:
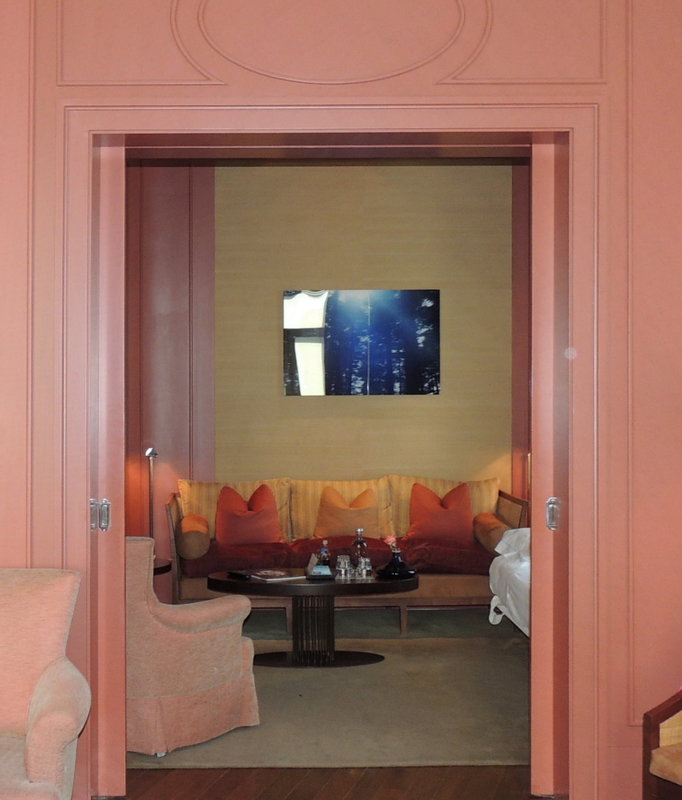
So, what’s our recipe for mutual success on a fast-track project? Three things: (1) Organization on my part (got that down, check!) (2) Communication between us (clear, responsive, documented, and solution-oriented) (3) A client that is flexible, available for real time consultations, ready to make decisions and move fast - just as my team and I will. Do you have a project that needs to be completed ASAP? Are you ready? Call me! Let’s go!   During the 17 years that I’ve been helping clients transform their houses into homes I’ve noticed that there are several critical steps that need to be undertaken to successfully decorate a new home, or significantly remodel an existing home. In my experience, missing any of these key steps can cause issues and delays in the decorating effort. It all starts with assessing your home inside and out. Does the interior design go with the exterior design? If not, do you want it to? What are the “givens” of your situation – e.g. the things that will be harder to change? Are you ok with these or are you willing to spend the time, effort and money to change them? Next, what’s your personal decorating style? Do you have a single design point of view that you want carried throughout the house – or do you like a variety of styles? What do you need to do to plan for your living needs? Do you entertain frequently? Inside? Outside? Do you need a place for the kids to play or designated homework area? Have you spent any time figuring out your budget? Decide your priorities. Start with the basics, like what you will sit on and function with initially, then move on to the smaller items and design accents. and ………….. I know that this is a little bit of a teaser since I’m not going to give the internet all of the steps and details that I’ve sorted out over the years. So, if you want to receive the detailed 4-page approach that I’ve written to cover this topic, please email me on the "Contact" page and I’ll send it to you. Until next time, I hope that your Summer was great and that as Fall arrives you have time to enjoy the splendor of the changing colors; especially here in New England!  Overnight guests -- Yay!! However, some folks might say “well…truthfully…nay…we’re not ready…” Whether you love to entertain guests and provide them with accommodations that mimic a 5-star resort, or just “get through it” to provide a reasonable bed for the night, one thing is for sure: having a nice guest room at the ready goes hand-in-hand with summer. You really do want your guests to have a great night’s rest. Invite them, they will surely come! Here’s some guest room inspiration for you…our hotel room in Lisbon, Portugal from 2 summers ago. This suite was a delight, and so generously appointed, especially the bath. 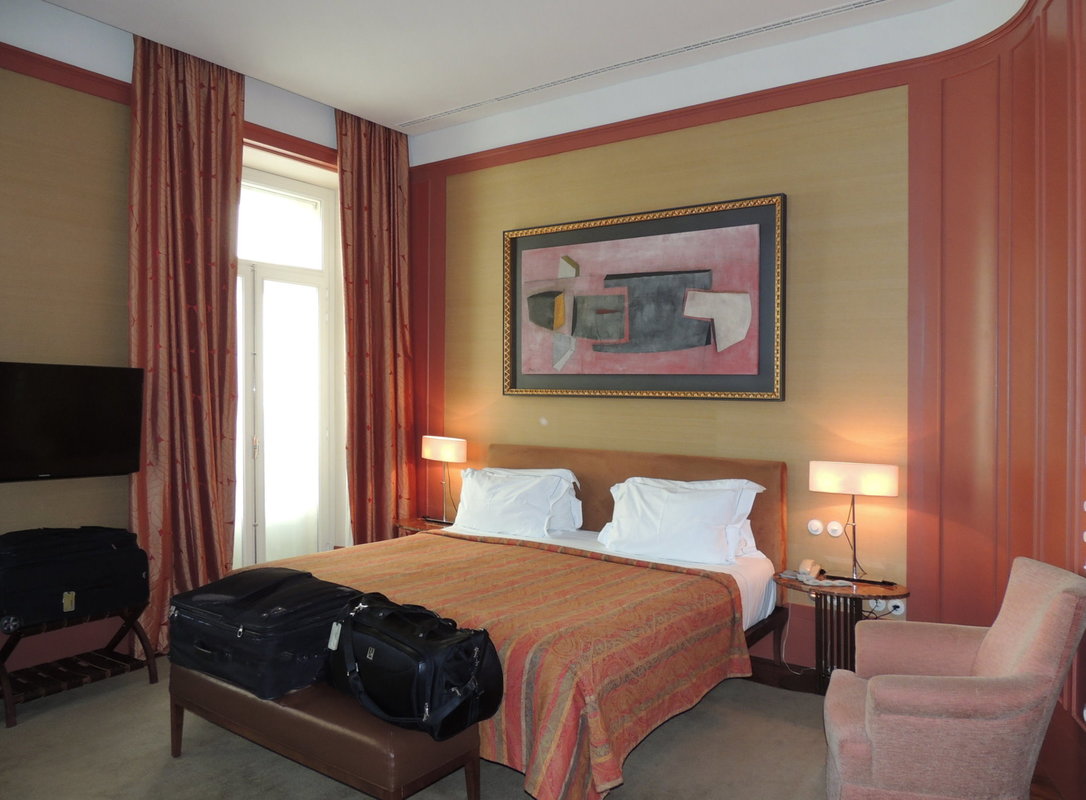
You might not have as much space as this hotel room to dedicate to your guest room, but it’s always nice to envision a heavenly place that you have stayed at when you embark on designing a special retreat for your guests. There were several elements which I really enjoyed in this hotel room. First, the draperies were sumptuous silk, and the many layers of drapery, sheers, and shades made for maximum privacy and light control, including blackout for sleep. Second, the room felt special, very European, and while the color scheme was not my most favorite, it had a cohesive design “point of view.” When you examine your own guest room and recognize that it’s furnished in non-coordinated cast-offs, maybe it’s time to actually think about improving both the style and functionality of the room. Making these kinds of changes will certainly put smiling faces at your breakfast table each morning when guests stay over. For the ultimate in packing in luxurious function for your guests’ every need in a small space, cruise ship cabins are just the ticket for inspiration. Here is a photo of our cabin on the Crystal Serenity on our latest European cruise. I particularly liked the sleek and neutral color scheme and tactile touches…and functional amenities everywhere. And having a cabin steward was pretty nice, too! 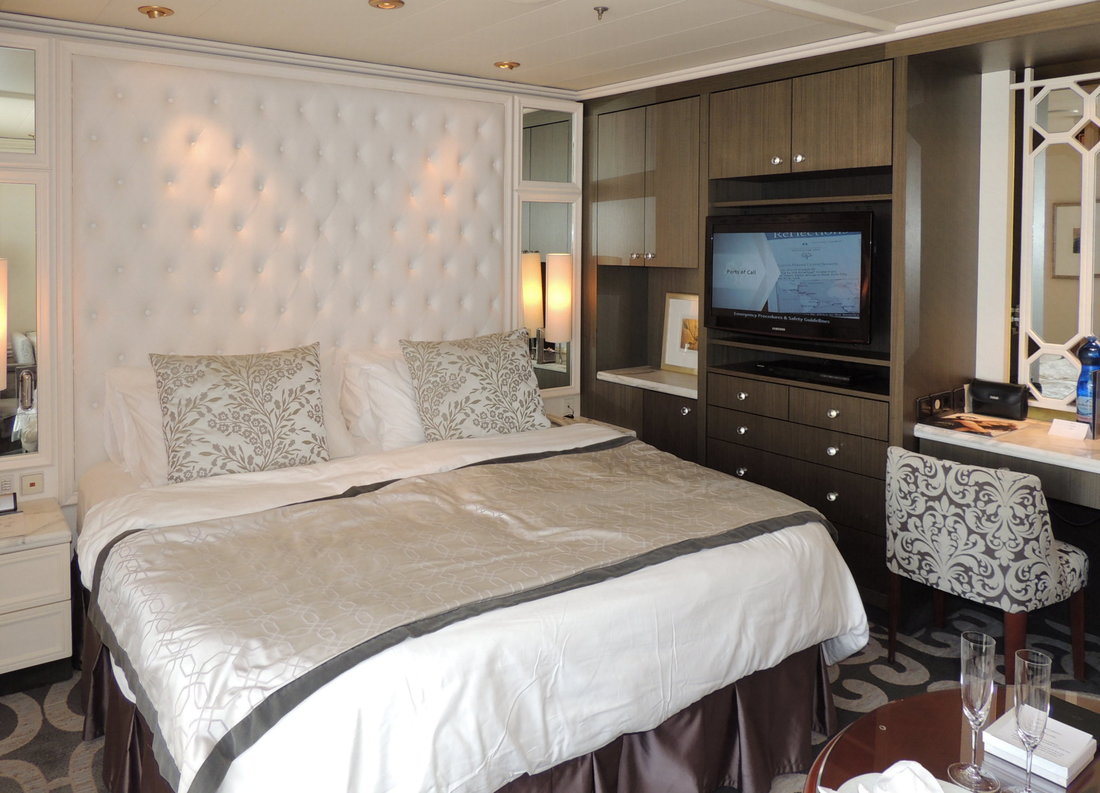 To help you out with your planning here are 15 Tips for a Terrific Guest Room Experience:
 Of course most of these suggestions are really common sense and adhere to a golden rule of sorts, “Provide for your guests as you would like to be treated as a guest.” In fact, I often recommend to my clients who are embarking on a guest bedroom renovation that they sleep in their guest bedroom for a night and solely use the guest bath. There is nothing like walking in your guests’ shoes (or bedroom slippers) to clearly assess your guest accommodations and plan ways to improve their experience in your home. I hope this blog has given you some food-for-thought and impetus to make your home more friendly for your guests. It’s summer, and I know lots of you are headed out on vacation. Safe and happy travels to you all! And if you are home and doing the “staycation” thing, I wish you fair weather and a minimum of road construction delays for all your outings and get-togethers. See you next week on the Center Stage blog!  |

Barbara PhillipsBarbara Phillips, interior designer and owner of Center Stage Interior Designs, has delivered impeccable window treatments and design services to both residential and commercial clients in Massachusetts since 2001. Categories
All
Archives
March 2021
|


 RSS Feed