|
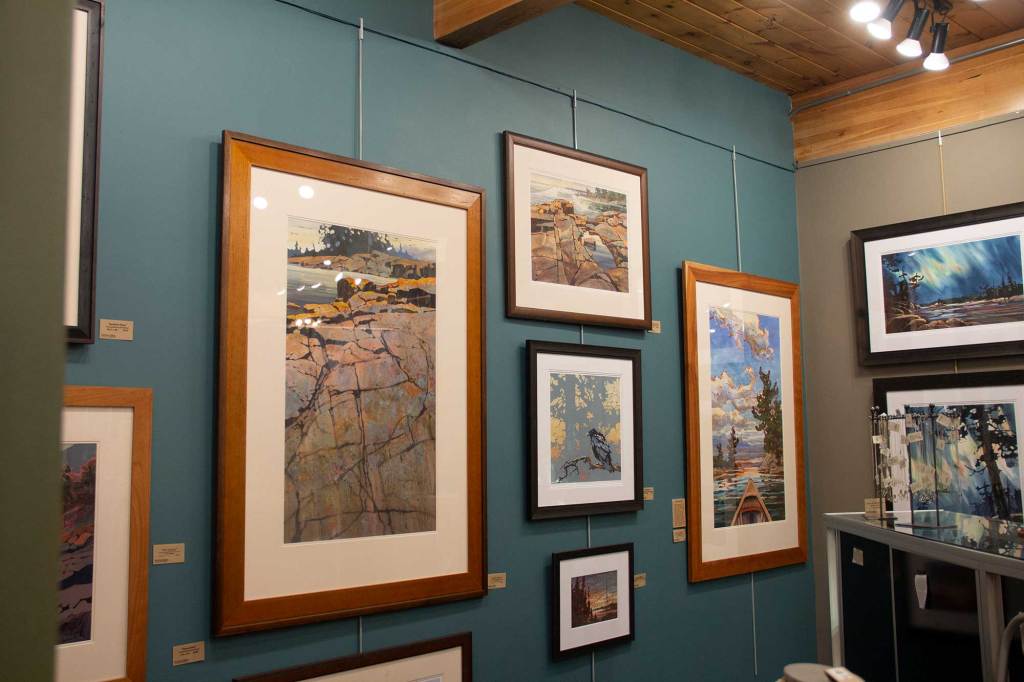
So where were we . . . . . . . . . prior to the mask making interruption. . . . . . . . . oh yes, “composing a gallery wall and installing it easily and perfectly by yourself”. Gallery walls are very popular these days, and for good reason. It’s fun and stylish to display your favorite art and photos rather than have them sadly tucked away awaiting “the plan” and “the time.” If you have children, you more than likely have an ever growing selection of artwork that would be delightful to display (….before your children leave for college). Additionally, with open concept house plans, we tend to have large expanses of uninterrupted walls that are virtually impossible to treat with just one or two pieces of artwork. So, let’s assume you have lots of artwork to hang, but you haven’t tackled that project yet for a variety of reasons. If you’re concerned that your current collection of art poses too much of a commitment (fearing that “once the gallery wall is up, it can never change”), you might want to check out a terrific hanging system called the Walker Display System: https://walkerdisplay.com/gallery/ I’ve posted about the Walker system before (“How to Display Your Children’s Artwork”) and especially like that it allows for the easy reconfiguration and the addition of new art. Galleries, libraries, and shops use the Walker Display System, or other similar systems, to showcase their ever-changing displays. As shown in the photo below, it imparts a bit of a modern vibe, so consider whether that will work with your décor. But once you have that top rail installed, everything is reconfigurable, so it’s a great option for most people. If you want to go the old-fashioned route of hanging your artwork with hooks and nails (and no connecting rods), then you have a bit more of an opportunity for placement creativity. But the issues then become (1) how to arrange your artwork for an interesting effect and (2) how to actually hang the pictures without it taking forever. For advice on arranging your artwork, let me point you to the All Modern website which gives some terrific tips in their article titled “How to Create a Gallery Wall”. Here’s some of their advice on gathering the art for your gallery wall: “Grab pieces from around your home, ones hidden away in the attic, or art you've collected for this purpose. Take stock of what you have and consider these factors:
What I’ll help you with today is a fast (!) and super simple way for determining exactly where to put the nails and picture hooks in the wall to achieve the overall look that you desire. Miraculously, there’s very little measuring involved. The materials that you will need are:
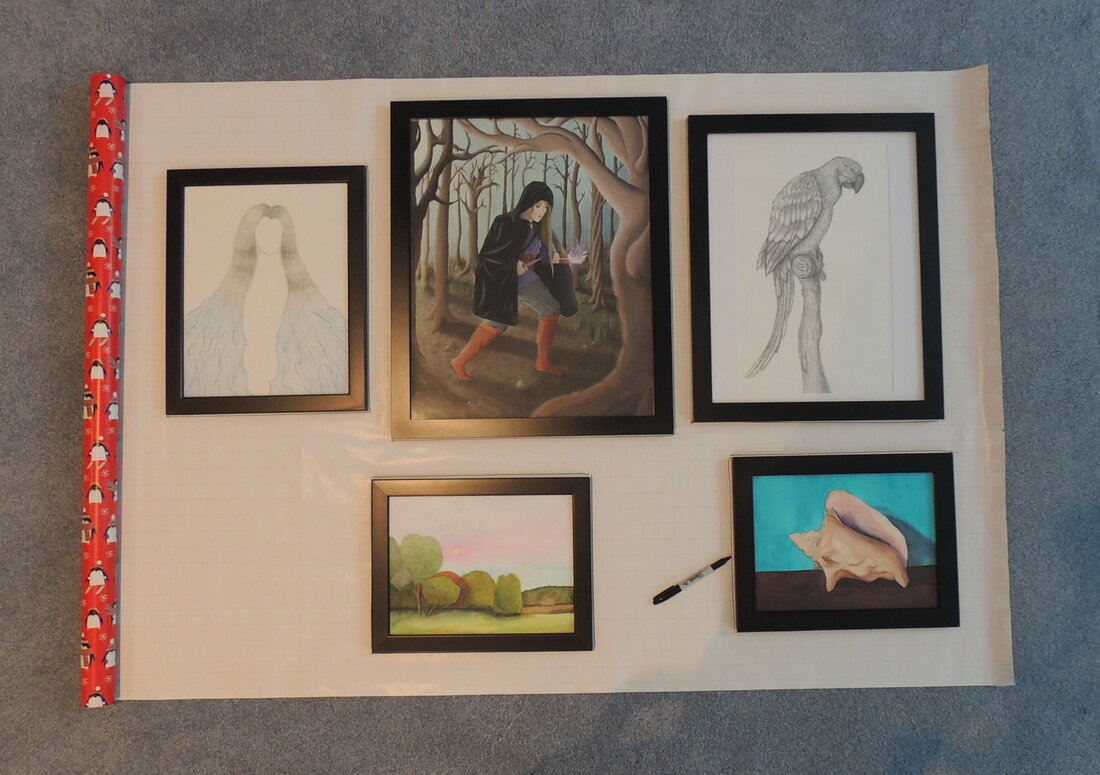
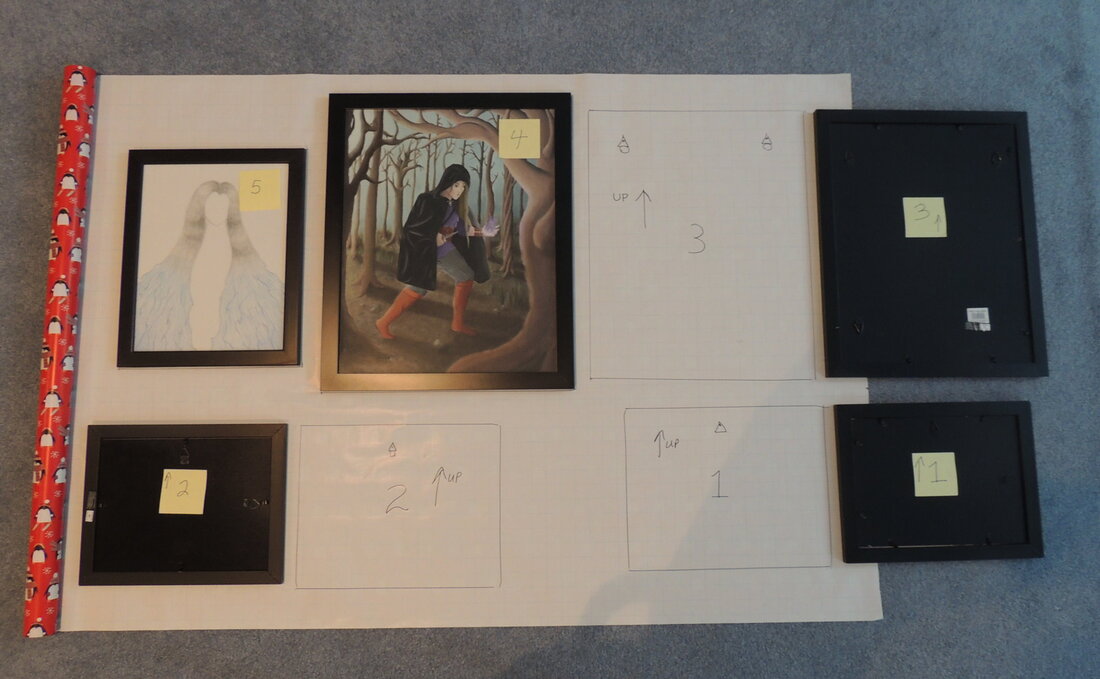
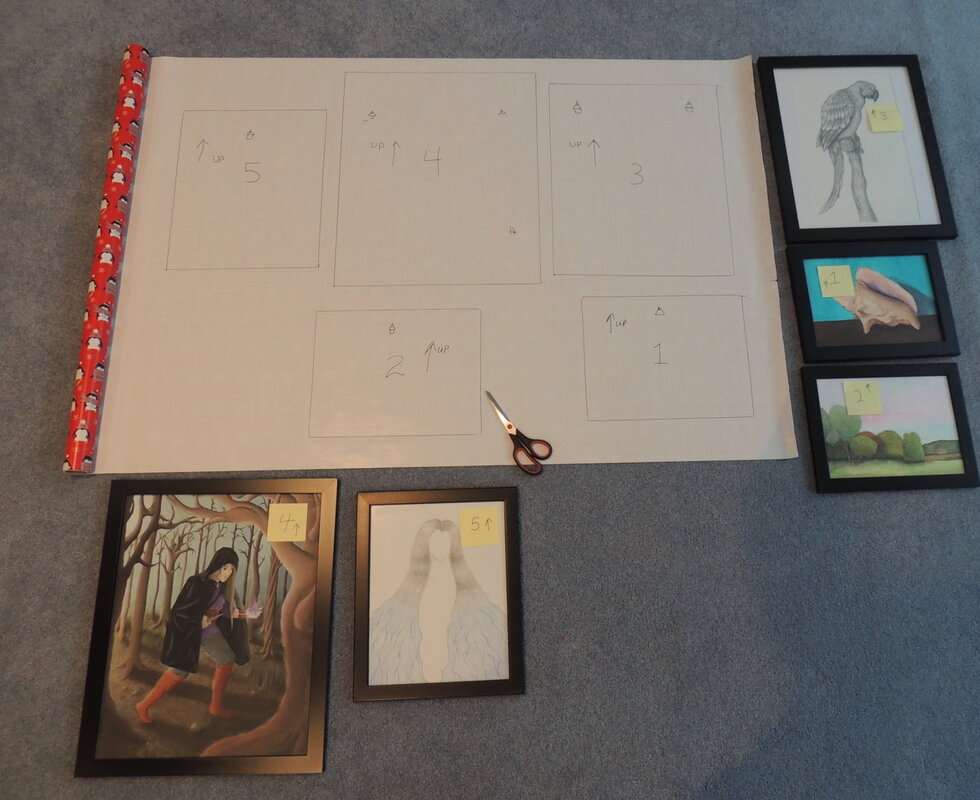
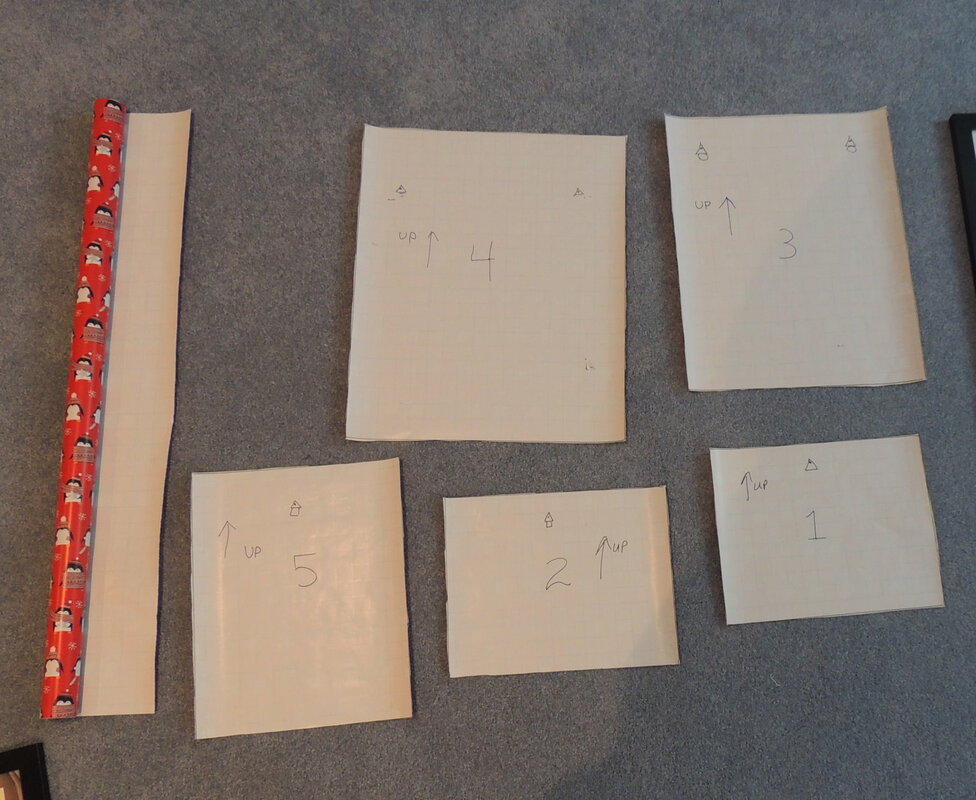
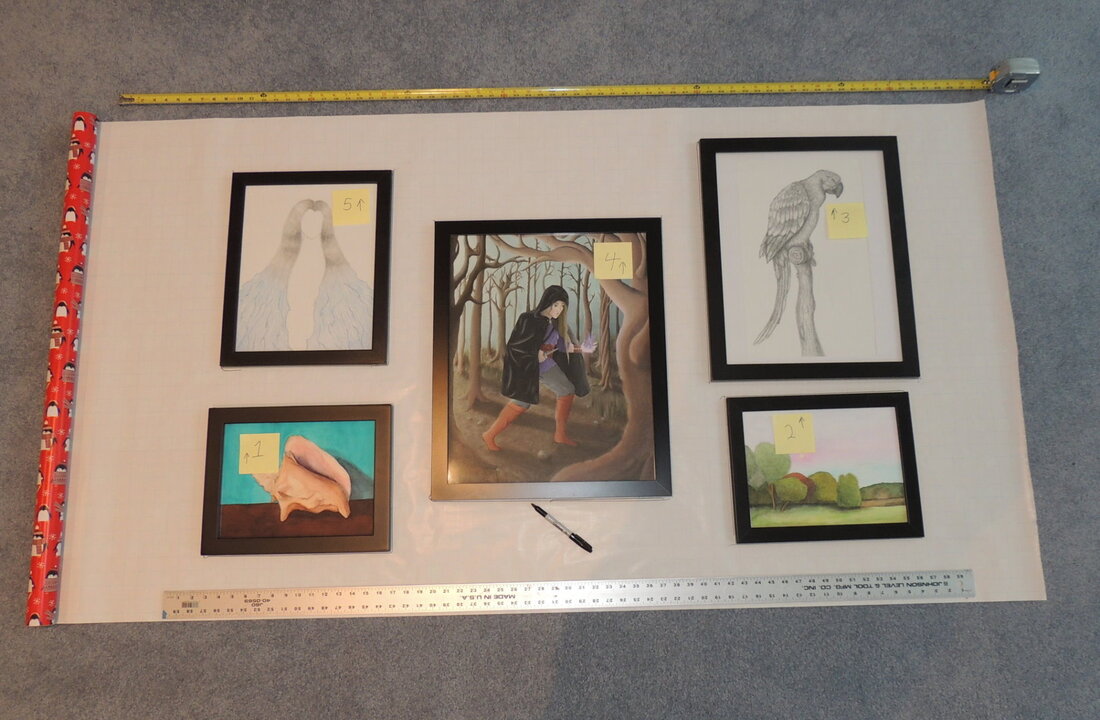
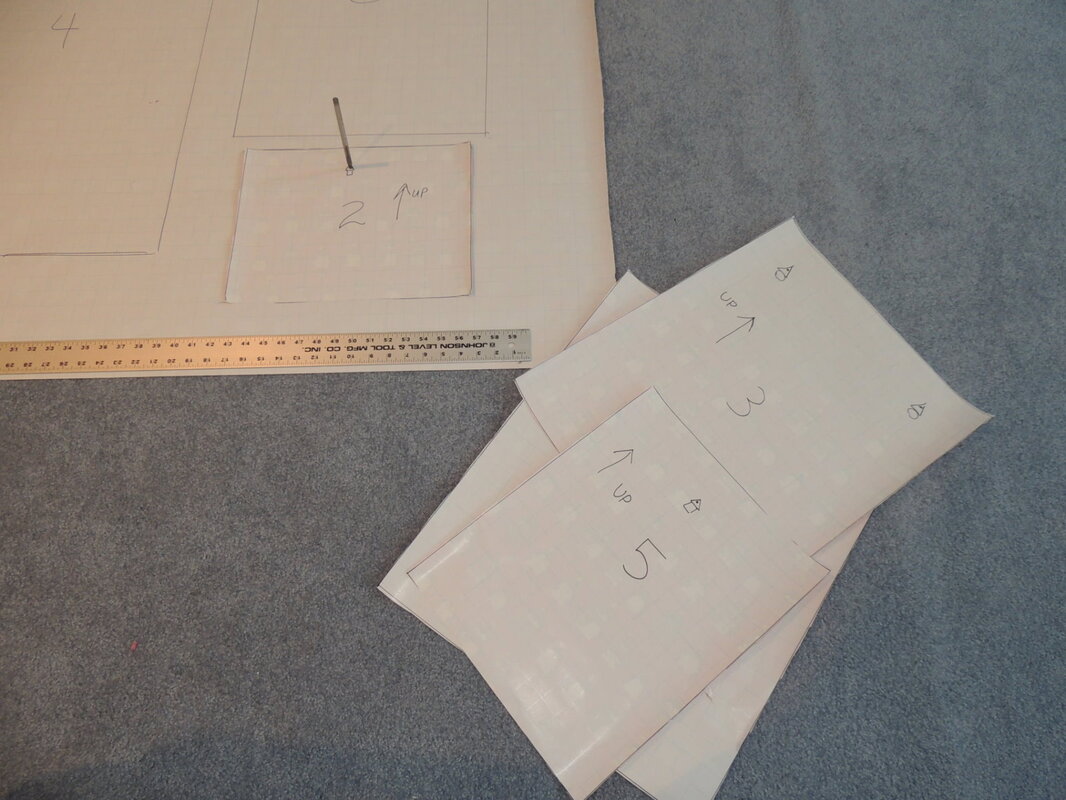
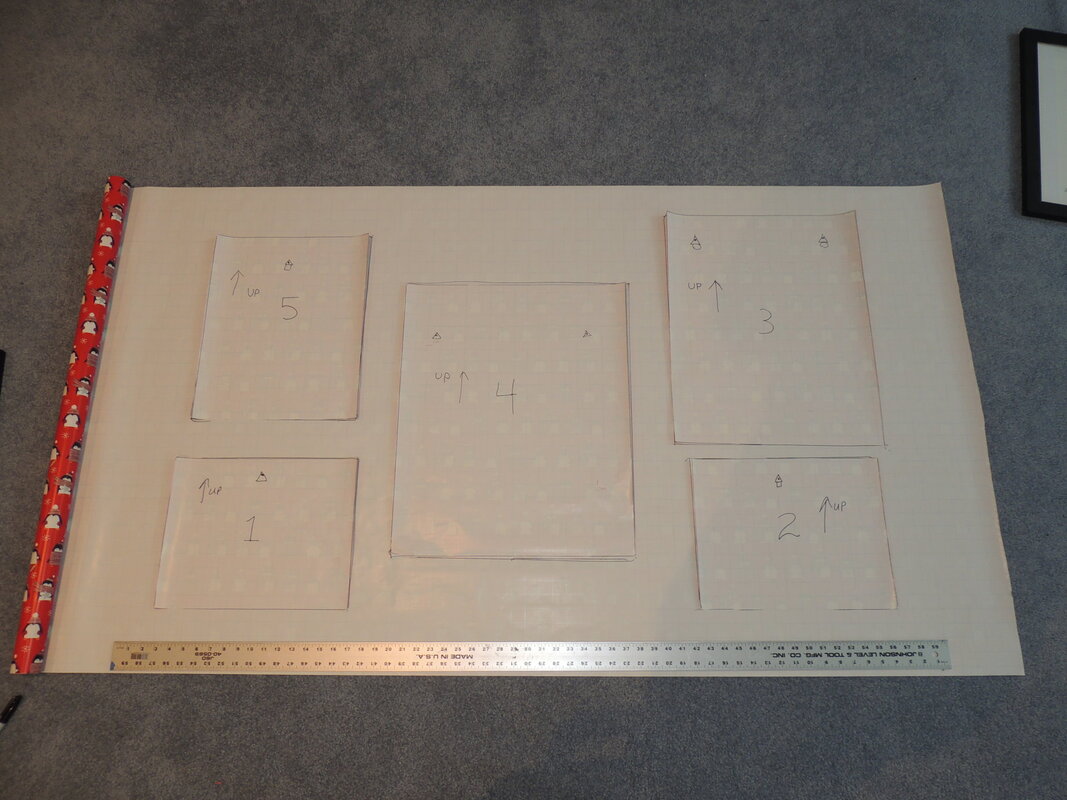
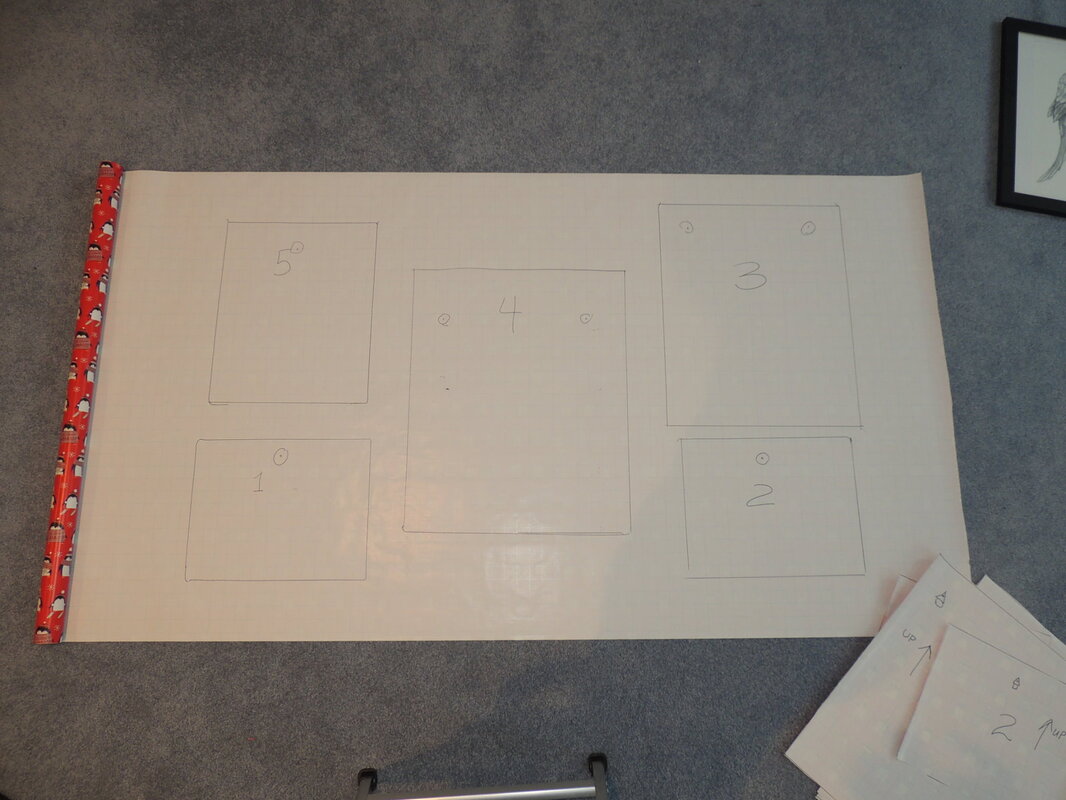
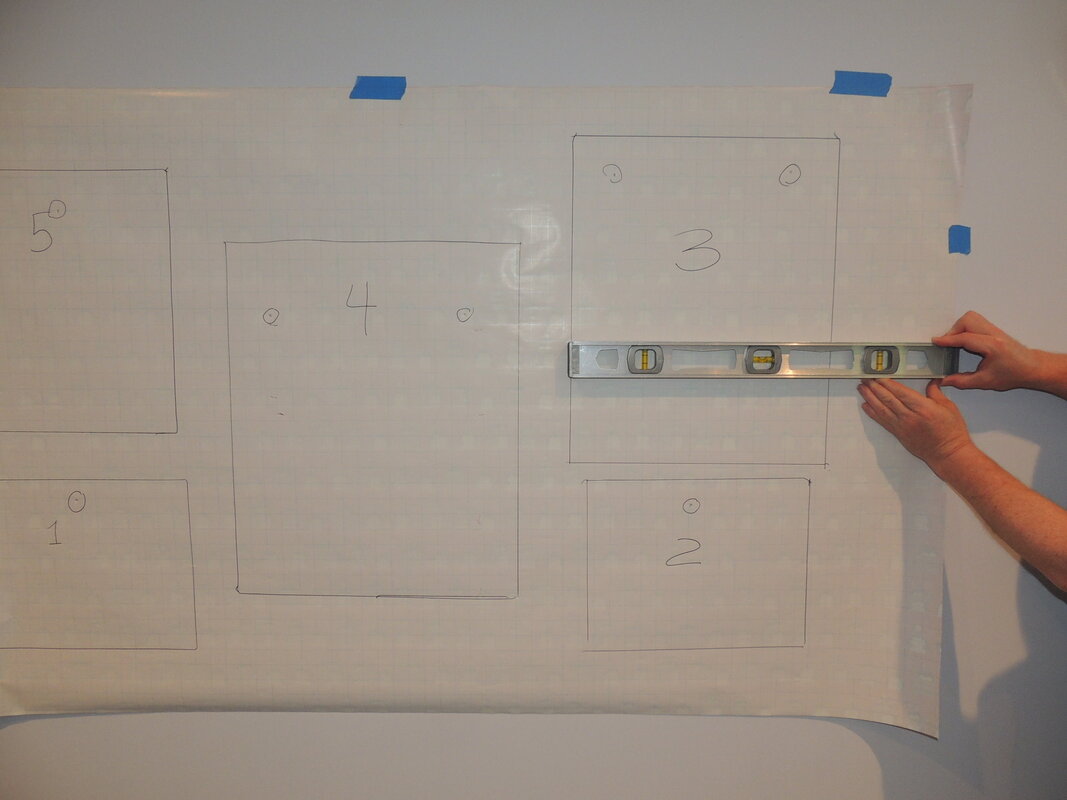
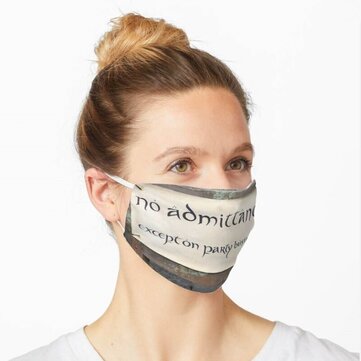
Step 1: Create paper templates of your artwork. Rollout the gridded wrapping paper and randomly lay out your artwork on the gridded side of the wrapping paper. Trace around the frame of each picture on the wrapping paper. To make rearranging the art easier I‘ve laid everything out on the carpet, which enables me to get a good view of all the artwork and the overall montage. Note: In this step-by-step process, I’m using some of my daughter’s artwork. She is prolific and it’s all beautiful. Step 2: Flip the artwork over and label both the artwork and templates. Labeling the pictures at this stage will help enormously. In addition, label both the front and back of the template with the number of the appropriate piece of art. I suggest you also label the number on both the front and back of the picture. Next, look at the hanging device (for example, a triangular hook, sawtooth hook, or wire that will need a few nails) for each picture. On each template, mark where the nail(s) should be placed. You will eventually transfer this point to the wall, so measure and transfer it accurately. Step 3: Cut out all the templates that you’ve drawn. Step 4: We now have our templates. Don’t skip this template stage. It’s very important since the templates show the positions of the nails that will eventually go into the wall. Having these templates also allows you to easily try out alternate arrangements - either on the wrapping paper on the floor - or actually on the wall using blue painter’s tape to temporarily hang the templates. Step 5: Roll out more wrapping paper - wide enough for the gallery wall - and try out different arrangements with the artwork. Based on the test arrangements that you made using the templates on the wall, place your artwork on the rolled out paper as it pleases you. If you haven’t tried out different arrangements on the wall, then play with different arrangements on the rolled out paper using either the artwork or the templates. For this example I’ve shown a very symmetric arrangement, but asymmetric arrangements work very well and are probably preferred if you have a great deal of artwork, perhaps more than 6 pieces. Once you’ve decided on your final configuration, trace around the picture frames so that you’ve captured the final layout on the rolled out paper. If your gallery wall height (the vertical distance of the pictures) is large, you might need to connect two strips of paper together. If you are doing a configuration up the stairs, you will definitely need to connect papers together. If you would like to use computer technology to play with different layouts (instead of paper), you can take a photo of the arrangement and Photoshop or PowerPoint it onto a picture of your wall. I have rendering software that will easily do this. So, if you want some help send me a photo of your wall, the size (width) of the wall, and a photo of the wrapping paper with the pictures placed upon it. Give me the dimensions of the wrapping paper, and I will scale your photo montage accordingly and give you a rendering of your proposed configuration. Step 6: Remove the pictures from the rolled out paper. Remove the artwork and place the appropriate template onto that picture’s space. In the example below, I place Template 2 on top of the final desired location for picture 2. Next, use an awl (or other pointy object) to push through both pieces of paper to mark where the nail should go. Step 7: Place all templates on the rolled out paper and mark all nail spots. Having the paper on carpet makes this an easy exercise. If you are working on a table, you can use carbon paper between the template and the rolled out paper to record the nail marks - but please, do it gently so that you don’t damage your table. Step 8. Now you should have all of the outlines of the pictures drawn on the rolled out paper with all of the nail spots marked. Step 9: Hang the roll of paper on the wall with blue painter’s tape, making sure the horizontal grid lines are perfectly level. Step 10: Now you know where to hammer the nails. Make slight indentations with a nail, remove the paper, and finish the process. Hang the pictures and you’re done. Viola! Featured Artwork was made by My Daughter I hope you’ve enjoyed seeing a fraction of my daughter’s artwork that I used for demonstration purposes in the photos for this gallery wall tutorial. We have several gallery walls in our home with her beautiful artwork in oils, pencil, watercolor and acrylic mediums. If you’d like to see more of her art and photographs, you can see it online by going to her Redbubble shop - which I previously mentioned in my “Finding Inspiration in Your Travel Photos” blog post. On the Redbubble site you can purchase over 75+ different types of items with artwork from over 500,000 artists printed on them (e.g. mugs, stickers, phone cases, wall art prints, T-shirts, pillows, acrylic blocks, coasters, postcards, greeting cards, tote bags, drawstring bags, water bottles, shower curtains, spiral notebooks, etc.,). We’ve enjoyed seeing where my daughter’s customers are coming from around the globe. Amusingly, with COVID-19 currently raging, people have started buying one of her photos from the “Lord of the Rings” and “The Hobbit” movie set located in Hobbiton, New Zealand for facial masks. The photo’s of Bag End with the “No admittance except on party business” sign. Now that’s just perfect for a mask! Who would have thought?? In any event, you might want to check out her Redbubble shop and browse around. You will of course recognize some of the originals that I used in this demonstration.
Stay healthy and productive. Drop me a note, or give me a call, if you get stuck during your efforts to create a gallery wall. I’ll be happy to help you out with a rendering if you ask. Comments are closed.
|
Barbara PhillipsBarbara Phillips, interior designer and owner of Center Stage Interior Designs, has delivered impeccable window treatments and design services to both residential and commercial clients in Massachusetts since 2001. Categories
All
Archives
March 2021
|


 RSS Feed